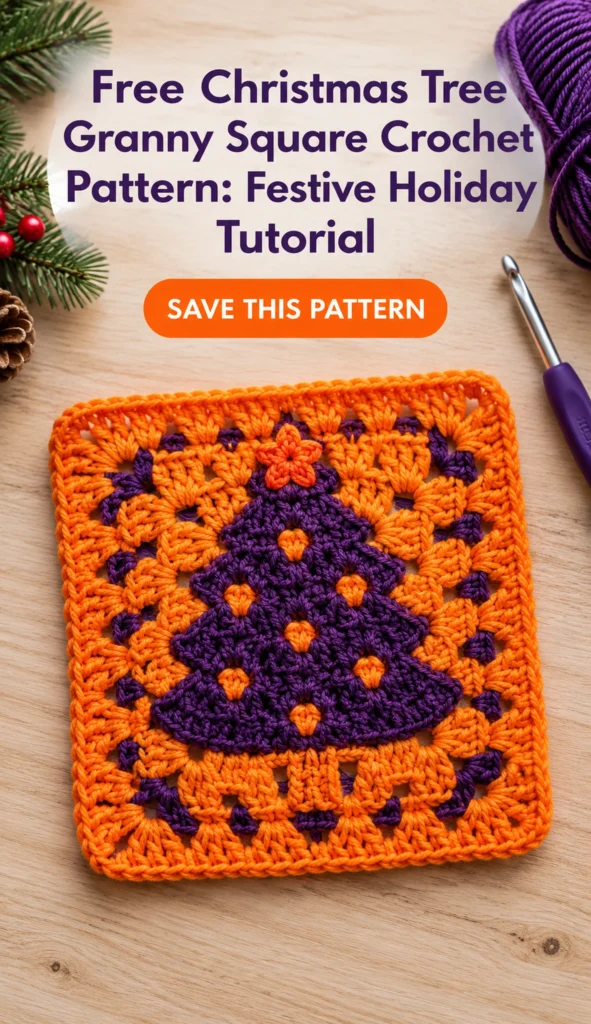
The holiday season is upon us, and there is no better way to celebrate than by crafting cozy, festive projects. If you are looking for a quick, festive, and incredibly cute project, this Christmas tree granny square pattern is exactly what you need. Whether you are a beginner looking to practice your color-changing skills or an advanced crocheter wanting to make a festive holiday blanket, this tutorial has something for everyone.
In this comprehensive guide, we will walk you through every single step of creating this beautiful holiday granny square. We will cover the essential stitches, master the invisible color change technique, and explore creative ways to use your finished squares. Grab your yarn and your hook, and let’s get started on this festive crochet adventure!
Why You’ll Love This Christmas Tree Granny Square Pattern
Before we dive into the stitches, let’s talk about why this specific crochet Christmas square deserves a spot in your holiday crafting queue.
First, it is incredibly versatile. Because it is worked in the round like a traditional granny square, you can easily multiply it. Make one for a festive coaster, make twenty to sew together into a holiday blanket, or use it as a patch for a Christmas cardigan.
Second, it is a fantastic stash-buster. This festive crochet pattern requires very little yarn. You can use leftover scraps of green and white worsted weight yarn from previous projects.
Finally, it teaches valuable techniques. This pattern introduces you to the double crochet cluster and the invisible color change. Mastering these skills will elevate your crochet game and make future projects much easier to execute.
Materials Needed for Your Holiday Crochet Project
To create your Christmas tree granny square pattern, you will need a few basic supplies. Keeping your materials organized will make the crafting process much smoother.
- Yarn: Worsted weight (Category 4) yarn in two colors. You will need a festive Deep Purple and a crisp Bright Orange. Cotton or acrylic blends work beautifully for this project.
- Crochet Hook: A 5.0 mm (H/8) crochet hook. If you tend to crochet tightly, you might want to size up to a 5.5 mm hook to ensure your square lays flat.
- Scissors: A sharp pair of yarn scissors for cutting your yarn and weaving in ends.
- Yarn Needle: A blunt-tipped tapestry needle for weaving in those pesky yarn tails at the end of your project.
- Stitch Markers (Optional): Helpful for marking the beginning of your rounds if you are a visual learner.
Essential Crochet Techniques Used in This Pattern
This Christmas tree granny square pattern relies on a few specific techniques. If you are unfamiliar with them, don’t worry! Here is a quick breakdown before we begin.
The Magic Ring (Magic Circle)
The magic ring is the best way to start crocheting in the round because it allows you to pull the center hole completely closed, leaving no gap. Make a loop with your yarn, insert your hook, yarn over, and pull up a loop. Chain one to secure, and then work your stitches directly into the center of the ring. Pull the tail to close it tightly at the end of the round.
The Double Crochet (dc) Cluster
Throughout this pattern, we use a “double crochet cluster.” For this specific tutorial, a cluster consists of three double crochets worked closely together. You will yarn over, insert your hook, yarn over and pull up a loop, yarn over and pull through two loops. Repeat this two more times in the same space. You will have four loops on your hook. Yarn over and pull through all four loops to complete the cluster.
The Invisible Color Change
Changing colors in crochet can sometimes leave a messy, visible knot. The invisible color change solves this. When you are on the last step of your final double crochet in a color, yarn over with the new color and pull it through the remaining loops on your hook. This creates a seamless, invisible transition!
Step-by-Step Christmas Tree Granny Square Pattern
Now for the fun part! Follow these step-by-step instructions to create your crochet Christmas tree granny square.
Note: The beginning chain 3 at the start of each round counts as the first double crochet of the cluster.
Round 1: Creating the Center Star

We will start by creating the center star of our tree using the green yarn.
- Start with a Magic Ring.
- Chain 3 (this counts as your first double crochet).
- Work 2 double crochets into the center of the magic ring. (These 3 stitches form your first double crochet cluster).
- Chain 2.
- Work 3 double crochets into the center of the ring (Second cluster).
- Chain 2.
- Repeat the (3 double crochets, chain 2) sequence two more times.
- You should now have a total of 4 double crochet clusters and 4 chain-2 corner spaces.
- Pull the tail of your magic ring to tighten the center hole.
- Slip stitch into the 3rd chain of your beginning chain-3 to close the round.
Round 2: Expanding the Square Base
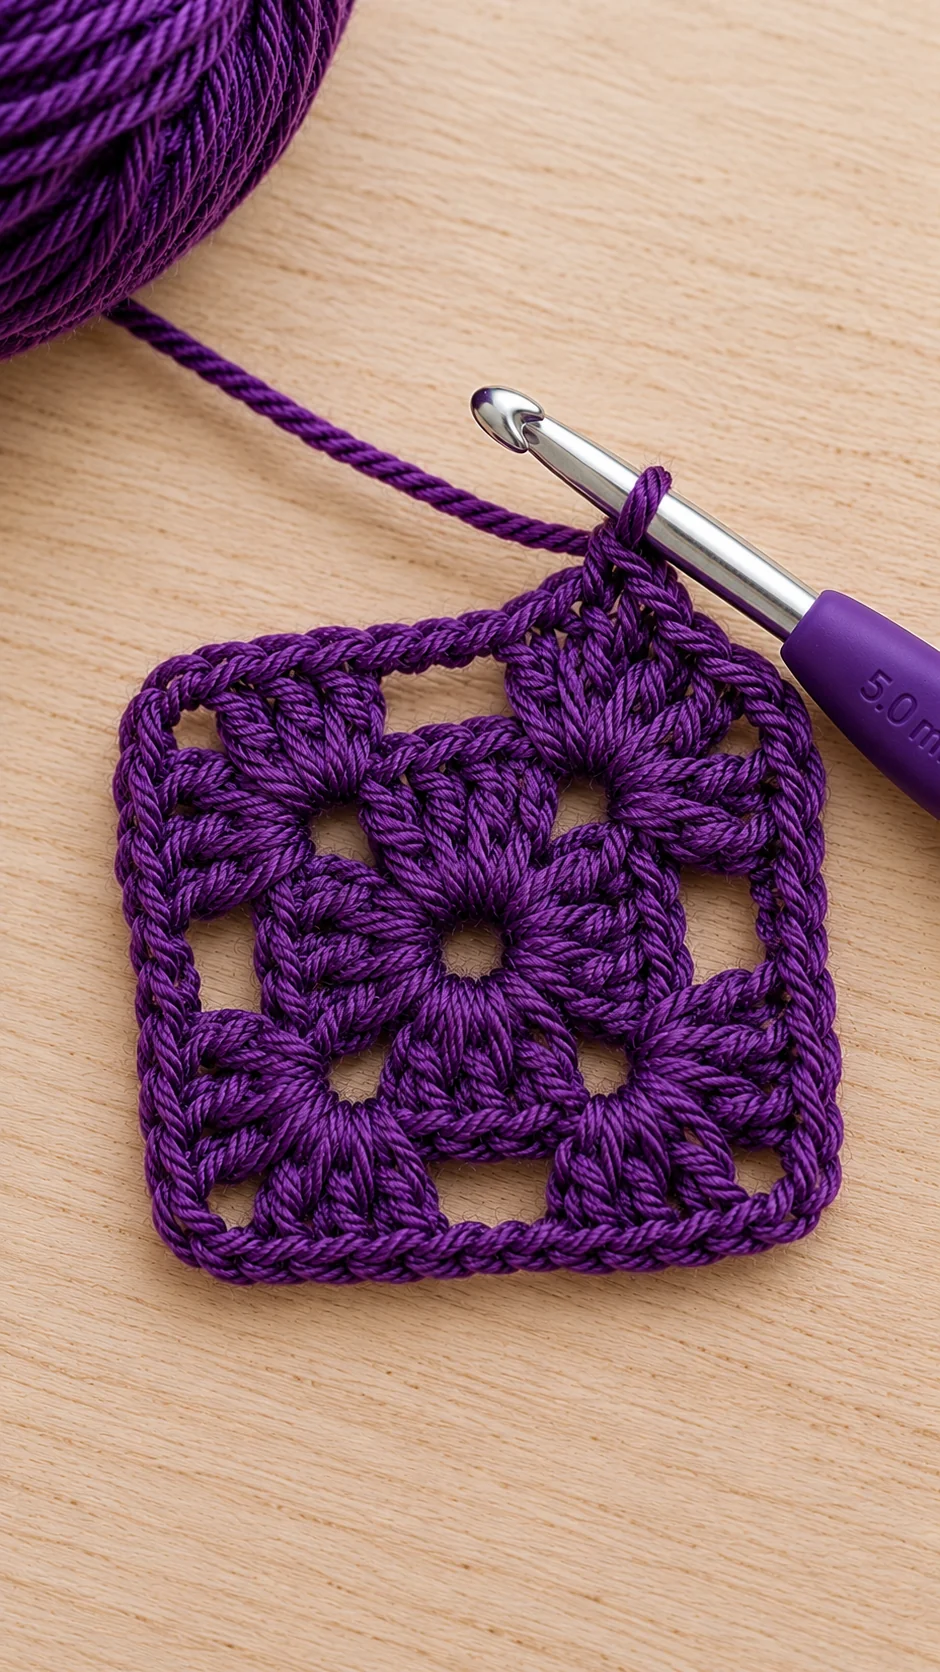
For round two, we will expand the square using only the green yarn.
- Chain 3 (counts as first dc), then chain 1.
- Move to the next chain-2 corner space. Work (3 dc, chain 2, 3 dc) into this space. This creates your first corner.
- Chain 1. Move to the next chain-2 space. Work (3 dc, chain 2, 3 dc) into the space.
- Chain 1. Repeat this corner pattern (3 dc, ch 2, 3 dc, ch 1) in the next corner space.
- For the final corner, chain 1, then work (3 dc, chain 2, 2 dc) into the last chain-2 space. (The beginning chain-3 acts as the first double crochet of this final cluster).
- Slip stitch into the 3rd chain of the beginning chain-3 to close the round.
Round 3: Forming the Tree Shape with Color Changes
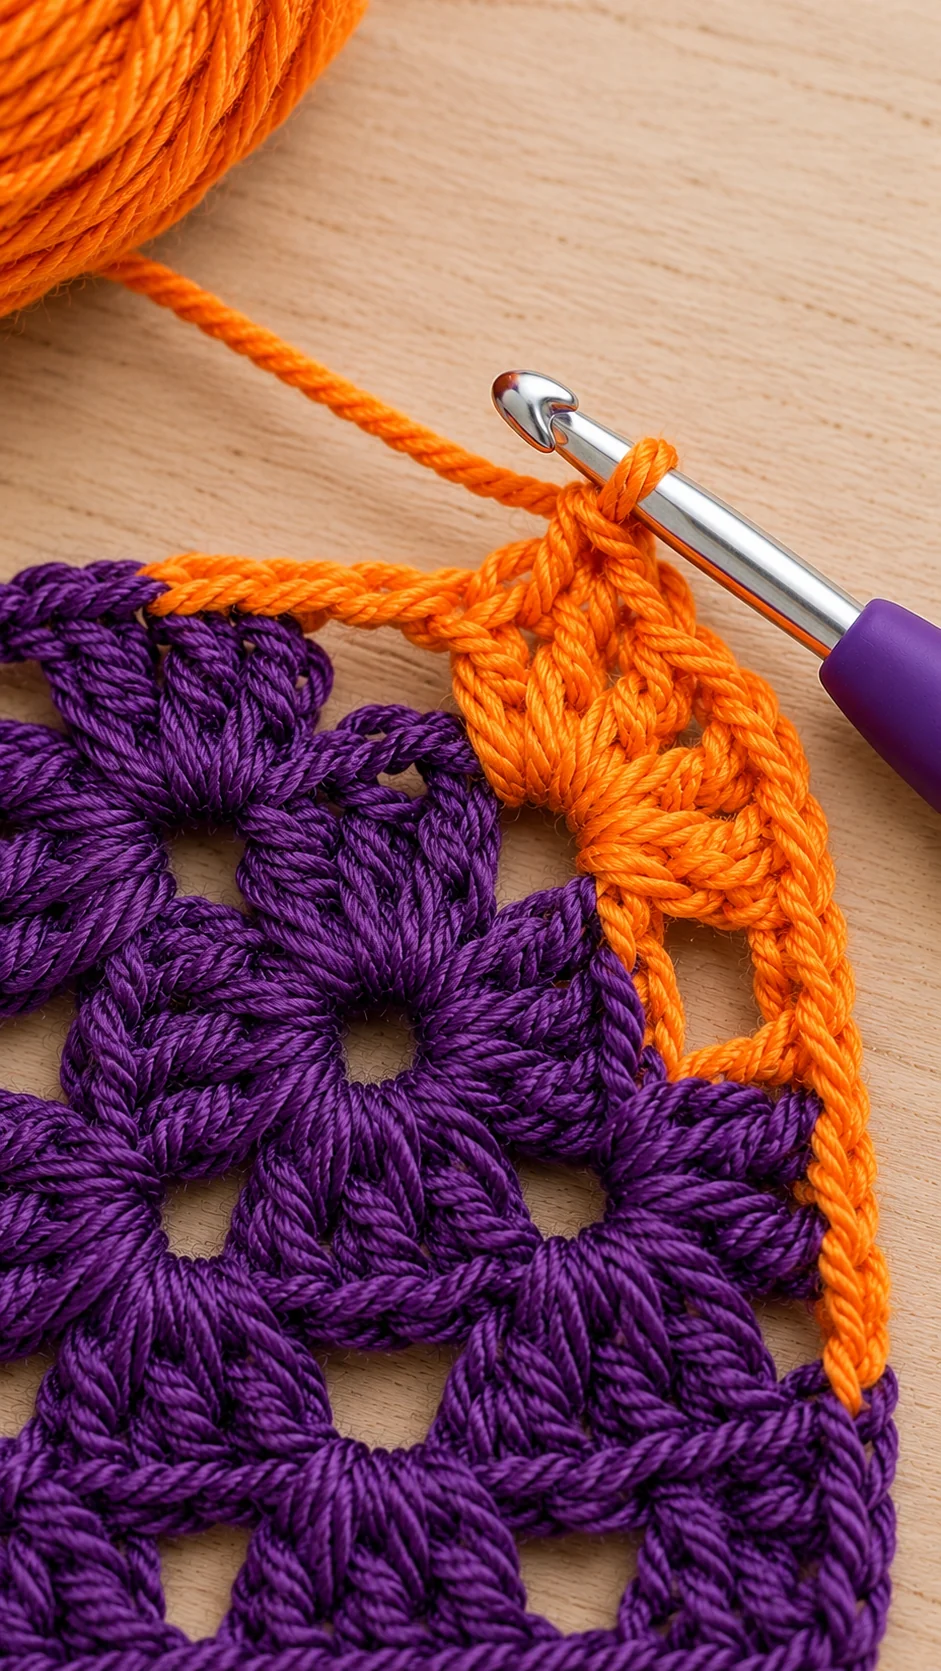
This is where the magic happens! We will introduce the white yarn to create the shape of the tree.
- Chain 3 (counts as first dc). Work 2 dc into the next chain-1 space.
- Color Change: On the very last pull-through of your 3rd double crochet, perform an invisible color change to your White yarn.
- Chain 1 with the white yarn.
- Move to the first chain-2 corner space. Work (3 dc, chain 2, 3 dc) into the space.
- Chain 1. Move to the next chain-1 space. Work 3 dc into the space.
- Color Change: On the last pull-through of the 3rd dc, perform an invisible color change back to your Green yarn.
- Chain 1. Move to the next chain-2 corner space. Work (3 dc, chain 2, 3 dc) into the space.
- Chain 1. Move to the next chain-1 space. Work 3 dc into the space.
- Color Change: Perform an invisible color change to White yarn on the last stitch.
- Chain 1. Move to the final chain-2 corner space. Work (3 dc, chain 2, 3 dc) into the space.
- Chain 1. Work 2 dc into the final chain-1 space to complete the cluster.
- Slip stitch into the 3rd chain to close the round.
Round 4: Building the Tree Body
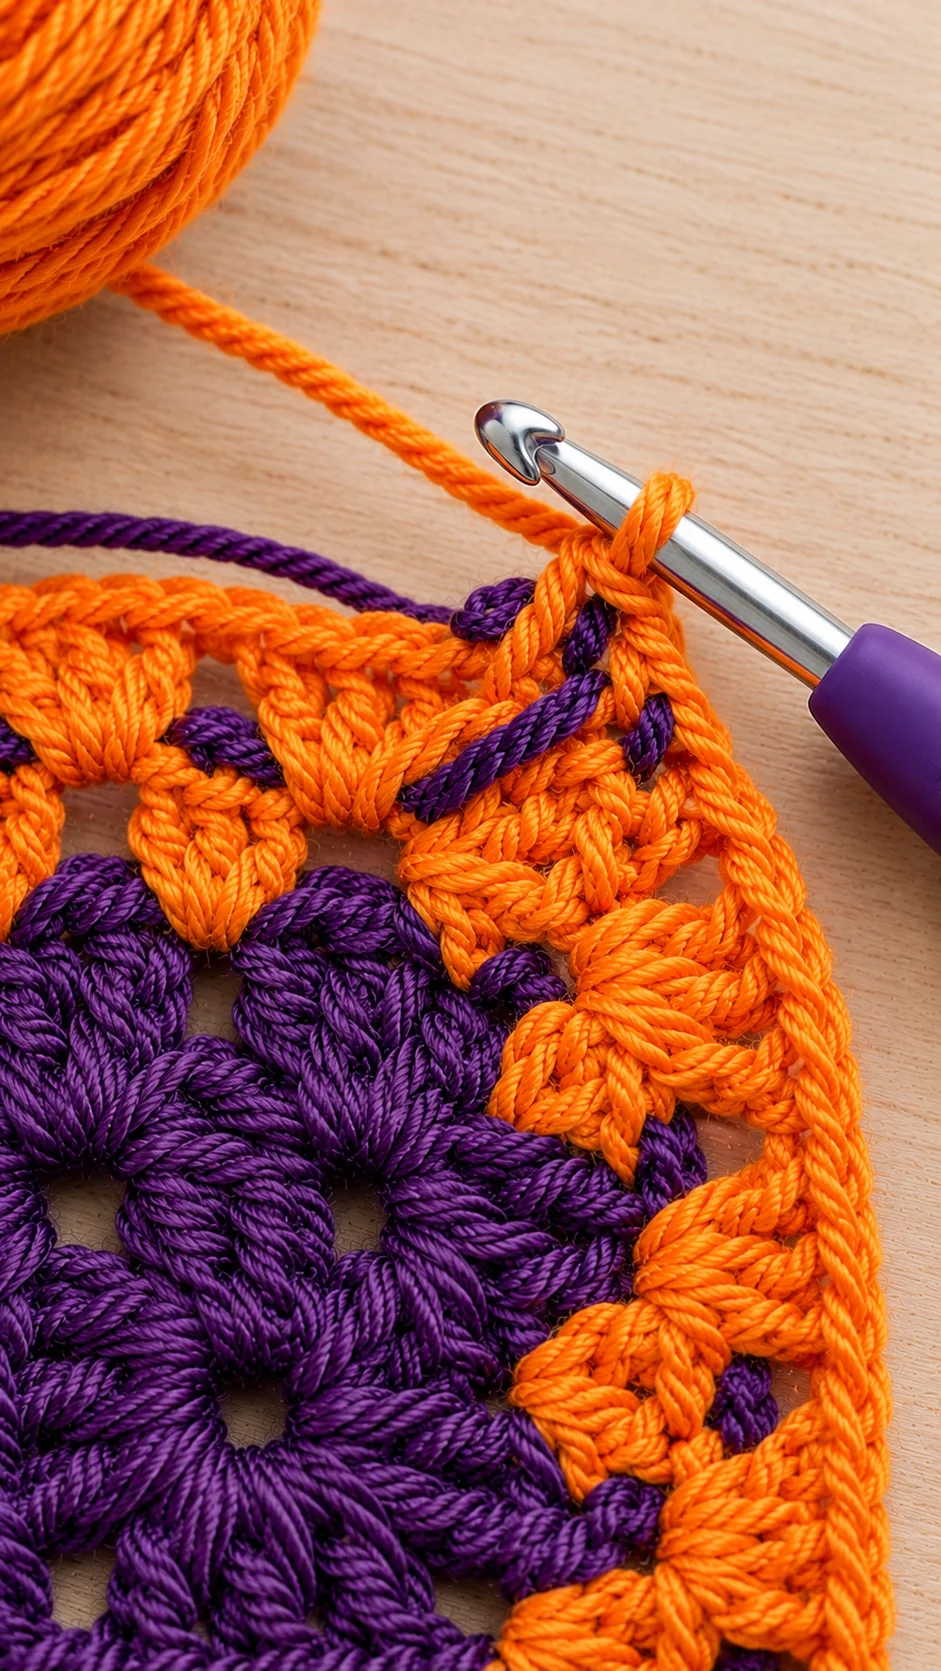
Round four is very similar to round three, but we will add an extra layer to the tree to make it look fuller.
Pro Tip: Instead of cutting your yarn at every color change, you can “carry” the unused yarn by crocheting over it. This saves time and reduces the number of ends you have to weave in later!
- Chain 3, then chain 1. Move to the next chain-1 space and work 3 dc into it.
- Color Change: Change to White yarn on the last stitch.
- Chain 1. Work (3 dc, chain 2, 3 dc) into the corner space. As you work these stitches, lay the green yarn tail over the previous row and crochet over it to carry it along.
- Chain 1. Work 3 dc into the next chain-1 space. Change to White yarn on the last stitch.
- Chain 1. Work 3 dc into the next chain-1 space. Change to Green yarn on the last stitch.
- Chain 1. Work (3 dc, chain 2, 3 dc) into the corner space, crocheting over the white yarn tail to carry it.
- Continue this pattern around the square, alternating white clusters and green corners, carrying the yarn as you go.
- On the final corner, change back to White. Work 2 dc in the last space to complete the cluster.
- Slip stitch to close the round.
Round 5: Adding the White Snow Border
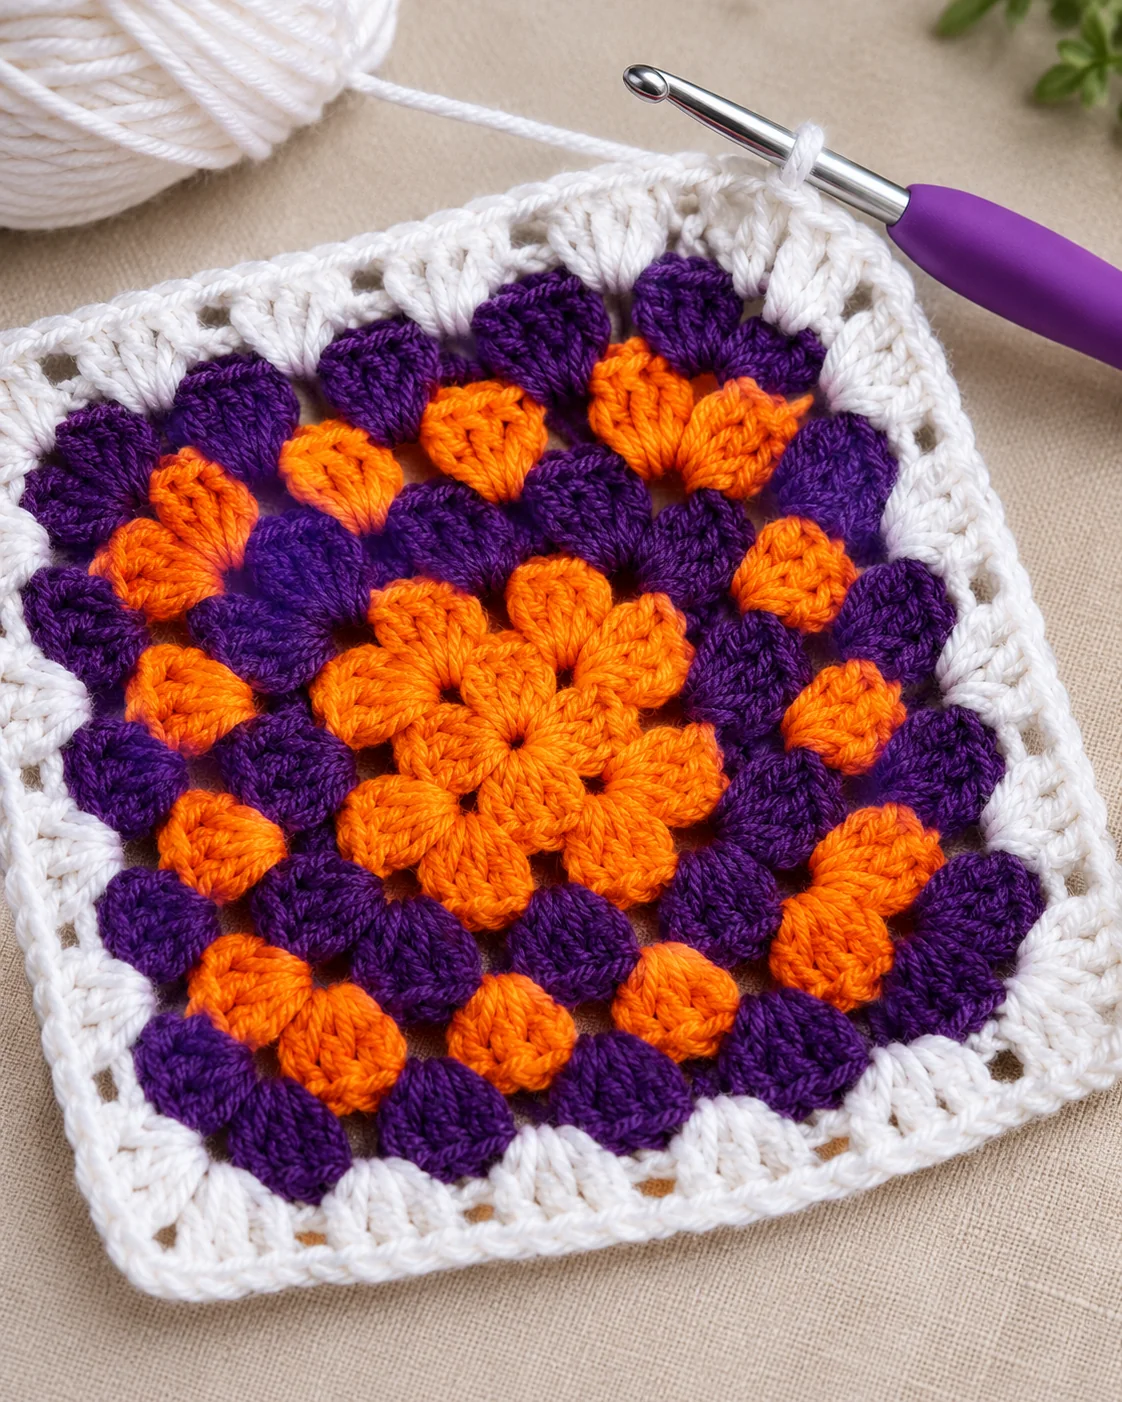
The tree is technically finished! Now, we will add one final round of plain white to create a beautiful “snowy” border around your Christmas tree granny square pattern.
- Chain 3 (counts as first dc). Work 2 dc into the next chain-1 space.
- Chain 1. Work (3 dc, chain 2, 3 dc) into the corner space.
- Chain 1. Work 3 dc into the next chain-1 space.
- Repeat this pattern (chain 1, corner cluster, chain 1, 3 dc cluster) all the way around the square.
- When you reach the end, slip stitch into the 3rd chain to close the round.
The Invisible Finish
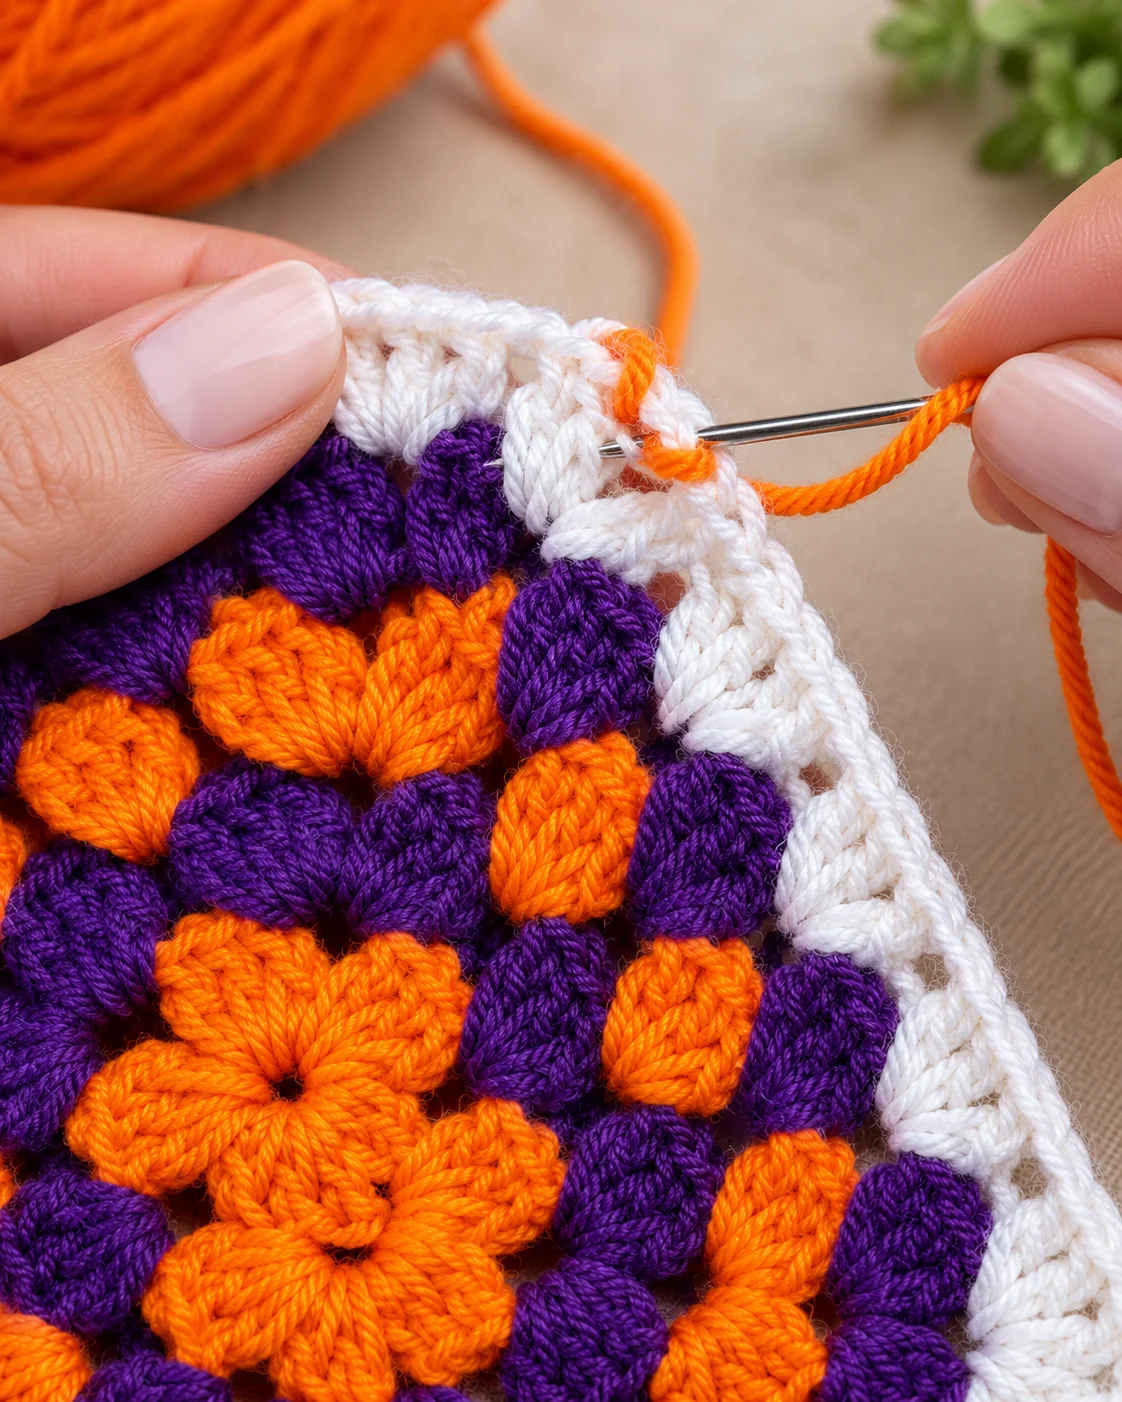
To give your square a professional, seamless finish, use the invisible join instead of a standard slip stitch.
- Cut your yarn, leaving a 6-inch tail, and pull it completely through the last loop.
- Thread the tail onto your yarn needle.
- Skip the beginning chain-3. Insert your needle from back to front under both loops of the next double crochet.
- Then, insert your needle into the center of the beginning chain-3 from front to back.
- Pull the yarn tight. This creates a perfect, invisible stitch that mimics a normal double crochet! Weave in your ends to secure.
Pro Tips for Perfect Color Changes and Finishing
When working a festive crochet pattern with multiple colors, achieving a clean finish is key. Here are some expert tips to ensure your crochet Christmas square looks store-bought.
Carrying Yarn vs. Cutting Yarn
In the video tutorial, the creator demonstrates carrying the yarn (crocheting over the unused color) rather than cutting it at every change.
- The Benefit: Carrying yarn saves you from having to weave in dozens of tiny ends, and it makes the rounds work up much faster.
- The Drawback: If you pull your stitches too tightly, the carried yarn might peek through to the front of your work.
- The Solution: If you want an absolutely flawless front, take the time to cut your yarn and rejoin it at every color change. Both methods are valid, so choose the one that best fits your project goals!
Blocking Your Granny Square
If your holiday granny square looks a little uneven or the corners aren’t popping, blocking is your best friend. Simply pin your square to a blocking mat, spritz it lightly with water, and let it dry completely. This will relax the fibers and give your square perfect, crisp edges.
Creative Ways to Use Your Christmas Granny Squares
One of the best things about the Christmas tree granny square pattern is its versatility. Once you have mastered the basic square, the crafting possibilities are endless!
1. Festive Holiday Coasters
Because this square is relatively small and worked with worsted weight yarn, it makes the perfect size for a drink coaster. You can line the back with a piece of felt or cork to make it waterproof. They make fantastic, quick DIY holiday gifts for coworkers and friends.
2. A Patchwork Christmas Blanket
Make dozens of these holiday blanket squares and join them together using a simple slip stitch join or a single crochet border. Alternate the orientation of the trees (some pointing up, some pointing down) to create a dynamic, modern geometric blanket.
3. Holiday Garments
Use the squares as panels for a festive Christmas sweater, a cozy cardigan, or even a stylish winter scarf. Sew the squares together in a long strip, add a border, and attach fringe for a beautiful, handmade winter accessory.
4. Christmas Tree Ornaments
Make mini versions of this square using DK or sport weight yarn and a smaller hook. Add a loop of ribbon to the top, and you have unique, handmade ornaments for your Christmas tree!
Conclusion
Creating a Christmas tree granny square pattern is a joyful and rewarding experience. Not only does it result in a beautiful, festive piece of decor, but it also helps you refine essential crochet skills like the invisible color change and the double crochet cluster.
Whether you are making a single coaster for your morning coffee or a massive blanket to keep your family warm, this crochet Christmas square is sure to bring holiday cheer to your handmade projects.
We hope you enjoyed this free festive crochet pattern tutorial! If you made this project, we would love to see it. Tag us on social media and share your beautiful holiday creations. Happy crocheting, and Merry Christmas!
You Did It!

Congratulations on finishing your Christmas tree granny square! Take a moment to look at the final photo to compare your overall shape and the close-up details. Happy crafting!