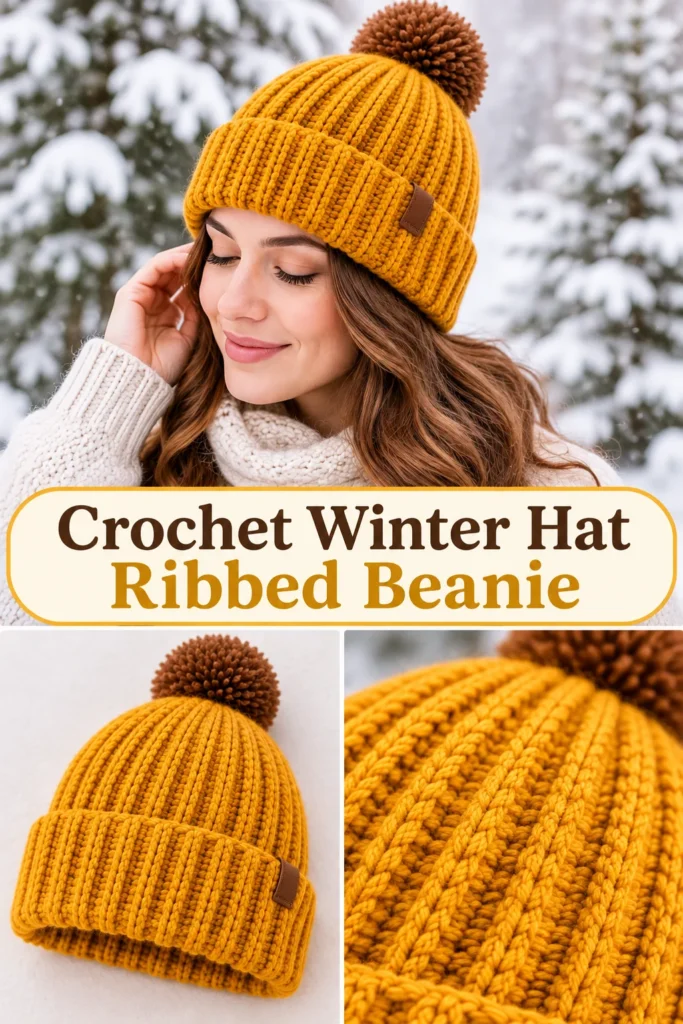
This simple ribbed beanie pattern is perfect for those wanting a fashionable, warm hat without the stress of complex construction or difficult stitches. Whether you are crafting a gift or adding to your own winter wardrobe, this project is an ideal choice for cold weather.
By utilizing a basic rectangular design and working single crochet stitches through the back loops, you can achieve a flexible, ribbed effect.
This guide covers everything you need to know, including selecting the right yarn, determining the correct measurements for fit, crafting the ribbed section, sewing the sides together, and closing the top to form a traditional beanie.
Contents
-
- Overview of the ribbed crochet beanie
- Required supplies and equipment
- Stitch guide and shorthand
Detailed beanie crochet instructions
- Assembly and final touches
- Troubleshooting frequent errors
- Ways to personalize your project
- Maintenance and cleaning
- Advice for professional results
- Common inquiries
Details Regarding This Simple Ribbed Crochet Beanie Guide
Because of its flexible build and vertical ridges that mimic a knitted look, a ribbed beanie remains a classic choice for winter wear. This construction ensures the hat fits the head comfortably.
The example shown utilizes a warm mustard yellow hue and includes a fluffy pom-pom, a snug crown, and a folded ribbed brim. While you can use a single primary color to achieve this style, adding contrasting accents or stripes is a great way to customize the piece.
I recommend the rectangle method for those new to crochet because it allows the maker to concentrate on stitch consistency rather than the complexities of shaping a crown over multiple rounds. The hat is formed by gathering one end and joining the sides once the rectangle is the correct size.
Project Specifications
- Project type: Ribbed crochet winter hat
- Skill level: Beginner
- Construction: Flat rectangle, joined into a tube
- Main stitch: Single crochet through the back loop
- Suggested adult size: Approximately 21–23 inches in head circumference
- Estimated time: 3–5 hours, depending on experience
- Suggested yarn: Medium-weight yarn, also called worsted weight or category 4
- Optional finishing: Folded brim and pom-pom
Because row counts can vary, you should prioritize measuring your progress. Your final dimensions will be influenced by your stitch tension, the hook and yarn you choose, and the total number of rows.
Required Supplies for Your Crochet Beanie
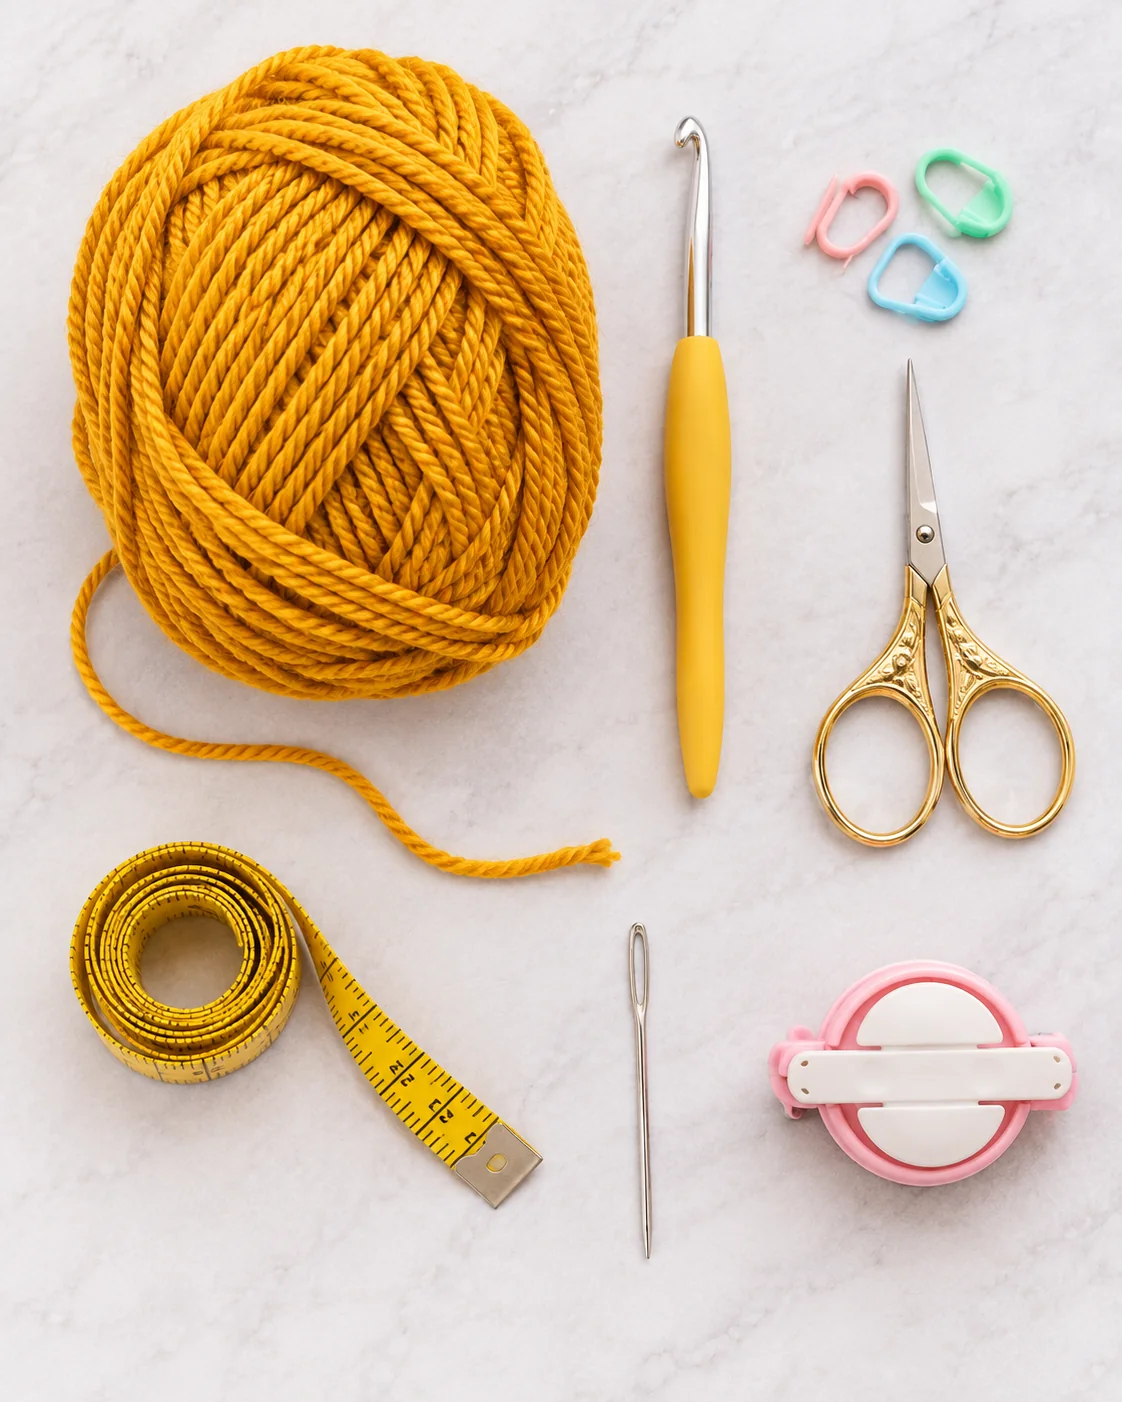
Creating a cozy hat for daily wear requires only a handful of fundamental tools.
Materials
Select a soft, medium-weight yarn to ensure comfort on the forehead. While wool blends or pure wool provide extra heat, a soft acrylic blend is a durable option for regular use. Acrylic yarn is also a convenient choice due to its ease of maintenance and wide variety of available colors.
Estimate roughly 150–200 g of yarn for an adult-sized beanie, particularly if you plan to add a pom-pom or a deep folded brim. Please note that this quantity is an approximation; smaller sizes or shorter styles will likely use less material.
Required Materials
- 5.0 mm crochet hook, adjusted to your yarn and tension
- Yarn needle for joining and weaving in ends
- Scissors
- Measuring tape
- Stitch marker, optional
- Removable stitch marker or pins for checking the seam
- Pom-pom maker or a small piece of cardboard, optional
You may want to switch to a smaller hook if the stitches appear too open, or a larger one if the resulting fabric is too rigid.
Helpful tip: To ensure the hat remains snug and doesn’t stretch out too much over time, create a small gauge swatch to check the flexibility before you begin.
Access PDF Document
Terminology and Crochet Abbreviations
The instructions provided follow US crochet conventions. For those using UK terms, please note that single crochet is referred to as double crochet.
| Abbreviation | Meaning |
|---|---|
| ch | Chain |
| sc | Single crochet (UK double crochet) |
| BLO | Back loop only |
| sl st | Slip stitch |
| st / sts | Stitch / stitches |
| row | A horizontal line of crochet stitches |
| FO | Fasten off |
Understanding the Back-Loop-Only Technique
A crochet stitch features two loops at its peak, forming a shape like a small V. The loop situated furthest from you is the back loop, while the one nearest is the front loop.
To perform back-loop-only crochet, you place your hook specifically under the back loop. By not working into the front loop, you produce raised ridges in the material.
The beanie gains its characteristic ribbed texture from these ridges, which also enable the rectangle to stretch to fit the head.
Guide to Crocheting a Beanie
This instructional draft utilizes a rectangular build, making it ideal for those new to the craft. To ensure the hat fits correctly, please confirm your measurements and create a gauge swatch before finishing the project.
Step 1: Make the foundation chain
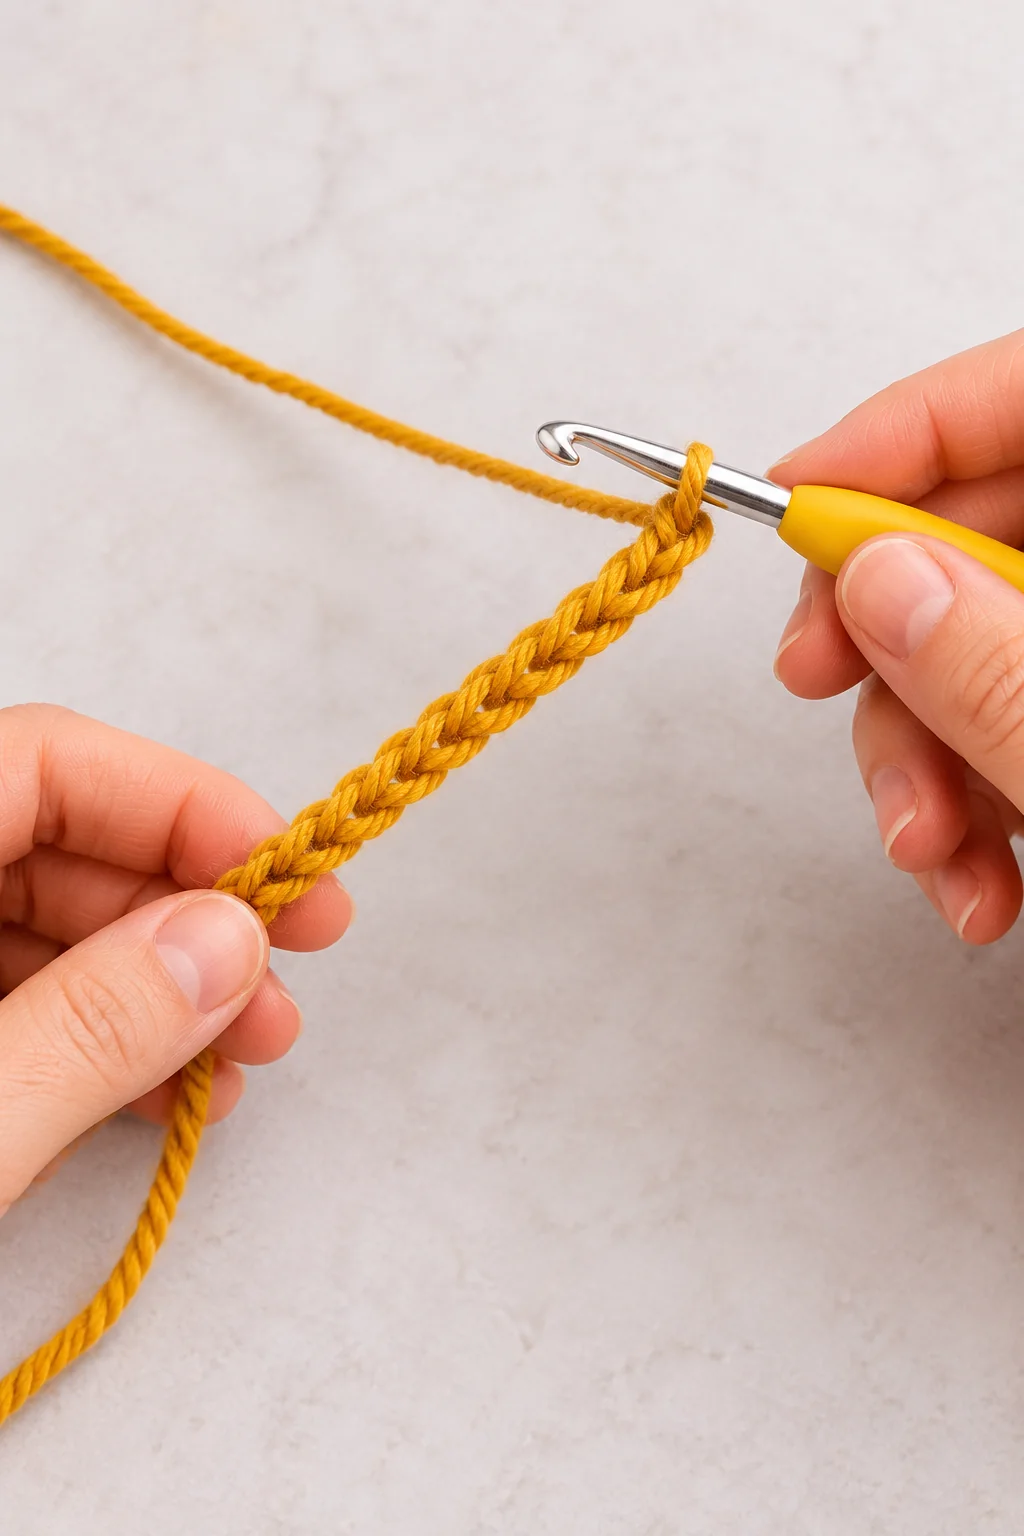
With your main yarn color and a 5.0 mm hook, make a slip knot.
Ch 41.
This foundation chain gives you approximately 40 single crochet stitches in the first row. The chain length determines the approximate height of the hat, so you can adjust it for a shorter or taller style.
For a standard adult beanie, a starting height of about 9–10 inches before folding the brim may work well. The precise amount depends on how much fabric you want to fold up.
Tip: Keep the chain relaxed. A very tight foundation chain can make the lower edge narrower and less stretchy than the rest of the hat.
Step 2: Work the first row
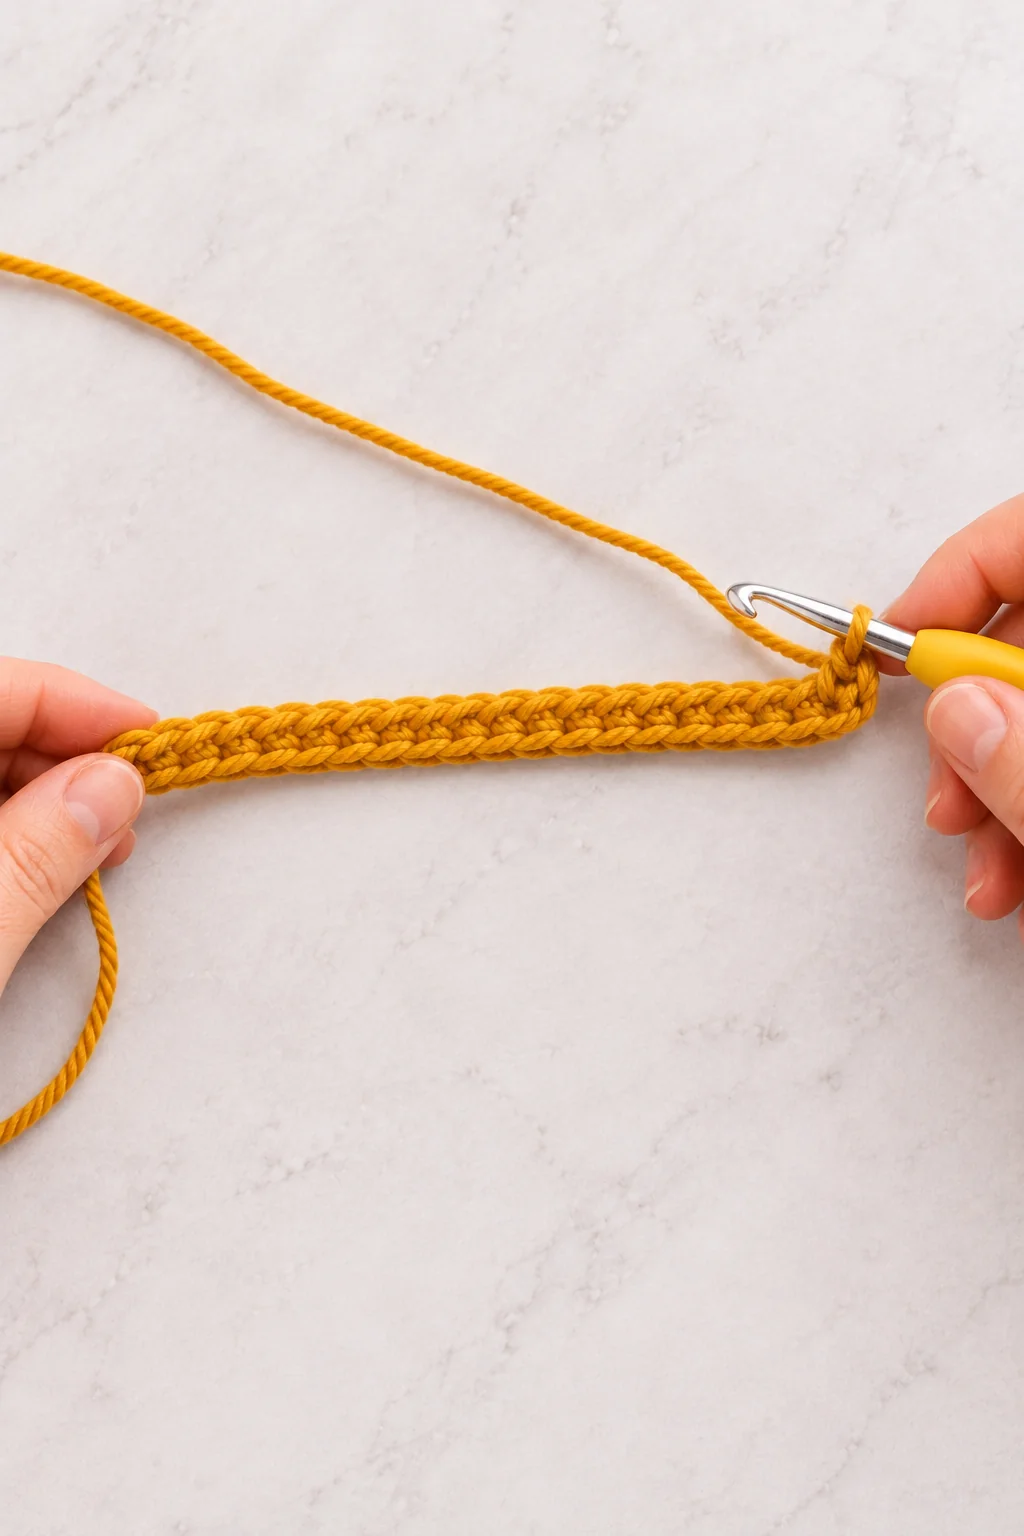
Insert your hook into the second chain from the hook.
Row 1: Sc in each chain across. (40 sts)
Ch 1 and turn your work.
The first row creates the base for your ribbed fabric. Count your stitches before continuing so you know your rectangle starts with the correct width.
Tip: The turning chain does not count as a stitch in this pattern.
Step 3: Start the ribbed texture
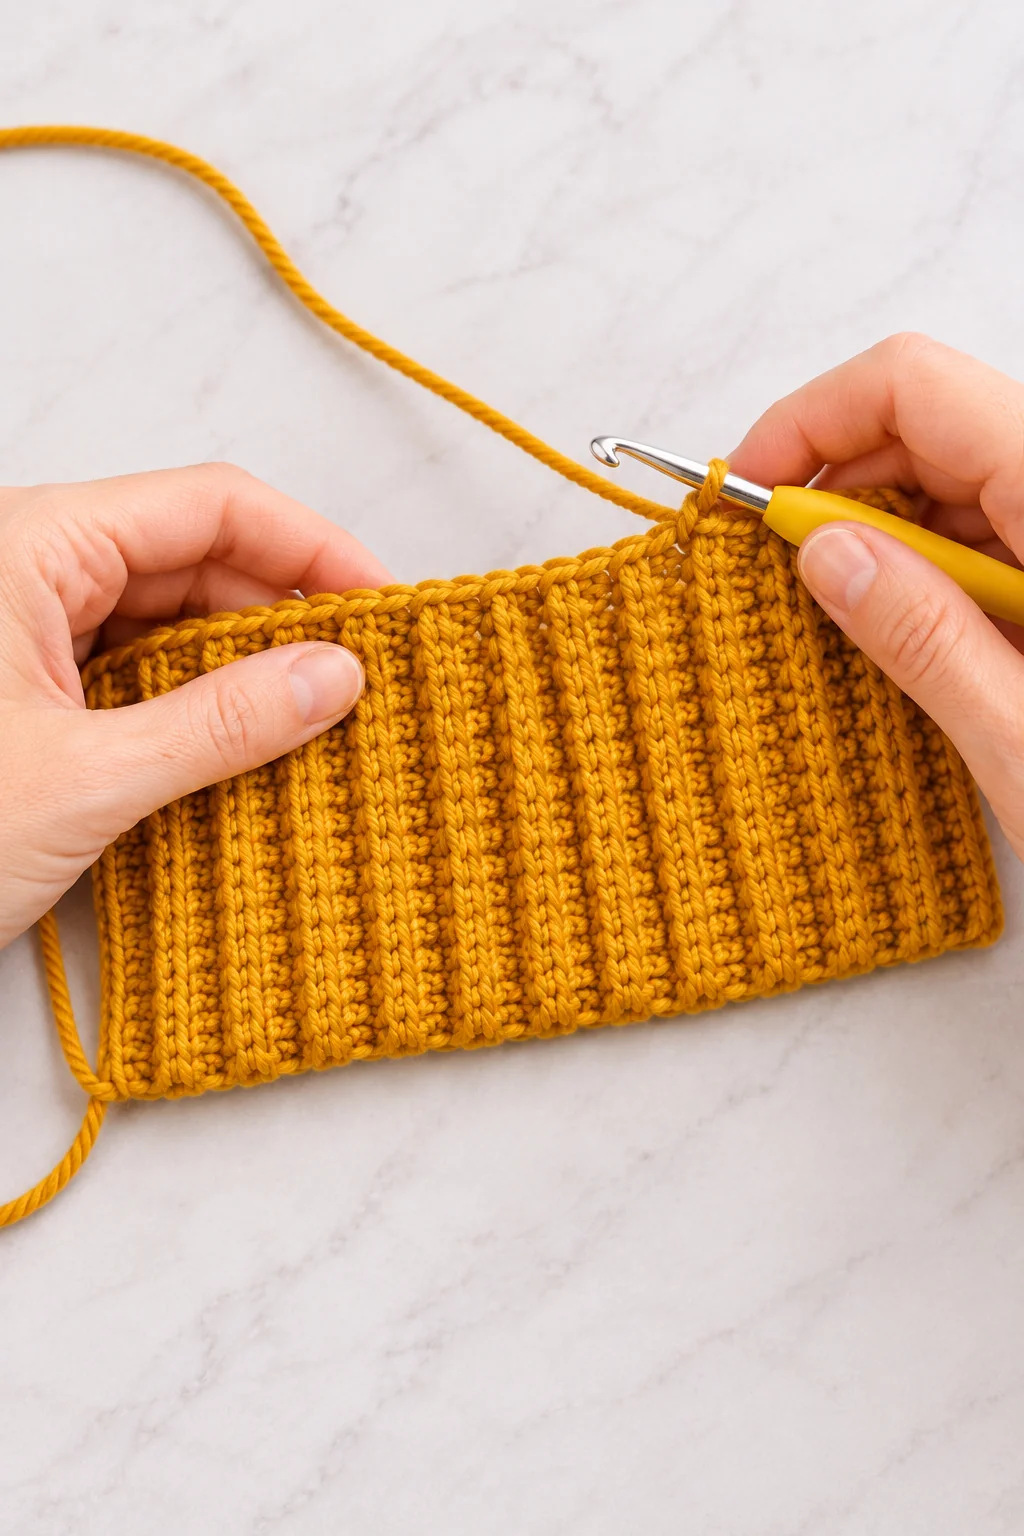
Row 2: Sc in the back loop only of each stitch across. (40 sts)
Ch 1 and turn.
Row 3 onward: Repeat Row 2, working one sc into the back loop of every stitch. (40 sts per row)
Continue in the same way until the rectangle reaches your desired length around the head.
The ribbing will form raised vertical lines when the rectangle is turned and assembled into a hat.
Tip: Check your stitch count every few rows. Accidentally skipping the first or last stitch can gradually narrow the rectangle and make the finished hat uneven.
Step 4: Measure the rectangle for a comfortable fit
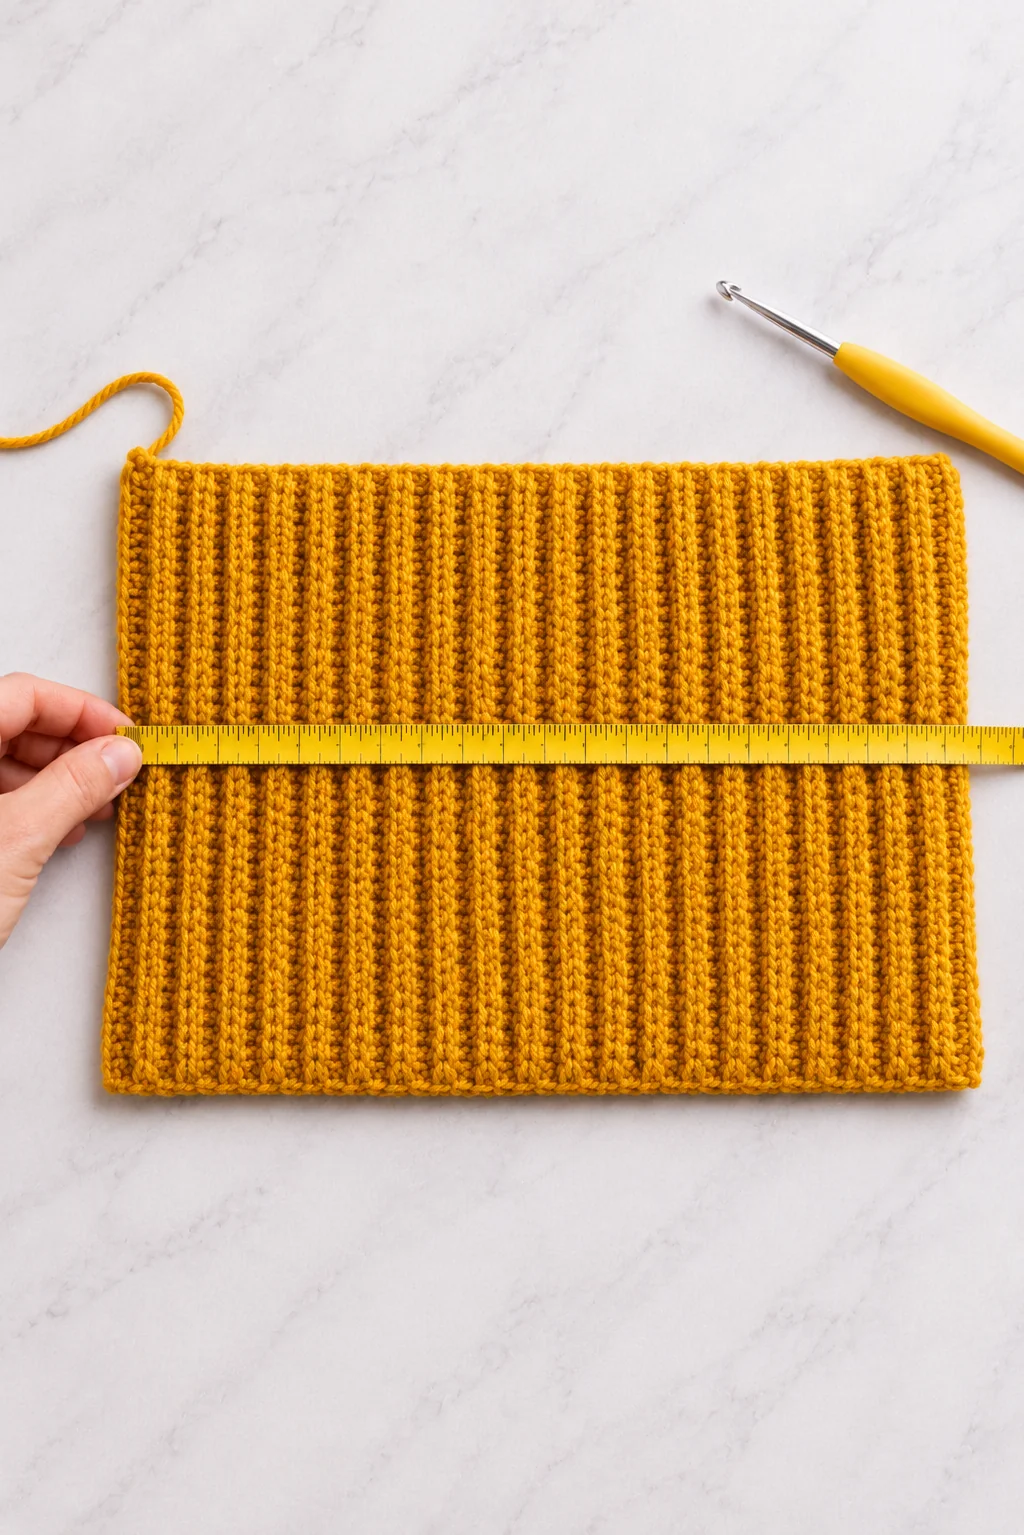
This is the most important part of the project.
The foundation chain determines the hat’s height, while the number of rows determines the rectangle’s length around the head.
For a typical adult head measuring 21–23 inches around, a starting rectangle length of approximately 20–22 inches may be suitable, depending on the stretch of your fabric and the amount of negative ease you prefer.
Negative ease means the hat is slightly smaller than the head so it stretches gently to fit. Do not make the rectangle excessively small, as this can create an uncomfortable hat.
Measure the rectangle without pulling it tightly. Then stretch it gently to see how much comfortable elasticity it has.
Tip: If you are making the beanie for someone else, ask for their head circumference and preferred hat depth instead of guessing.
Step 5: Fold and join the sides

Once the rectangle reaches your target measurements, fasten off, leaving a long yarn tail if you plan to sew the seam.
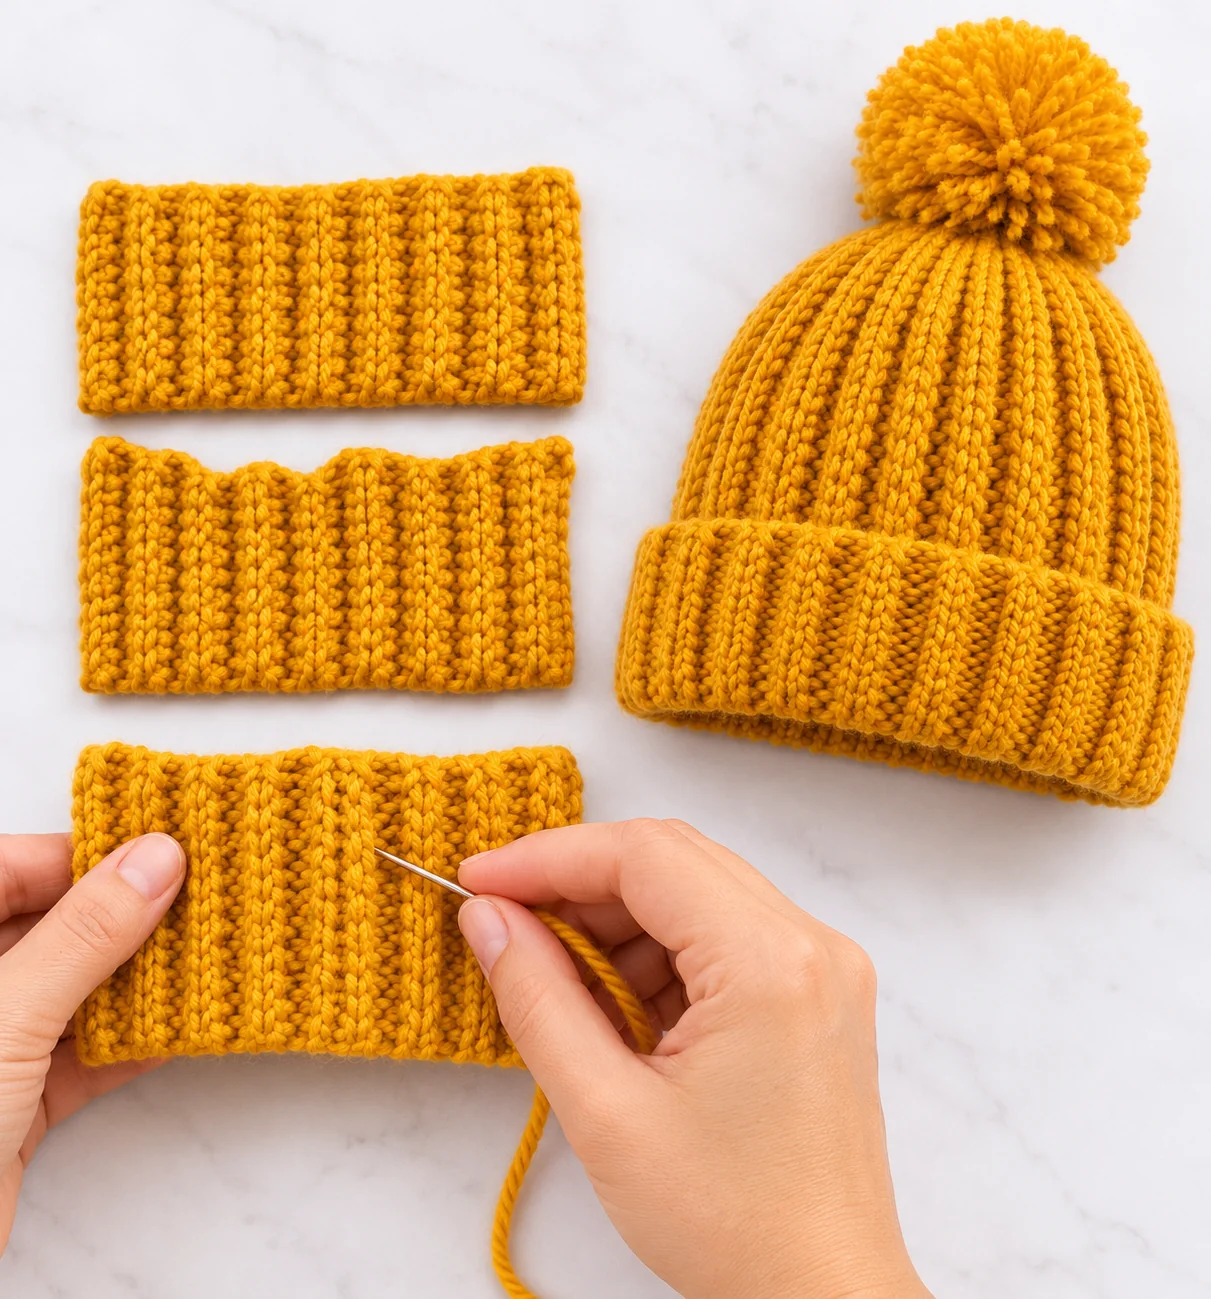
Fold the rectangle so the two short edges meet. The ribbed rows should run vertically along the hat.
Join the short edges using one of these methods:
- Slip stitch seam: Insert your hook through corresponding stitches along both edges and slip stitch them together.
- Whipstitch seam: Use a yarn needle to sew the edges together with small, even stitches.
A slip stitch seam is convenient if you want to keep crocheting with the same yarn. A sewn seam can create a softer finish when worked carefully.
Try the tube over your head or a suitable measuring form before closing the crown.
Tip: Keep the seam aligned with the ribbing so the hat looks neat when worn.
Step 6: Gather and close the top

Thread your yarn needle with a long piece of matching yarn.
Run the needle through the row ends around one open edge of the tube. Work a loose running stitch all the way around the opening.
Pull the yarn gently to gather the fabric into a closed crown. Adjust the gathers so they are spread evenly rather than bunched in one spot.
Pass the yarn through the gathered edge several more times to secure the opening. Knot firmly on the inside and weave in the remaining end.
If a small opening remains, use a few extra stitches to close it.
Tip: Avoid pulling so hard that the yarn breaks or the fabric puckers into a hard knot. A smooth, evenly gathered crown looks more professional.
Step 7: Add the folded brim
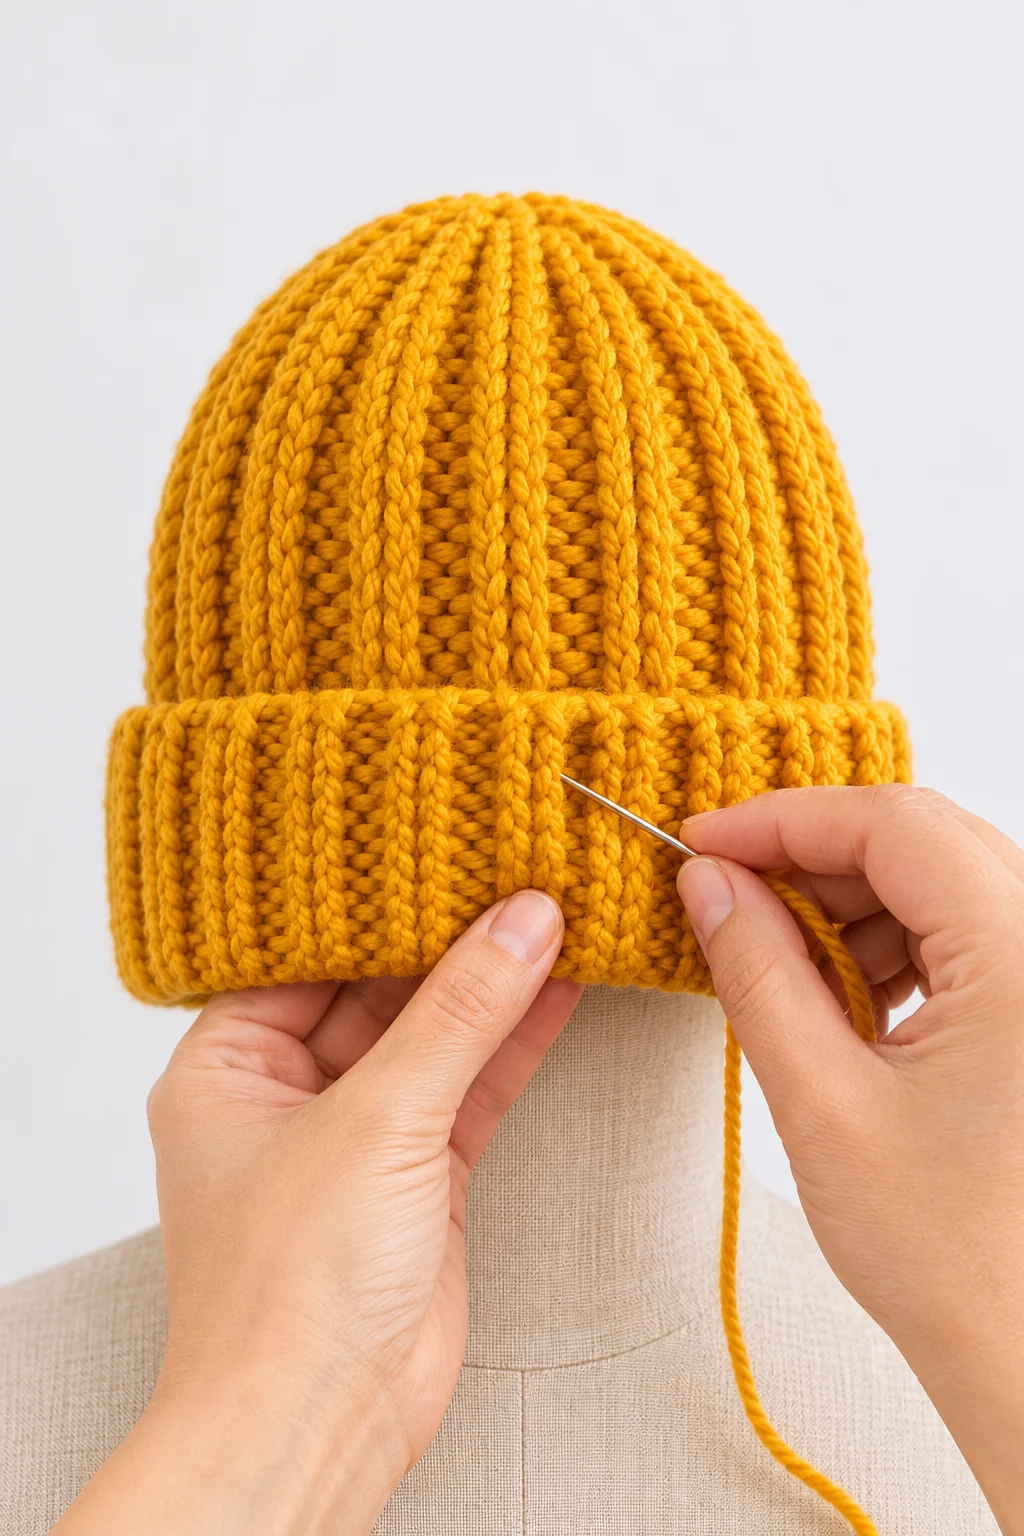
Turn the hat right side out and fold the lower edge upward to create a cuff.
Try the beanie on to check that the brim is comfortable and that the hat covers the ears as desired.
You can leave the cuff folded loosely or secure it with a few discreet stitches at the side seams.
For a longer, slouchier beanie, use a deeper rectangle and a smaller fold. For a fitted winter hat, keep the body closer to the head and adjust the depth to suit your preference.
Step 8: Add an optional pom-pom
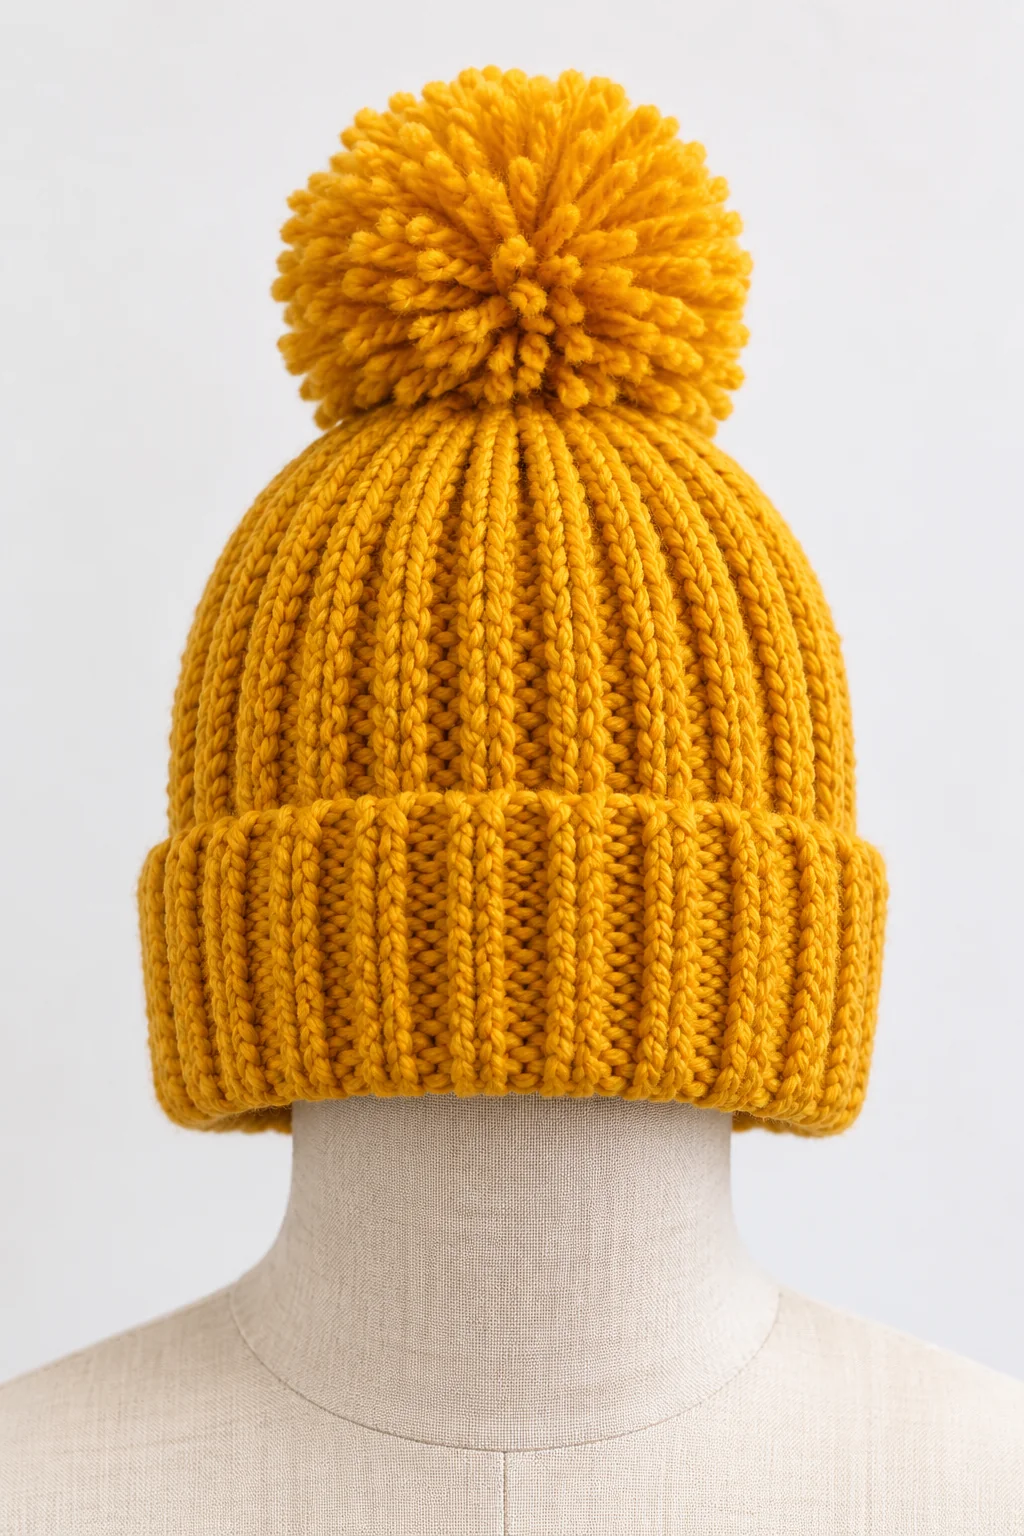
A fluffy pom-pom creates the cozy look shown in the reference image.
Make a pom-pom using a pom-pom maker or cardboard template. Wrap the yarn until it looks full, tie it tightly in the center, and cut the loops. Trim the yarn into a round shape.
Attach the pom-pom to the gathered crown with strong yarn, making several secure passes through the center of the hat.
If you prefer a minimalist look, leave the top plain or add a small crocheted ball instead.
Finishing tip: If you want to wash the hat frequently, consider a detachable pom-pom attachment that is compatible with your yarn and construction.
You Did It!
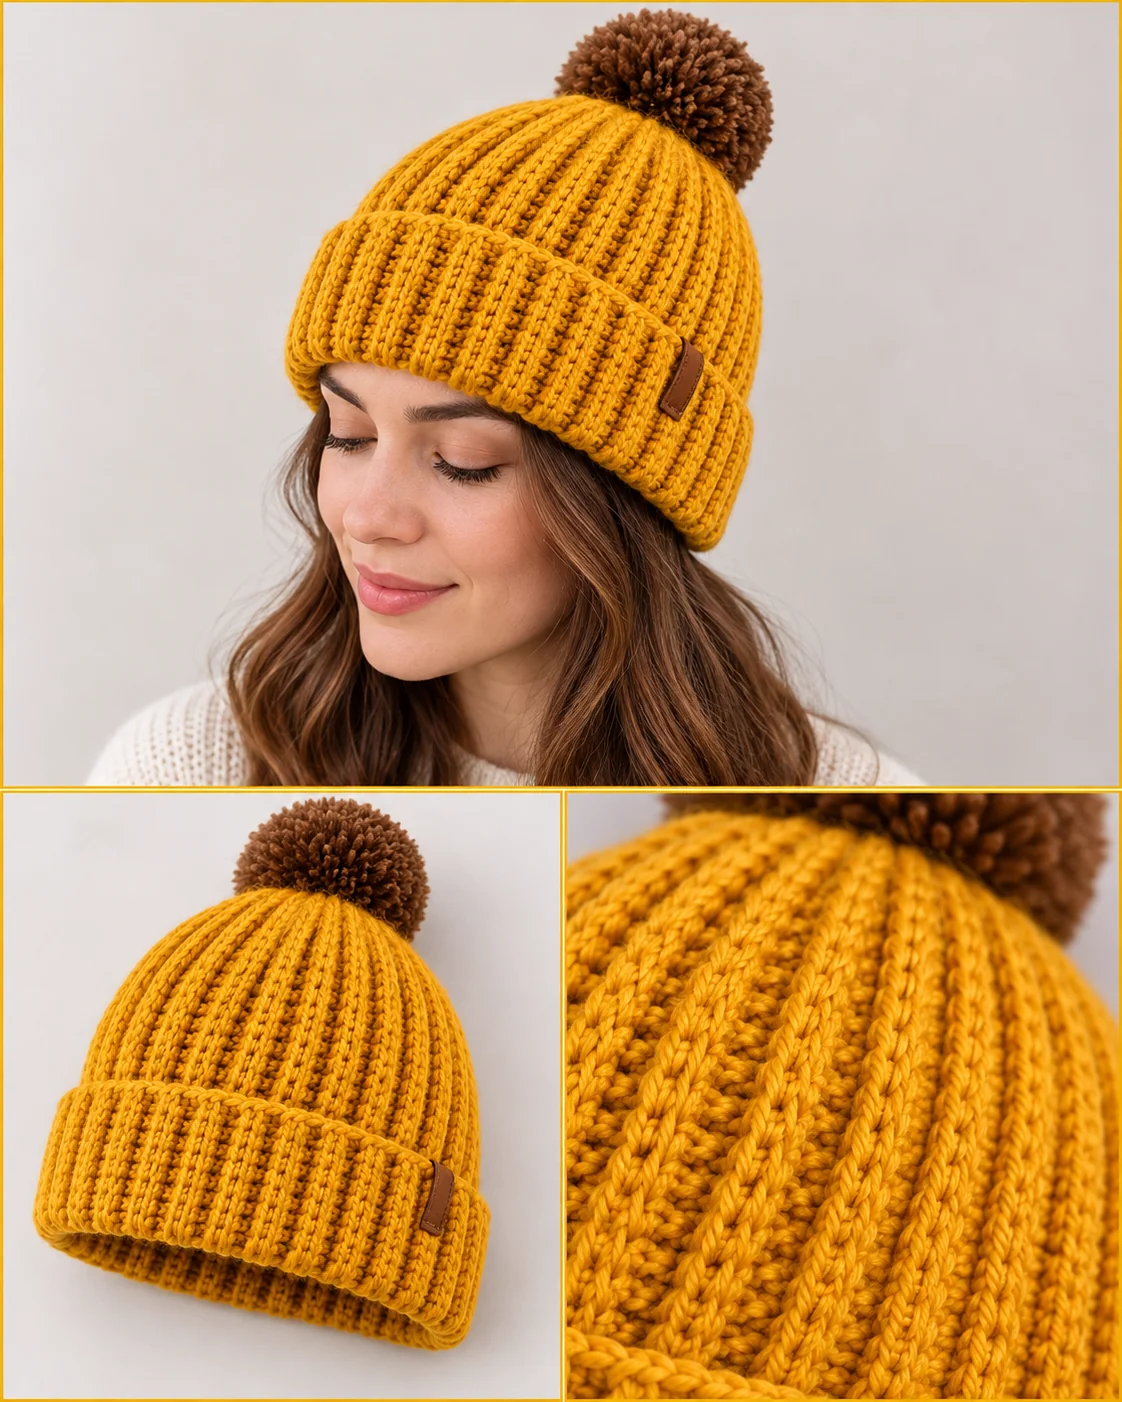
Congratulations on finishing your cozy ribbed beanie! Take a moment to look at the final photo to compare your overall shape and the close-up details of the ribbing. Enjoy wearing your handmade creation!
Common Crochet Beanie Mistakes and How to Fix Them
The hat is too tight
The foundation chain may be too tight, the rectangle may be too short, or your stitches may be too firm. Try a larger hook, relax your tension, or add more rows to increase the circumference.
The ribbing looks uneven
Uneven tension can make some ridges appear taller than others. Keep your yarn tension consistent and make sure each stitch goes into the back loop only.
The rectangle is too narrow
The starting chain controls the height of the rectangle. If your hat does not cover enough of your head, increase the foundation chain and make a new sample.
The crown looks bulky
Gather the top gradually and distribute the folds evenly. Use several small securing stitches rather than one large knot in the center.
The seam feels uncomfortable
A bulky seam can rub against the head. Try a flatter whipstitch seam or reduce the tension of your slip stitches. Weave in yarn tails so no rough ends press against the skin.
The brim keeps unfolding
Make sure the brim is deep enough for the style you want. You can tack it discreetly at the side seam or leave it free for a flexible, adjustable cuff.
Ways to Personalize Your Ribbed Crochet Hat
You can easily tailor a basic ribbed beanie to your taste without altering the fundamental build.
Classic mustard yellow: Attach a brown faux-fur pom-pom to a hat made in the warm golden shade seen in the reference image.
Neutral winter style: For a versatile accessory that complements most winter coats, select yarn in charcoal, taupe, beige, or cream.
Two-color stripes: Create horizontal stripes throughout the hat by alternating yarn colors every few rows.
Men’s or unisex beanie: For a minimalist daily look, omit the pom-pom and use brown, gray, navy, or black.
Women’s winter beanie: Add a playful touch with a fluffy pom-pom and choose colors like sage, dusty pink, burgundy, or warm mustard.
Child-size version: Since head sizes differ, do not base the size on age; instead, adjust the number of rows and the foundation chain by measuring the wearer’s head and desired hat depth.
Lightweight spring beanie: Select a compatible hook and a lighter yarn, keeping in mind that thinner yarn will affect the finished dimensions and gauge.
Maintaining Your Crochet Beanie
To ensure your handcrafted hat stays soft and keeps its original form, follow these maintenance tips.
-
- Refer to the yarn label for specific washing guidelines.
- Use a gentle detergent appropriate for the fiber type and wash carefully.
- Do not wring or twist the fabric.
- Use a clean towel to press out any remaining water.
Lay the beanie flat to dry after reshaping it.
- Unless the yarn label explicitly permits it, stay away from high heat.
- Keep the item clean and dry in a storage area shielded from direct sunlight.
In the event that your beanie features a faux-fur pom-pom, also adhere to the care directions provided by the pom-pom manufacturer.
Expert Advice for Polished Results
Achieving a clean-looking beanie requires a combination of precise measurements and meticulous stitching.
Begin by verifying your gauge. Because stitch size variations accumulate over many rows, even a minor discrepancy can alter the final circumference of the hat.
Maintain a regular stitch count throughout the process. Fixing a dropped stitch is far simpler when discovered after two rows rather than twenty.
Before you begin gathering the crown, ensure the fit is correct. The beanie needs to provide a comfortable stretch around the head, avoiding both excessive tightness on the forehead and a loose fit that causes it to slide.
Ensure all yarn ends are woven in tightly. This prevents loose ends from slipping out while the hat is worn, particularly at the side seam and the crown.
When capturing photos of your completed beanie, use natural window light to highlight the yarn texture and avoid harsh shadows. Include a side profile to showcase the folded brim, a detail shot of the ribbed texture, and a view of the pom-pom from the top.
Common Inquiries
1. Can those new to crochet handle this simple ribbed beanie pattern?
It is beginner-friendly. The project is built from a rectangle utilizing basic chains, single crochet, back-loop-only stitches, gathering, and joining. Proficiency in sewing crochet components together and counting stitches is recommended.
2. Creating a ribbed single crochet beanie
To achieve the desired circumference, crochet a rectangle by working single crochet stitches into the back loop of every stitch. Begin by creating a foundation chain that matches the height of the hat.
3. What is the required yarn quantity for a crochet beanie?
Depending on the pom-pom, the depth of the hat, the thickness of the yarn, and whether there is a folded brim, a standard adult hat generally requires 100–200 g. To ensure there is enough for a fuller design, this tutorial suggests an estimate of 150–200 g.
4. Which crochet hook size is recommended?
For medium-weight yarn, begin with a 5.0 mm hook. You should select a hook size that produces a flexible, comfortable fabric without any oversized gaps.
5. Ensuring a Proper Fit for a Crochet Beanie
Determine the depth you want for the hat and measure the circumference of your head. Create a rectangular piece, remembering to factor in how much the fabric will stretch, and verify the size before you gather the crown and join the edges.
6. Is it possible to create this ribbed crochet hat without including a pom-pom?
Yes, you certainly can. The beanie takes on a modern, minimalist appearance with a basic gathered crown. Alternatively, a detachable pom-pom or a small ball made from crochet can be added.
7. Is it permissible to sell completed hats created with a crochet pattern?
Review the rules of the marketplace you are using and the terms provided with the specific pattern. While you may have the right to sell a handmade finished product, this does not mean you are allowed to resell, distribute, or duplicate the PDF or written instructions.
8. Defining a Crochet Beanie Pattern PDF
These digital guides provide downloadable instructions that you can print or view on a screen. When selecting a PDF, ensure it provides the necessary materials, assembly steps, stitch definitions, and the sizes you need.
Closing Remarks: Crafting Your Simple Ribbed Crochet Beanie
For those seeking a warm, handcrafted winter piece without the stress of complex shaping, this ribbed crochet beanie pattern is an ideal choice. You can easily customize the look with an optional folded cuff, thanks to the stretchy back-loop ribbing and straightforward rectangular design.
Ensure you verify your stitch counts and double-check all measurements to confirm the fit before you seal the crown. By paying close attention to these final details, you can transform a simple rectangle into a high-quality hat perfect for personal use or gifting.
If you follow this beanie tutorial, please share which yarn color you preferred in the comments, pin the pattern for future inspiration, and send it to any friends who love handmade accessories.


