Color Palette
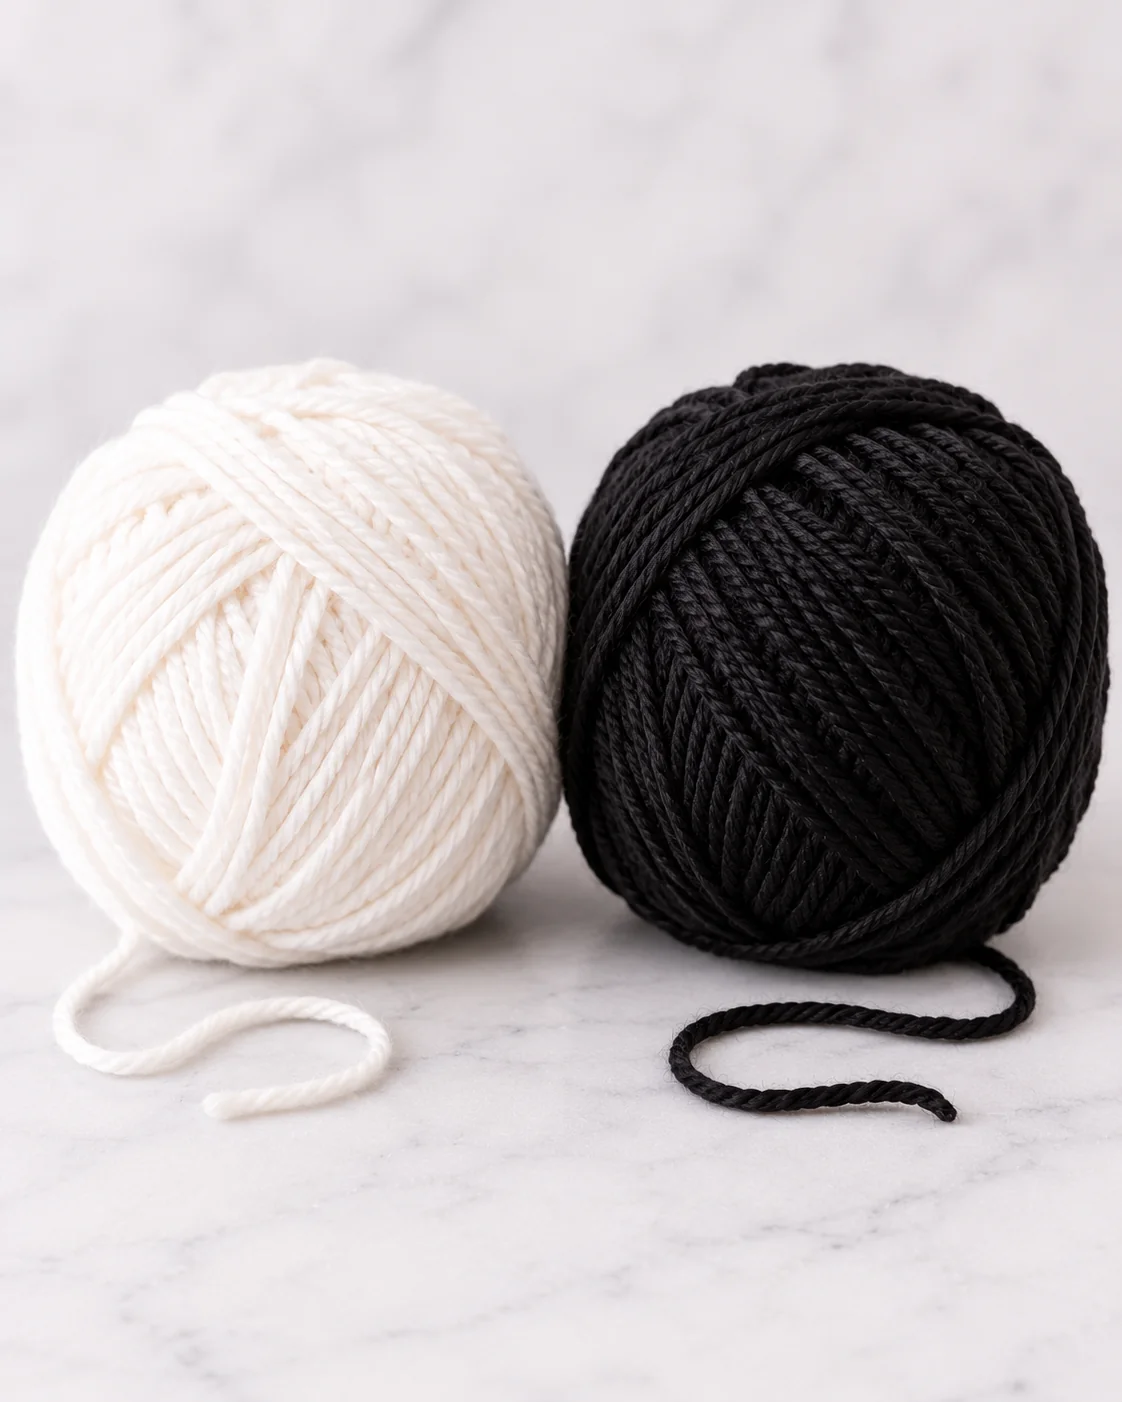
This version features a selection of colors that create an elegant and harmonious mood. The palette begins with white, which brings a sense of brightness and purity to the design. This is followed by black, adding a bold and sophisticated contrast. Together, these two colors complement one another perfectly, balancing light and dark to achieve a timeless aesthetic. The interplay between the crisp white and the deep black ensures the overall look remains refined and visually balanced.
Panda Keychain Crochet Pattern: Cute Mini Amigurumi
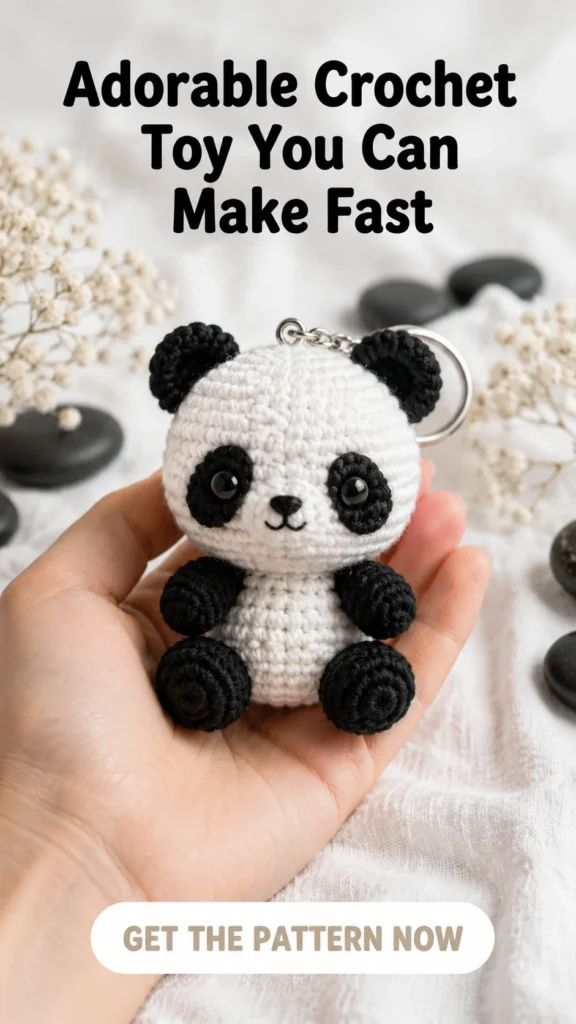
A tiny panda gets its expression from a few carefully placed details: two black oval patches, a rounded white muzzle, and small curved brows. This panda keychain crochet pattern follows the supplied three-page chart, with the original round counts translated into clear working tables.
You’ll make the head and body separately, crochet the black limbs, and join the legs while working the body. The result is a compact, seated-style panda with a large head and a softly projecting muzzle. The photos show the shape; the tables explain how each piece is built.
Panda Keychain Crochet Pattern: Project Overview
The panda keychain crochet pattern uses small, separately shaped pieces rather than one continuous body. Most of the fabric is single crochet, with increases and decreases controlling the outline. Oval chain starts create the eye patches and muzzle; magic-ring starts create the other pieces.
This isn’t just a round-counting exercise. Face placement and sewing have a large effect on the result, so keep the pieces movable until you’ve checked the expression. The source gives placement references for the eyes and ears, but it doesn’t assign a difficulty level or completion time.
Keep the panda keychain crochet pattern open beside your work and mark each completed round. A range such as R10–17 means eight separate rounds, not one round repeated an unspecified number of times. Count the stitches before moving into shaping, especially on the legs.
| Detail | Source information |
|---|---|
| Construction | Separate head and body; legs joined during body R6 |
| Palette | White head, muzzle and body; black patches, ears and limbs |
| Hook listed | 1.75 mm |
| Eyes listed | 6 mm |
| Finished size | Not specified in the supplied chart |
| Testing status | Translation reviewed against screenshots; not test-crocheted |
Materials and Size Notes
For this panda keychain crochet pattern, the only specified tool measurement is a 1.75 mm crochet hook. The chart also lists 6 mm eyes. It does not identify a yarn brand, fiber, weight, yardage, gauge, or finished height, so those details shouldn’t be presented as established specifications.
- White and black yarn: choose compatible yarns, but confirm the actual yarn specification before promising a matching size.
- A 1.75 mm hook, as listed in the source. Check that your chosen yarn produces a workable, dense fabric.
- Two 6 mm eyes, as listed, or securely embroidered features where appropriate for the recipient.
- Stuffing and a yarn needle for the source’s stuffing and sewing steps.
- Useful additional tools: a removable stitch marker, scissors, and temporary placement pins. These are practical additions, not listed source measurements.
Changing the yarn changes the scale of the panda keychain crochet pattern. A thicker yarn may create a larger panda, but it won’t establish a predictable finished measurement without a sample. Work a small fabric test and inspect it for gaps before committing to all the pieces.
Read the Source Symbols
The panda keychain crochet pattern tables retain the chart’s X, V, A, and W notation so you can compare them with the screenshots. These symbols are local pattern shorthand, not a replacement for standard US abbreviations. Read W carefully: here it means three single crochets in one stitch.
| Source mark | Working meaning |
|---|---|
| X | Single crochet (sc) |
| V | Increase: 2 sc in the same stitch |
| A | Decrease: work 2 stitches together as 1 sc |
| W | 3 sc in the same stitch |
| CH | Chain |
| SL | Slip stitch |
| ( … ) × n | Repeat the bracketed sequence n times |
| Magic ring | Adjustable ring used for the circular starts |
The chart does not specify an invisible decrease, a particular joining routine for every round, or a chain at every round start. Don’t add those details as though they were printed instructions. Use a marker to track the round boundary and keep a consistent working method during your sample.
For standard US terminology, compare the Craft Yarn Council crochet abbreviation list. It distinguishes single crochet, increases, decreases, and slip stitches, while the source-symbol key above explains the shorthand used in this panda keychain crochet pattern.
Crochet the Black Eye Patches
Make two patches in black for the panda keychain crochet pattern. Each begins with a five-chain oval rather than a magic ring. Work around both sides of the foundation chain, placing the three-stitch groups at the ends to turn the oval.
| Round | Source sequence | Total |
|---|---|---|
| 1 | Black: ch 5; starting in the second chain, 3X, W; continue around the other side: 3X, W | 12 |
| 2 | 3X, 3V, 3X, 3V | 18 |
Slip stitch and leave a long sewing tail, as directed. The source places an eye at the center of the first round of each patch. Check the orientation of the two ovals together before their final attachment; they should look like a pair rather than two unrelated shapes.
Don’t judge the expression from one loose patch alone. For the panda keychain crochet pattern, the patches, muzzle, and head have to be assessed together. Keep the sewing tails accessible and avoid permanently tightening both patches until the front view looks balanced.
Shape the White Head
Begin the panda keychain crochet pattern head in white with six single crochets in a magic ring. The increases build to 42 stitches, pause for one round, and then expand to 48. That extra increase round is easy to miss if you assume the shaping stops at R7.
| Round | Source sequence | Total |
|---|---|---|
| 1 | White: 6X in a magic ring | 6 |
| 2 | 6V | 12 |
| 3 | (X, V) × 6 | 18 |
| 4 | (2X, V) × 6 | 24 |
| 5 | (3X, V) × 6 | 30 |
| 6 | (4X, V) × 6 | 36 |
| 7 | (5X, V) × 6 | 42 |
| 8 | 42X | 42 |
| 9 | (6X, V) × 6 | 48 |
| 10–17 | 48X in each round | 48 |
| 18 | 3X, A, (6X, A) × 5, 3X | 42 |
| 19 | (5X, A) × 6 | 36 |
| 20 | 2X, A, (4X, A) × 5, 2X | 30 |
| 21 | (3X, A) × 6 | 24 |
| 22 | X, A, (2X, A) × 5, X | 18 |
The source positions the eyes between R14 and R15, with six stitches between them. Use that stated eye spacing as the reference; it is not an instruction to leave six empty stitches between the outer edges of the black patches. Recheck the position from straight ahead before securing the components.
Add stuffing after R21, following the source order, then work R22 to leave 18 stitches. The panda keychain crochet pattern does not close the head to zero: the remaining opening is for assembly with the body. Finish with the source’s slip stitch and sew the eye patches to the head.
Use small additions of stuffing so you can adjust the face without forcing the crochet fabric apart. This is general finishing advice, not a specified stuffing quantity. Stop and redistribute any obvious lump before it becomes hidden behind the muzzle or neck seam.
Add the Rounded Muzzle
The white muzzle makes the panda keychain crochet pattern look rounded rather than flat-faced. It starts with seven chains and is worked around both sides, much like the smaller eye patches. After increasing to 28 stitches, the final plain round gives it depth.
| Round | Source sequence | Total |
|---|---|---|
| 1 | White: ch 7; starting in the second chain, 5X, W; continue around the other side: 5X, W | 16 |
| 2 | 5X, 3V, 5X, 3V | 22 |
| 3 | 5X, (V, X) × 2, V, 6X, (V, X) × 3 | 28 |
| 4 | 28X | 28 |
Stuff the muzzle and sew it below the eyes, as the source directs. Temporarily place it first and look from the side as well as the front. A centered oval can still appear tilted if one end sits farther forward than the other.
For a neat panda keychain crochet pattern finish, distribute the sewing tension around the edge rather than pulling one small area tight. The source’s final assembly instructions add the black embroidered nose later. Its exact embroidery stitch count isn’t given, so follow the pictured shape without claiming a prescribed formula.
Make and Position the Ears
Make two ears in black. These are short circular pieces with two plain rounds after the increase round. The panda keychain crochet pattern places them five rows down from the top of the head; the source doesn’t give a stitch-by-stitch lateral spacing.
| Round | Source sequence | Total |
|---|---|---|
| 1 | Black: 6X in a magic ring | 6 |
| 2 | 6V | 12 |
| 3–4 | 12X in each round | 12 |
Pin both ears before sewing either one completely. Check their height against the crown and their tilt against the eye patches. If one ear leans backward, adjust the attachment line rather than trying to correct the entire head with extra stuffing.
The ears don’t have a separate stuffing instruction in the chart. Don’t add one as a requirement of the panda keychain crochet pattern. Compare the soft, flattened appearance in the supplied finished photo and confirm any construction change during your own sample.
Crochet the Arms and Legs
Arms — make two in black
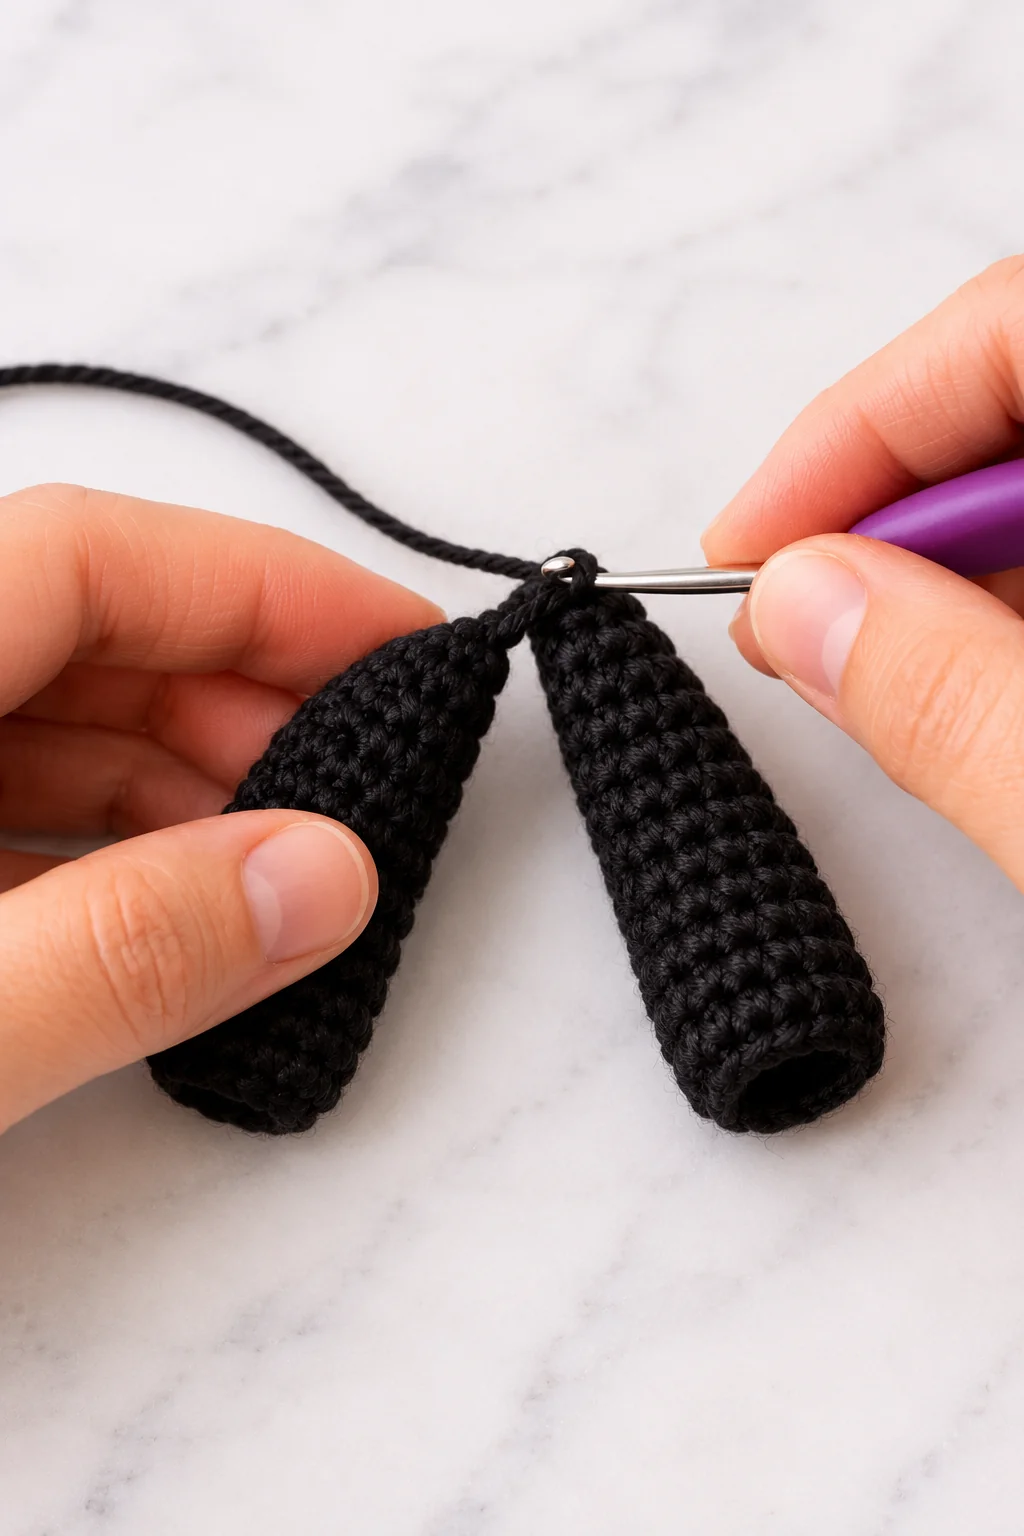
The arms in the panda keychain crochet pattern start with seven stitches, not six. They increase to 14 and taper back to 10. Keep the two pieces together while counting the plain rounds so one arm doesn’t finish longer than the other.
| Round | Source sequence | Total |
|---|---|---|
| 1 | Black: 7X in a magic ring | 7 |
| 2 | 7V | 14 |
| 3–4 | 14X in each round | 14 |
| 5 | (5X, A) × 2 | 12 |
| 6 | 2X, A, 4X, A, 2X | 10 |
| 7 | 10X | 10 |
Legs — make two in black
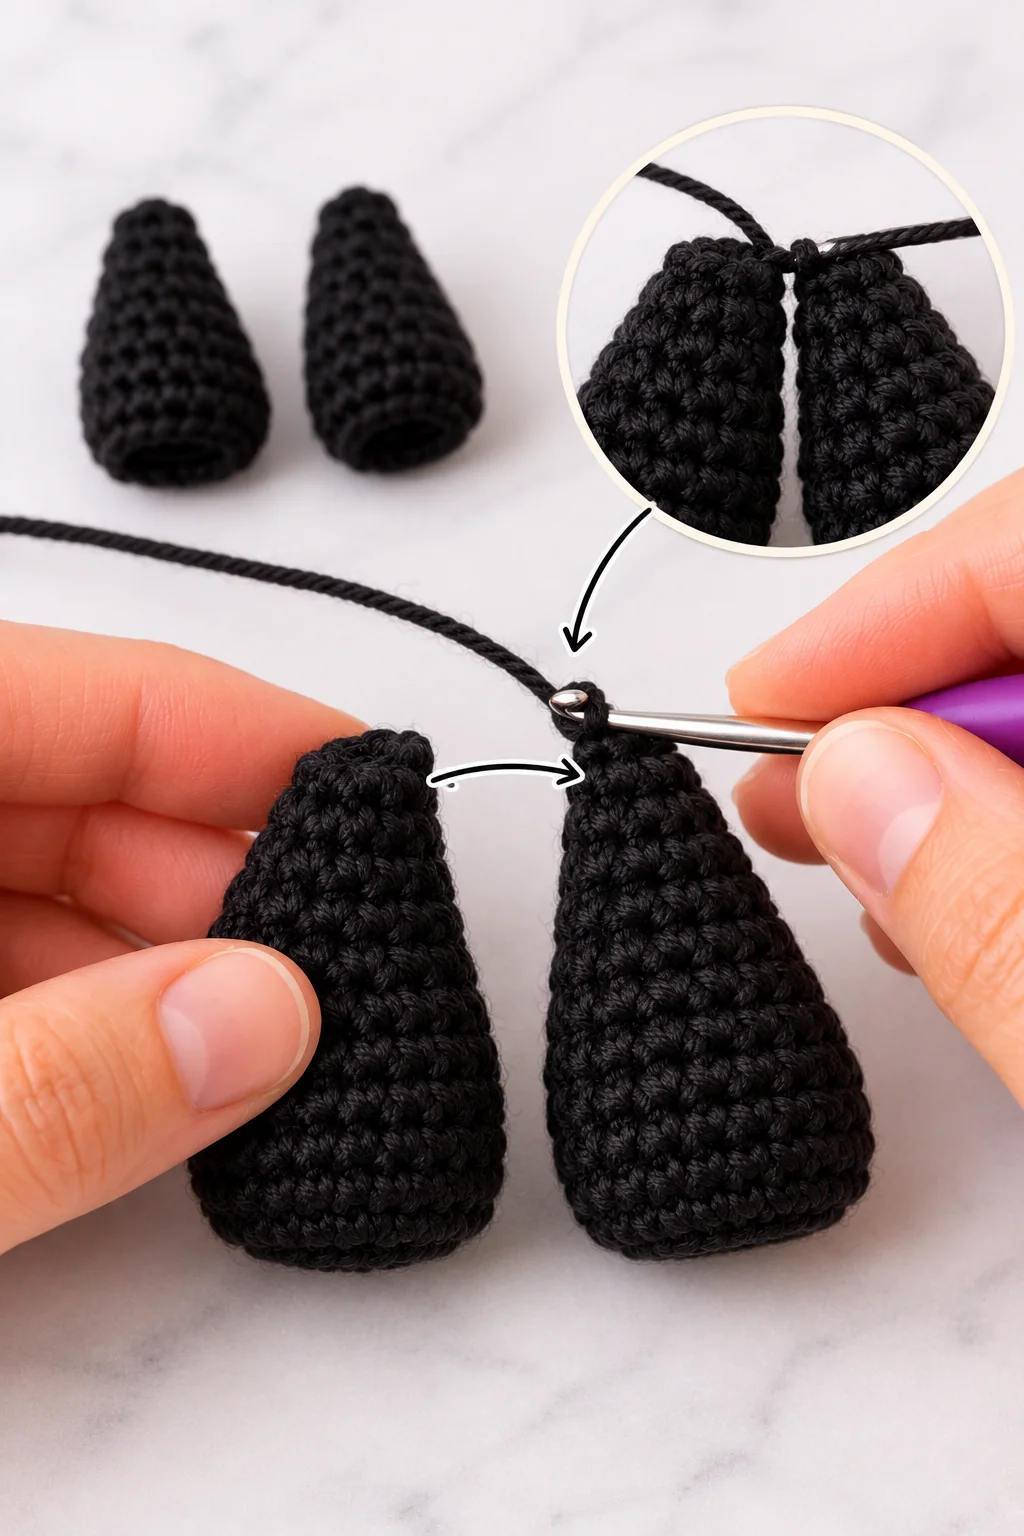
The legs are wider at the base and taper sharply near the top. In the panda keychain crochet pattern, R6 ends with 13 stitches and R7 ends with 10. Those odd-looking intermediate counts are deliberate in the chart, so don’t round them to a more familiar number.
| Round | Source sequence | Total |
|---|---|---|
| 1 | Black: 6X in a magic ring | 6 |
| 2 | 6V | 12 |
| 3 | (X, V) × 6 | 18 |
| 4–5 | 18X in each round | 18 |
| 6 | 4X, 5A, 4X | 13 |
| 7 | 4X, 3A, 3X | 10 |
| 8 | 10X | 10 |
Fold each leg opening and close it with five single crochets, as directed. Unlike the arm closure, this matches the five pairs available from ten stitches. These five closing stitches provide the joining edge used when the body reaches R6; keep the pieces ready before starting that round.
Work the Body and Join the Legs
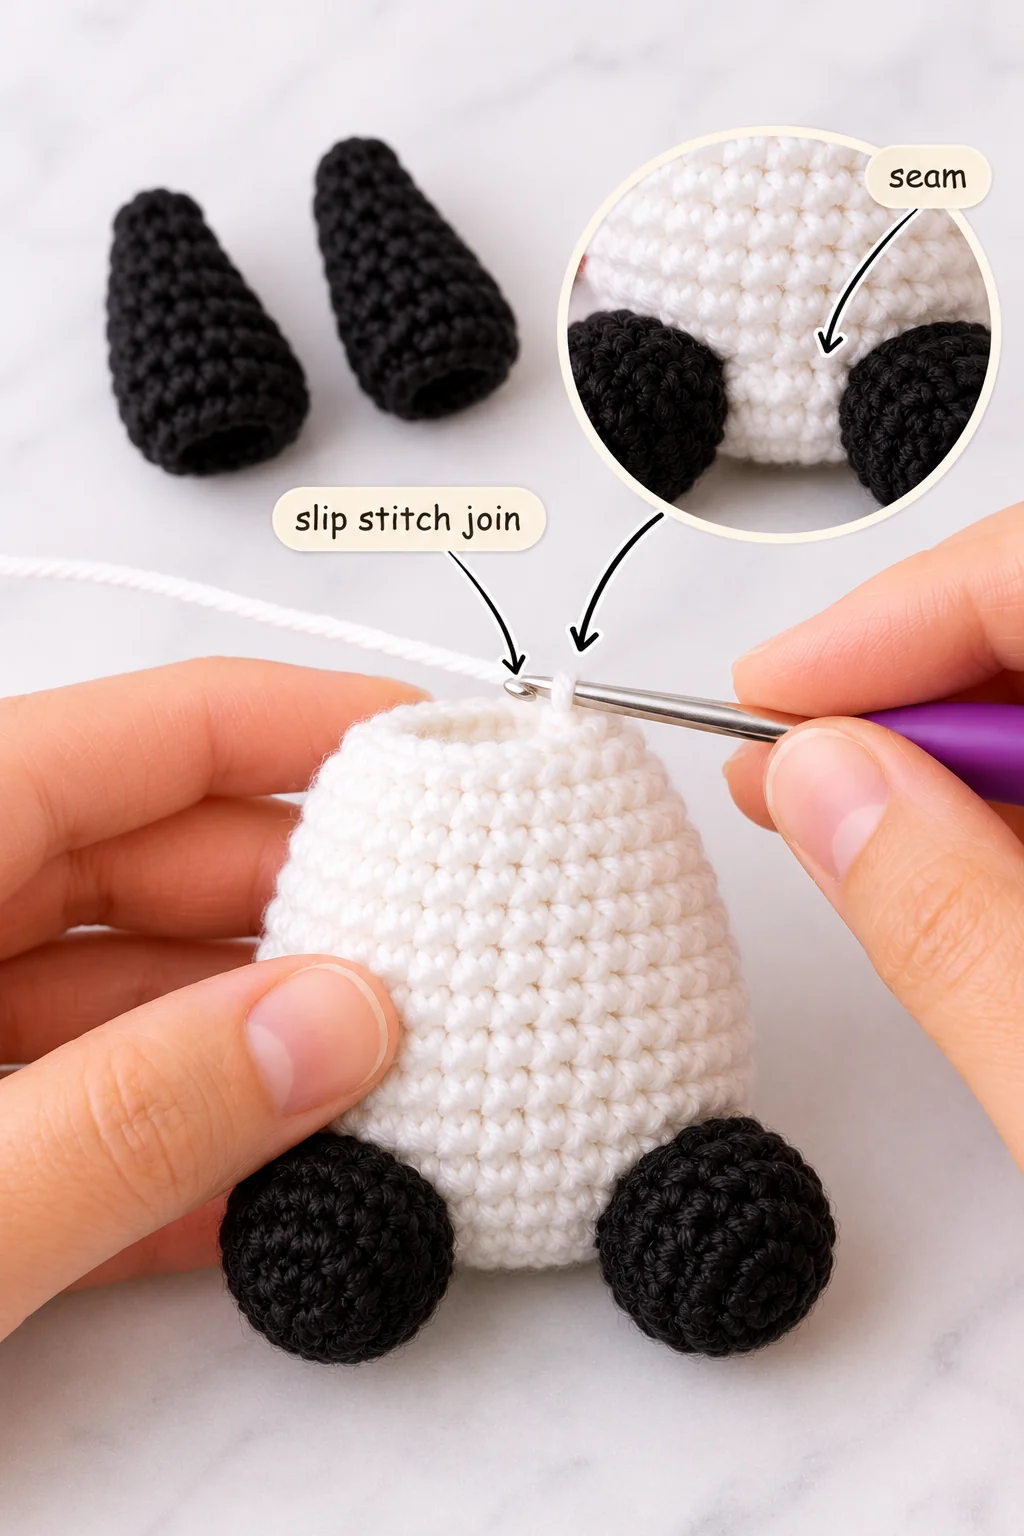
Work the body of the panda keychain crochet pattern in white, increasing to 30 stitches. The legs are attached during R6 rather than sewn onto the finished body afterward. Read the whole joining round before crocheting it, because both legs must be ready at the same time.
| Round | Source sequence | Total |
|---|---|---|
| 1 | White: 6X in a magic ring | 6 |
| 2 | 6V | 12 |
| 3 | (X, V) × 6 | 18 |
| 4 | (2X, V) × 6 | 24 |
| 5 | (3X, V) × 6 | 30 |
| 6 | 5X; join leg 1 to the body across 5X; 10X; join leg 2 to the body across 5X; 5X | 30 |
| 7–9 | 30X in each round | 30 |
| 10 | (3X, A) × 6 | 24 |
| 11 | 24X | 24 |
| 12 | (2X, A) × 6 | 18 |
The joining round totals 30 body stitches: five plain, five joining the first leg, ten plain, five joining the second leg, and five plain. The joining stitches occupy their places in that round; they are not ten additional stitches. If your count becomes 40, recheck how you interpreted the leg joins.
After R12, slip stitch and leave a long sewing tail. The panda keychain crochet pattern body ends with 18 stitches, matching the head opening’s count. That is a useful assembly checkpoint, but it doesn’t specify an exact sewing stitch or an automatic stitch-to-stitch alignment.
Before closing the neck seam, check the torso from the front and back. The legs should sit symmetrically relative to the front of the face. If the body is rotated under the head, the panda may look twisted even when every round count is correct.
Assemble and Finish Your Panda
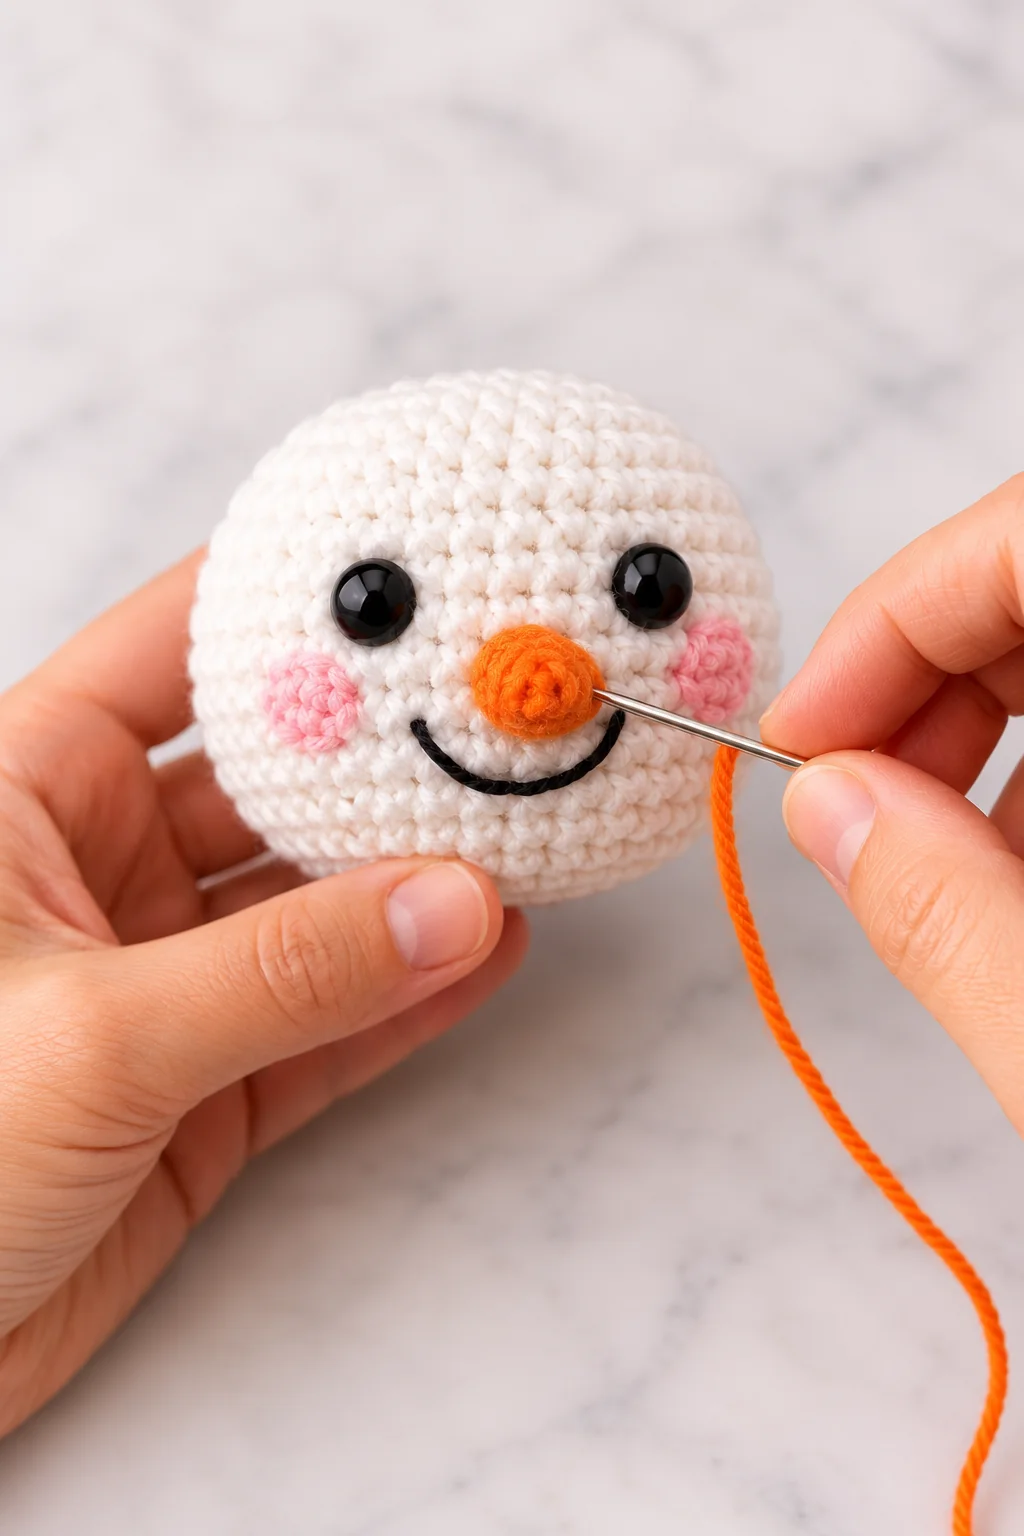
The source finishes the panda keychain crochet pattern by sewing the arms to the body sides, stuffing the body, joining it to the head, and embroidering the brows and nose in black. No tail or additional accessory is listed. Keep the final silhouette close to what the supplied photographs actually show.
- Resolve the marked arm-closing question before permanently attaching the arms.
- Place the arms at the body sides and compare their height from the front. The source does not name an exact attachment round.
- Stuff the body and sew it to the head, checking that both 18-stitch openings are aligned without a twist.
- Embroider the black brows and nose. Use the reference image for the expression; exact embroidery counts are unspecified.
- Secure the ends and remove every temporary pin or marker before handling the finished piece.
Give the panda keychain crochet pattern a final expression check before burying the last tail. View the panda at eye level, not only from above. A small change in ear angle or muzzle tension can have more effect than adding another embroidered detail.
If you intend to attach a keyring, obtain a separate, suitable attachment and reinforcement method from a reliable pattern source. The supplied pages don’t establish where a loop should sit, what yarn should carry the load, or how much pulling the finished item can withstand.
Maintenance and Problem Solving
Correcting Asymmetrical Eye Patches
Verify that the eye patches are spaced six stitches apart and aligned with the R14–15 reference. You should also examine the tension of your sewing and the orientation of the ovals. Because the white muzzle is positioned in front of the lower face in this panda keychain crochet pattern, it may affect the visibility of the patches.
Filling is visible through the white material
Prior to inserting additional stuffing, evaluate the combination of your hook, yarn, and fabric test. Because yarn specifications are not provided, using the 1.75 mm hook alone does not ensure the density seen in the sample photo. Do not push stuffing into fabric that has already reached its stretching limit.
Improper alignment of the body or legs
Verify the placement of each folded leg’s five-stitch joining edge by recounting R6 of the body. Before attaching the head, ensure both sides are symmetrical. Because the panda keychain crochet pattern specifies a total of 30 stitches for this round, you can easily determine if the issue is due to an incorrect stitch count or poor positioning.
Maintenance and Storage
Refer to the guidelines provided for your specific stuffing, yarn, and eyes for care instructions. No specific blocking temperature or machine washability has been determined. Keep the panda in a dry location, ensuring it is away from sharp items that might snag the small limbs, and check all hardware added separately before use.
Additional Resource Guides
The following guides provide supplementary information to the panda keychain crochet pattern. While these resources offer general finishing inspiration, the original tables remain the primary authority for this specific panda’s stitch counts.
- Practical solutions for frequent amigurumi errors, including pinned assembly, stuffing, facial planning, and counting.
- Advice for achieving sharper high-contrast details, specifically regarding finishing tips, color changes, and panda shaping.
- Design context for mixing fluffy and smooth amigurumi textures, which is helpful when experimenting with different yarn surfaces.
Common Inquiries
Which crochet hook is required for the panda keychain?
A 1.75 mm hook is specified in the provided chart. Because gauge and yarn weight are not mentioned, you should perform a test with your specific hook and yarn combination to ensure the panda’s final dimensions align with the photos.
Final Dimensions of the Panda
No specific dimensions for the completed project are provided in the source. Because the eye size and the hand shown in the photo are not dependable indicators of scale, it is recommended to crochet and measure a sample before stating a specific width or height.
Positioning the Ears and Eyes
Attach the ears five rows below the top of the head. Position the eyes with six stitches separating them, placing them between R14 and R15. Sew the black eye patches onto the head, ensuring the facial features are correctly aligned before you secure the seams.
Can a beginner handle this panda keychain crochet pattern?
Beyond knowing basic stitches, you must be able to handle sewing, joining, shaping, and oval starts. While the source does not provide a specific difficulty level, the instructions for closing the arms are somewhat unclear. This project is best suited for someone who is confident in tracking their stitch counts.
Is a keyring attachment provided in this panda keychain crochet pattern?
It is not. While the title refers to a keychain, the three pages of the pattern fail to specify an attachment technique or hardware measurements. Rather than adding an unverified loop and asserting its stability, consider this a gap in the construction instructions.
Completing Your Panda
The appeal of this panda keychain crochet pattern relies on its specific proportions: small black limbs, a muzzle that projects outward, dark oval patches, and a large white head. Before sewing the seams, use temporary placement to verify the layout and ensure every shaping round maintains these clear relationships.
Begin by crafting the two eye patches and addressing the noted question regarding arm-closure. To make this a more reliable guide for future makers, record the confirmed corrections, measurements, and actual yarn used alongside the chart after verifying the panda keychain crochet pattern with a physical sample.
You Did It!
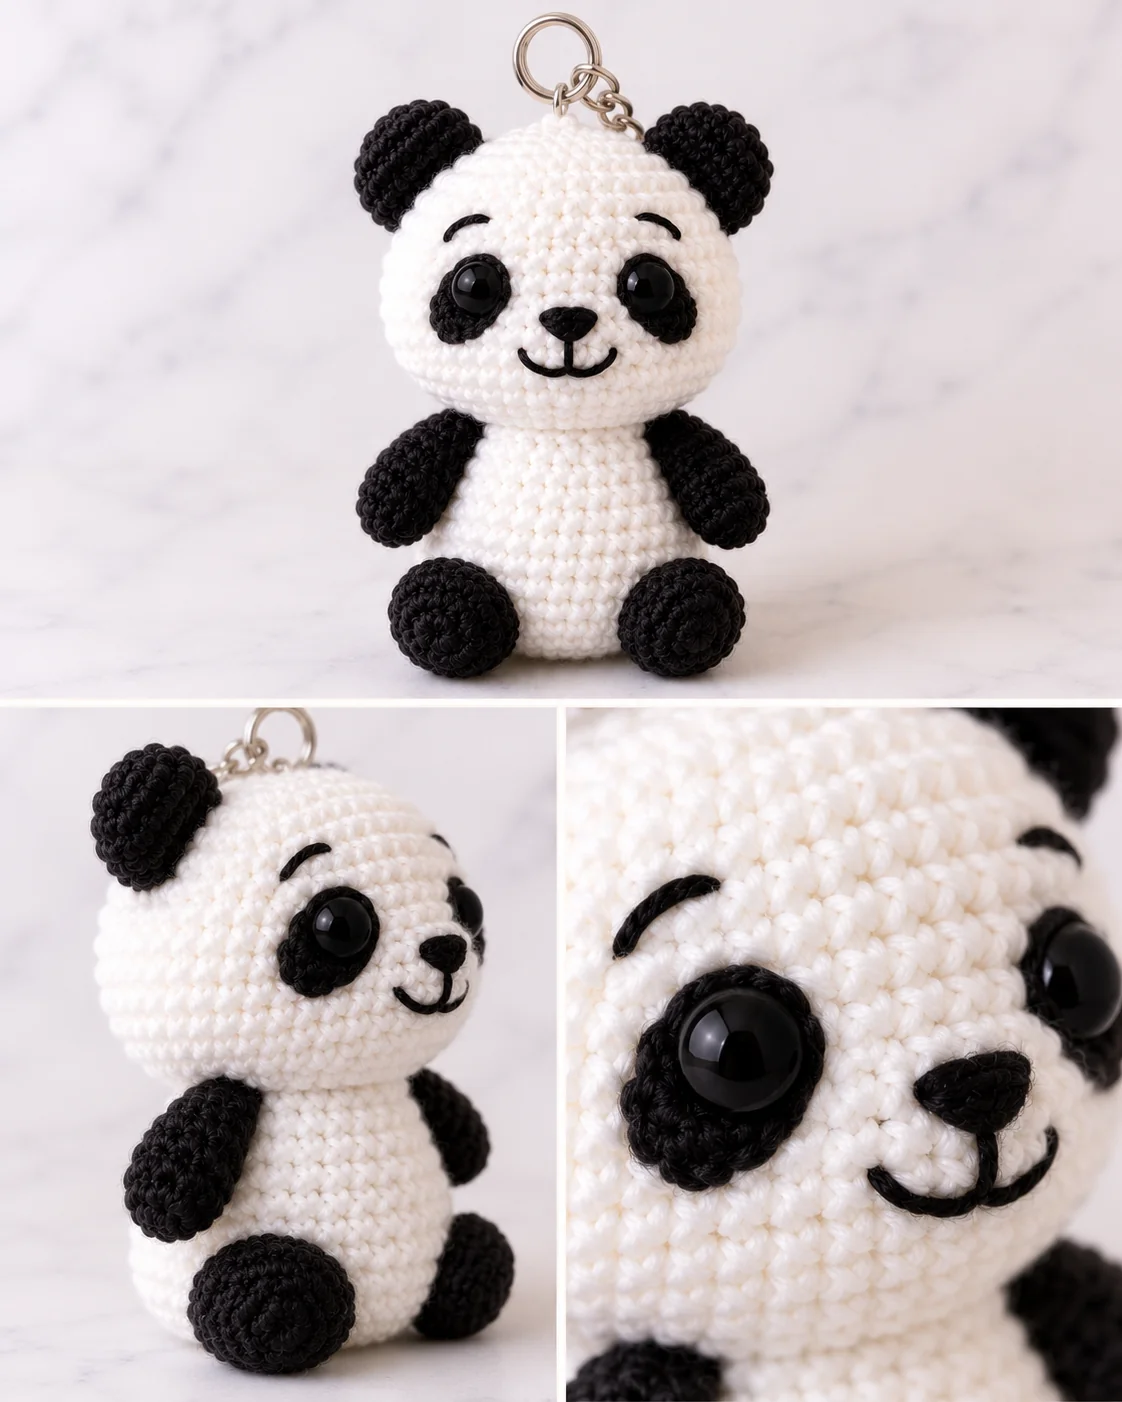
Congratulations on completing your mini panda! Take a moment to compare your finished amigurumi to the final photos to check the overall shape and those cute close-up details. Enjoy your adorable new keychain!