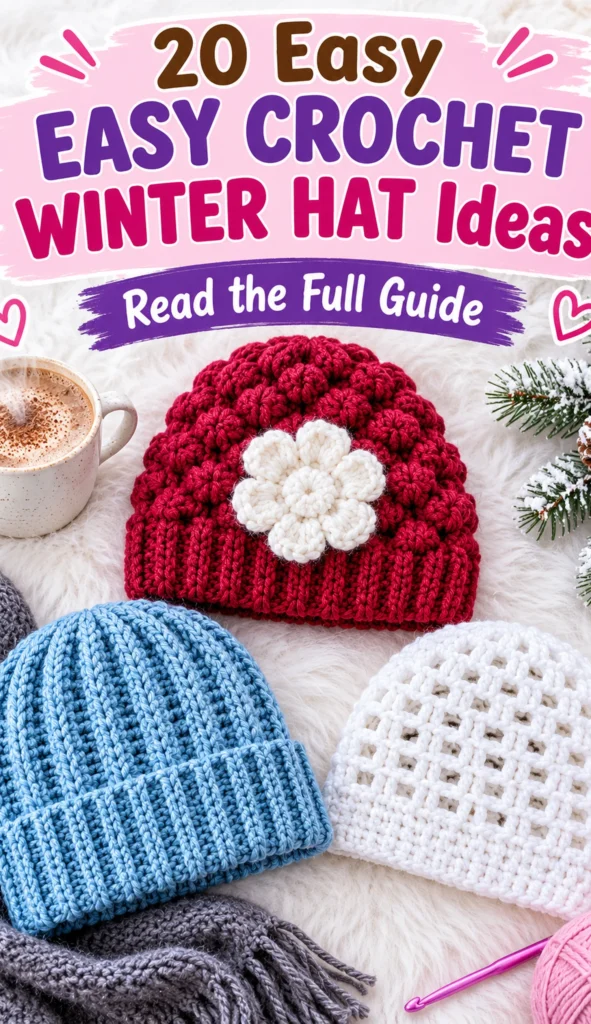
Creating a winter hat is a rewarding project for anyone learning to crochet. These designs focus on textures and shapes that suit the cold weather, providing a way to practice essential stitches while making something functional.
Disclosure: This article was drafted with the help of AI tools. Images are AI-generated illustrations.
When choosing a style, consider the look you want and the yarn you have available. Some designs rely on simple stitches for a clean look, while others use textured stitches to create a thicker fabric.
Key Takeaways:
- Measure the wearer to ensure a comfortable fit.
- Work a gauge swatch to determine the correct size.
- Follow yarn label instructions for hook size and care.
- Choose stretchy stitches for headwear to avoid tightness.
- Weave in all ends securely to prevent unraveling.
Table of Contents
Quick Reference: Styles at a Glance
| Style | Look | Main technique | What to check |
|---|---|---|---|
| Back Loop Only Ribbed Beanie | Vertical ridges | Back loop only | Join method |
| Puff Stitch Textured Hat | Bumpy surface | Puff stitch | Yarn quantity |
| Lined Mesh Winter Toque | Openwork with lining | Lace/mesh | Gap size |
| Tapestry Crochet Patterned Hat | Graphic patterns | Tapestry crochet | Fit looseness |
| Shell Stitch Winter Cap | Scalloped | Shell stitch | Shell alignment |
| Granny Square Patchwork Hat | Multi-color squares | Granny squares | Seam strength |
| Plain Single Crochet Beanie | Smooth | Visual style only | Stitch tension |
| Double Crochet Slouchy Hat | Relaxed fit | Visual style only | Decrease rounds |
| Half Double Crochet Winter Cap | Uniform | Visual style only | Fabric density |
| Treble Crochet Dense Winter Hat | Tall stitches | Visual style only | Anchoring |
| Waffle Stitch Winter Beanie | Grid texture | Visual style only | Post stitch placement |
| Basketweave Texture Hat | Woven look | Visual style only | Gauge swatch |
| Striped Color-Block Hat | Horizontal lines | Visual style only | Color transitions |
| Cable-Look Crochet Hat | Braided columns | Visual style only | Width changes |
| Cluster Stitch Winter Beanie | Pebbled | Visual style only | Cluster spacing |
| Ridged Row Hat | Horizontal ridges | Visual style only | Row symmetry |
| Moss Stitch Winter Cap | Woven seed | Visual style only | Chain space placement |
| Dense V-Stitch Winter Beanie | V-shapes | Visual style only | Construction method |
| Popcorn Stitch Texture Hat | Large bumps | Visual style only | Yarn quantity |
| Solid Granny Stripe Beanie | Vintage stripes | Visual style only | Seam technique |
Why are winter hats great for beginners?
Hats typically use basic shapes and repetitive motions that help new crocheters build muscle memory. Most designs are worked in rounds or simple rectangles.
At a Glance:
- Repetitive stitch patterns
- Fast progress with thick yarn
- Basic geometric construction
- Low number of complex joins
Because hats are often made with thicker winter yarns, the stitches are easier to see and identify. This makes it simpler to spot mistakes and correct them before moving forward.
What materials should you use?
Selecting the right yarn depends on the desired feel and care needs. All stitch names used in these descriptions follow US crochet terms.
At a Glance:
- Acrylic for easy washing
- Wool for traditional warmth
- Bamboo for softness
- Cotton for breathability
Acrylic yarn is a common choice because it is easy-care and widely washable. Wool is another option that provides warmth but can felt or shrink if washed in hot water. Bamboo offers a softer, drapey quality, while cotton is breathable and lacks the stretch found in other fibers.
Check the yarn label for the recommended hook size. You can adjust the hook size up or down to change the tension of your fabric.
Yarn Properties:
- Acrylic: Machine washable
- Wool: Prone to shrinking in heat
- Bamboo: Very drapey
- Cotton: Minimal stretch
Hook Tip: Always start with the hook size listed on the yarn label.
How do you ensure a proper fit?
Correct sizing prevents the hat from being too tight or slipping off. Start by measuring the wearer around the forehead, above the eyebrows and ears, or by measuring a well-fitting hat.
At a Glance:
- Measure the forehead
- Create a gauge swatch
- Avoid tight fits
- Check measurements often
Working a gauge swatch is essential. This small test square in your chosen stitch tells you how many stitches fit into a specific measurement, which helps you determine the foundation chain or starting round.
For headwear, keep the fit comfortably loose. If you use a technique that reduces stretch, you must measure more carefully to ensure the hat is not too tight.
Winter Crochet Hat Styles to Try
This list is organized by texture and technique, moving from smooth, simple designs to more complex, three-dimensional stitches suited for winter.
1. Back Loop Only Ribbed Beanie
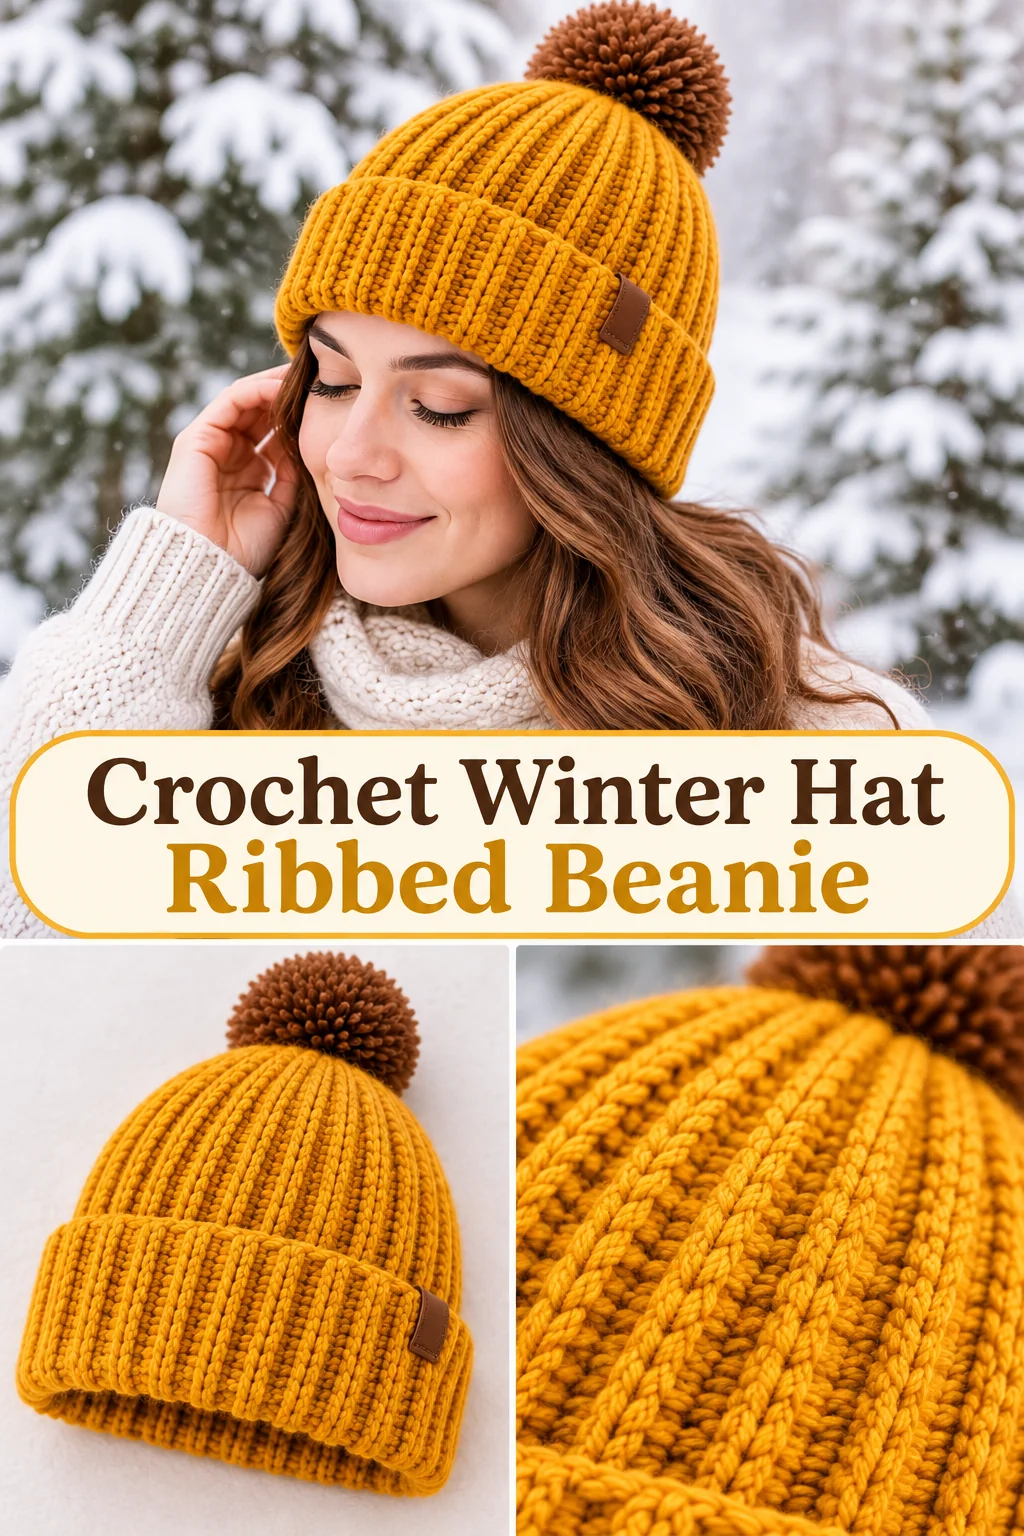
This beanie features a classic ribbed look in icy blue, which mimics the appearance of knit fabric. The vertical ridges give the hat a structured yet flexible appearance.
The back loop only (BLO) single crochet technique creates these raised ridges. This method results in a stretchy fabric that expands and contracts along the row.
Because the stretch runs along the row, the foundation chain typically determines the length of the band. This differs from hats worked in rounds where the stretch is different.
When choosing a pattern for this style, check if the hat is worked as a flat rectangle and then joined, or if it is worked in a circle. This affects how you measure the starting chain.
To ensure the hat remains comfortably loose, work a gauge swatch. This helps you determine how much the BLO ribbing will stretch once the hat is worn.
Design Features:
- Vertical ridge texture
- High stretch fabric
- Knit-like appearance
2. Puff Stitch Textured Hat
This hat in deep berry red has a thick, bobbled surface that looks very cozy. The puff stitches create a three-dimensional effect across the entire fabric.
Puff stitches are made by pulling up multiple loops in one stitch before closing them. This creates a bumpy, soft fabric that feels denser than standard stitches.
One important consideration is that puff stitches use more yarn than basic stitches. You may need more materials than a smooth hat of the same size.
Beginners should be careful not to pull the closing chain too tight, as this can distort the shape of the puff and affect the overall fit of the hat.
Because the fabric is denser, check the pattern for sizing advice. A dense puff stitch fabric may have less stretch than a plain double crochet hat.
3. Lined Mesh Winter Toque
This snow white hat features an openwork design paired with a fabric lining to make it suitable for winter. The outer gaps create a delicate, airy pattern over a solid base.
The lace effect is achieved by alternating double crochet stitches with chain spaces and skipped stitches. This creates a fabric with visible holes that allows the lining to show through.
Unlike the solid puff stitch hat, the outer crochet layer is much lighter and more flexible. The lining provides the necessary density for cold weather wear.
When making this for children, ensure the chain spaces are not too loose to prevent fingers from catching in the gaps. Check the pattern for the specific chain count used in the mesh.
Because the mesh is more open, it may stretch more than solid fabrics. A gauge swatch will help you determine if you need to adjust your hook size to keep the gaps small.
Safety Note: Keep mesh gaps small so little fingers cannot catch in the fabric.
4. Tapestry Crochet Patterned Hat
This hat in soft charcoal gray uses two different colors to create a graphic pattern. The colors are integrated directly into the fabric rather than embroidered on top.
Tapestry crochet involves carrying the unused color inside the stitches. This technique ensures that both colors are visible on the surface of the work.
The resulting fabric is thicker and firmer than a single-color hat. However, this also means it has less stretch than a plain crochet fabric.
Because of the reduced stretch, it is vital to measure the head carefully and keep the fit comfortably loose. Check if the pattern suggests a larger starting size to compensate for the firmness.
When working with two colors, maintain a consistent tension for both yarns. If one color is pulled tighter than the other, the hat may warp or pull unevenly.
Tapestry Tips:
- Carry yarn loosely
- Check tension frequently
- Measure wearer accurately
5. Shell Stitch Winter Cap
This cap in soft gold features a scalloped texture that looks like small fans. The shells create a rhythmic, overlapping pattern across the hat.
A shell is created by working several double crochets into the same stitch or space. A shell commonly skips two stitches on each side to keep the fabric flat.
This differs from the puff stitch by creating a flatter, wider texture rather than a bumpy one. It provides a more decorative look that is less dense than a solid beanie.
Check your chosen pattern to see how the shells are aligned, as they can be stacked or staggered. This alignment changes the visual flow of the cap.
Because shells use double crochet, the fabric is more flexible than single crochet. Use a gauge swatch to ensure the scalloped edges do not make the hat too wide.
6. Granny Square Patchwork Hat
This hat in soft sage green uses a variety of colors in a patchwork style. It is constructed from several small squares joined together to form a cap.
Granny squares are worked in rounds from a center point. Once the squares are completed, they are joined using a slip stitch or a sewn seam.
Because the squares are joined, this construction is more rigid than a hat worked in a single piece. It has very little natural stretch.
Ensure the joints are secure and that there are no large gaps where the squares meet. Check the pattern for how the squares are arranged to create the rounded shape of the head.
Since this style is not stretchy, it is essential to measure the wearer accurately. Ensure the finished diameter of the joined squares is comfortably loose for the head.
Assembly Check:
- Check seam strength
- Verify square size consistency
- Ensure flat joins
7. Plain Single Crochet Beanie
This forest green beanie has a smooth, consistent surface. It is a minimalist design that focuses on the quality of the yarn and the shape of the hat.
Using only single crochet creates a dense, solid fabric. This is one of the simplest techniques for beginners to master and provides full coverage.
Compared to the lined mesh hat, this design is completely opaque. It is a sturdy base for adding pom-poms or bows if the pattern allows.
Beginners should watch their tension to ensure the stitches do not become too tight. Tight stitches can reduce the natural stretch of the fabric, making the hat too small.
Because the fabric is dense, it provides a clean look that highlights the color of the yarn. Check the pattern for how to handle the decrease rounds to keep the top smooth.
8. Double Crochet Slouchy Hat
This plum purple hat has a relaxed fit that hangs loosely at the back. The slouchy silhouette is a popular modern style for winter.
Double crochet stitches are taller than single crochet, which makes the fabric grow faster and feel slightly softer than a dense beanie.
The increased height of the stitches contributes to the drape of the hat. This makes it different from the rigid structure of a granny square hat.
When following a pattern, check how the decrease rounds are handled at the top. This is what maintains the slouchy shape rather than a tight fit.
Because double crochet is more open than single crochet, the hat will have more drape. Use a gauge swatch to ensure the height of the stitches matches the desired slouch.
Style Notes:
- Relaxed silhouette
- Faster growth than single crochet
- Soft drape
9. Half Double Crochet Winter Cap
This mustard yellow cap offers a balance between the density of single crochet and the height of double crochet. It has a clean, uniform look.
The half double crochet stitch creates a fabric that is slightly thicker than double crochet but less stiff than single crochet.
This makes it a versatile choice for winter hats that need to be substantial without being overly heavy or too open.
If you are undecided between a plain beanie and a slouchy hat, this stitch is a great middle ground. Check the gauge swatch to see how the height affects the fit.
Because HDC is a standard stitch, it is easy to maintain consistent tension. This ensures the hat remains symmetrical and fits comfortably loose around the head.
10. Treble Crochet Dense Winter Hat
This mint green hat features very tall stitches that create a distinct vertical texture. To make it suitable for winter, the design uses a dense arrangement of stitches.
Treble crochet stitches are the tallest of the basic stitches. When worked closely together without gaps, they create a flexible but substantial fabric.
Because the stitches are so tall, they can lean slightly. This creates a different visual flow than the compact puff stitch or the dense HDC cap.
Check the pattern for how the treble stitches are anchored. This prevents the hat from becoming too loose or losing its shape over time.
Due to the height of the stitches, this hat may stretch more than other styles. Work a gauge swatch to ensure the fabric does not become too loose when worn.
Texture Details:
- Tall vertical stitches
- Flexible fabric
- Substantial feel
11. Waffle Stitch Winter Beanie
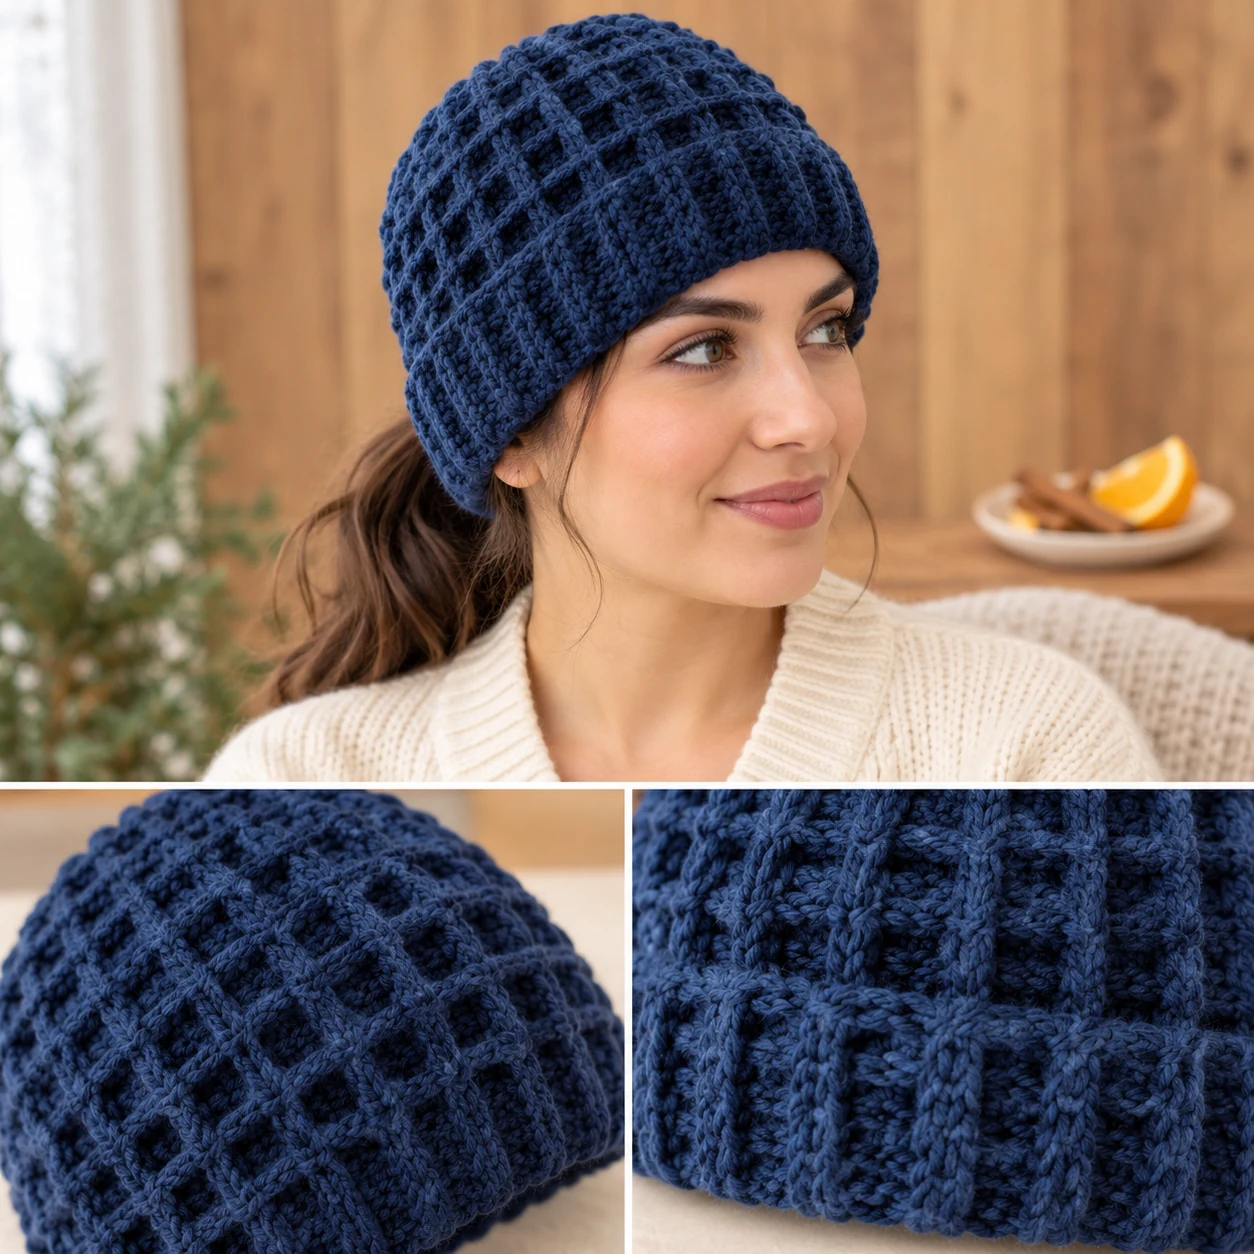
This navy blue beanie has a deep, grid-like texture that resembles a waffle. This creates a very thick and visually interesting fabric.
The waffle effect is created by alternating post stitches and standard stitches. This results in recessed squares and raised ridges.
This design is significantly thicker than a plain single crochet hat, making it a heavy-duty choice for cold weather.
Because of the complexity of the texture, beginners should take their time to ensure the post stitches are placed correctly to maintain the grid pattern.
The thickness of the waffle stitch can reduce the overall stretch of the hat. Measure the wearer carefully and ensure the design is worked to be comfortably loose.
12. Basketweave Texture Hat
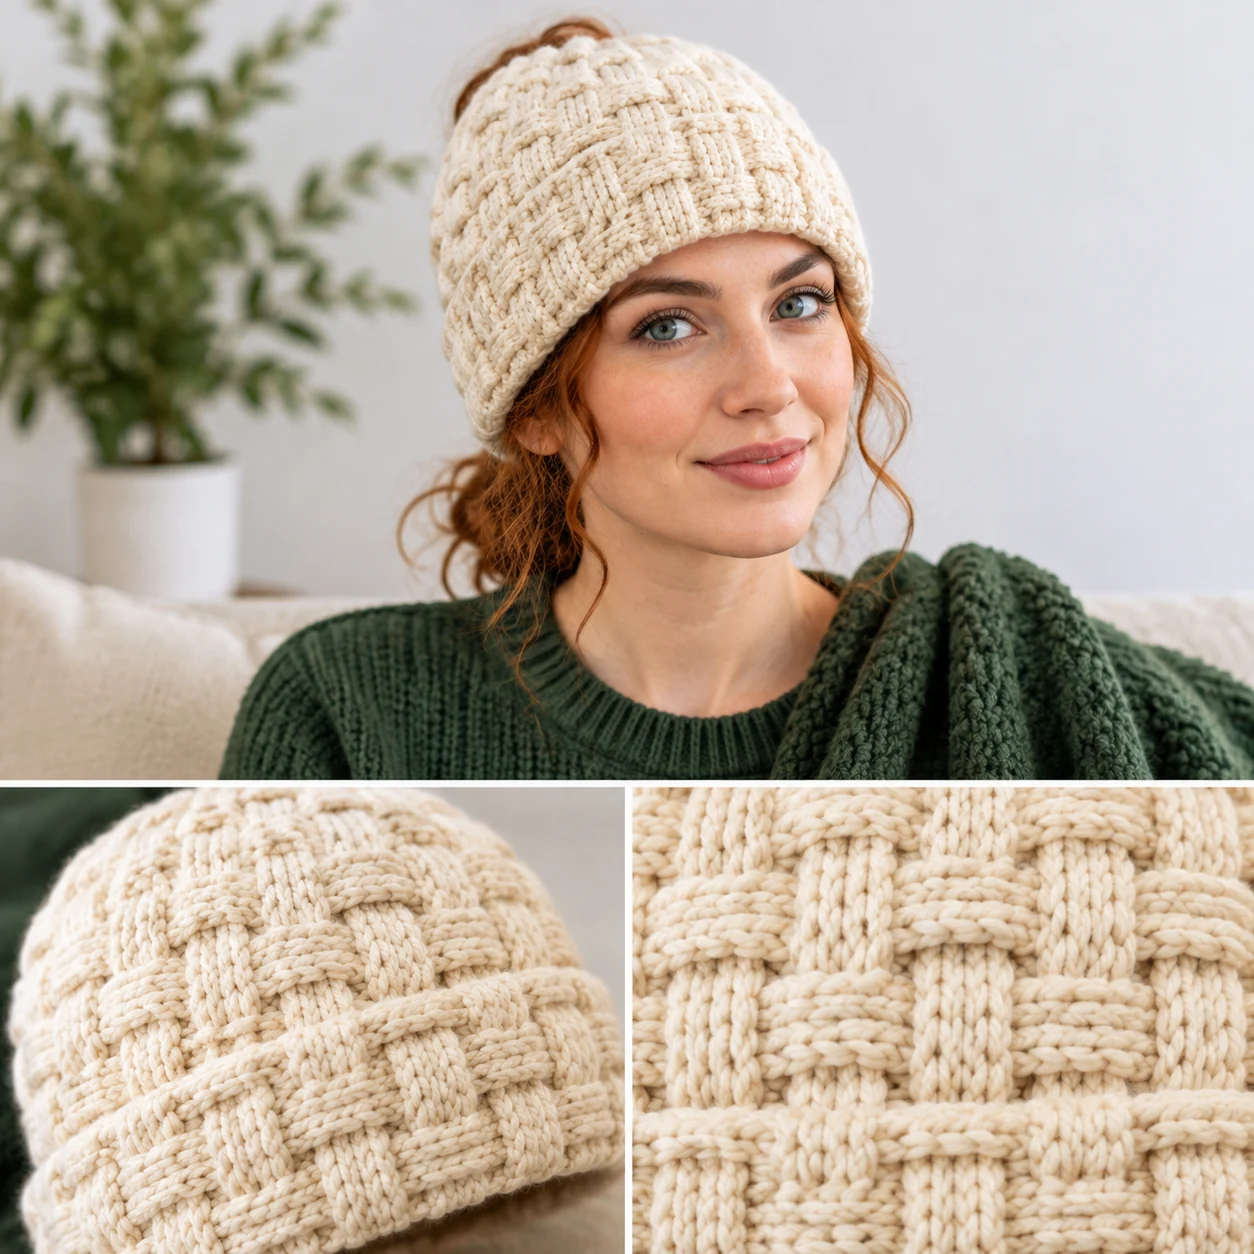
This cream-colored hat looks like a woven basket. The interlocking blocks of stitches create a sophisticated, professional appearance.
The basketweave look is achieved by alternating blocks of front-post and back-post stitches. This creates a layered effect across the surface.
This differs from the waffle stitch by creating a flatter, more woven look rather than deep holes and recessed squares.
Since this involves post stitches, the fabric is firmer. Ensure you work a swatch to check the fit and adjust your hook size if the fabric is too stiff.
Because the interlocking blocks create a dense fabric, the hat may have less stretch than a plain beanie. Check the pattern for sizing adjustments to maintain a loose fit.
Construction Tips:
- Use post stitches
- Maintain consistent tension
- Check fabric firmness
13. Striped Color-Block Hat

This hat in gray and white features bold horizontal stripes. It is a simple way to add visual interest without using complex stitches.
The design is usually worked in basic stitches, with the color changed every few rows. This is an excellent project for practicing color transitions.
Unlike the tapestry hat, where colors are carried, this style involves cutting the yarn or carrying it only when changing rows.
When changing colors, make sure the new color is pulled through the last loop of the previous stitch for a clean line between the stripes.
Since this style often uses basic stitches, the stretch depends on the stitch chosen. Use a gauge swatch to ensure the stripes do not distort the fit of the hat.
14. Cable-Look Crochet Hat

This oatmeal-colored hat features braided-looking columns that mimic knitted cables. It provides a classic, winter-cabin aesthetic.
The cable effect is created by crossing stitches over one another using post stitches. This pulls the fabric into a rope-like shape.
Cables make the fabric very thick and dense, which differs from the airy nature of the lined mesh hat or the treble crochet hat.
Beginners should be aware that cables can pull the width of the hat inward. Check the measurements frequently to ensure the fit remains comfortably loose.
Because cables create a heavy texture, they can affect the drape of the hat. A gauge swatch will help you see how the cables impact the final width and stretch.
Cable Check:
- Cross stitches carefully
- Check width after cables
- Use a contrasting color for practice
15. Cluster Stitch Winter Beanie
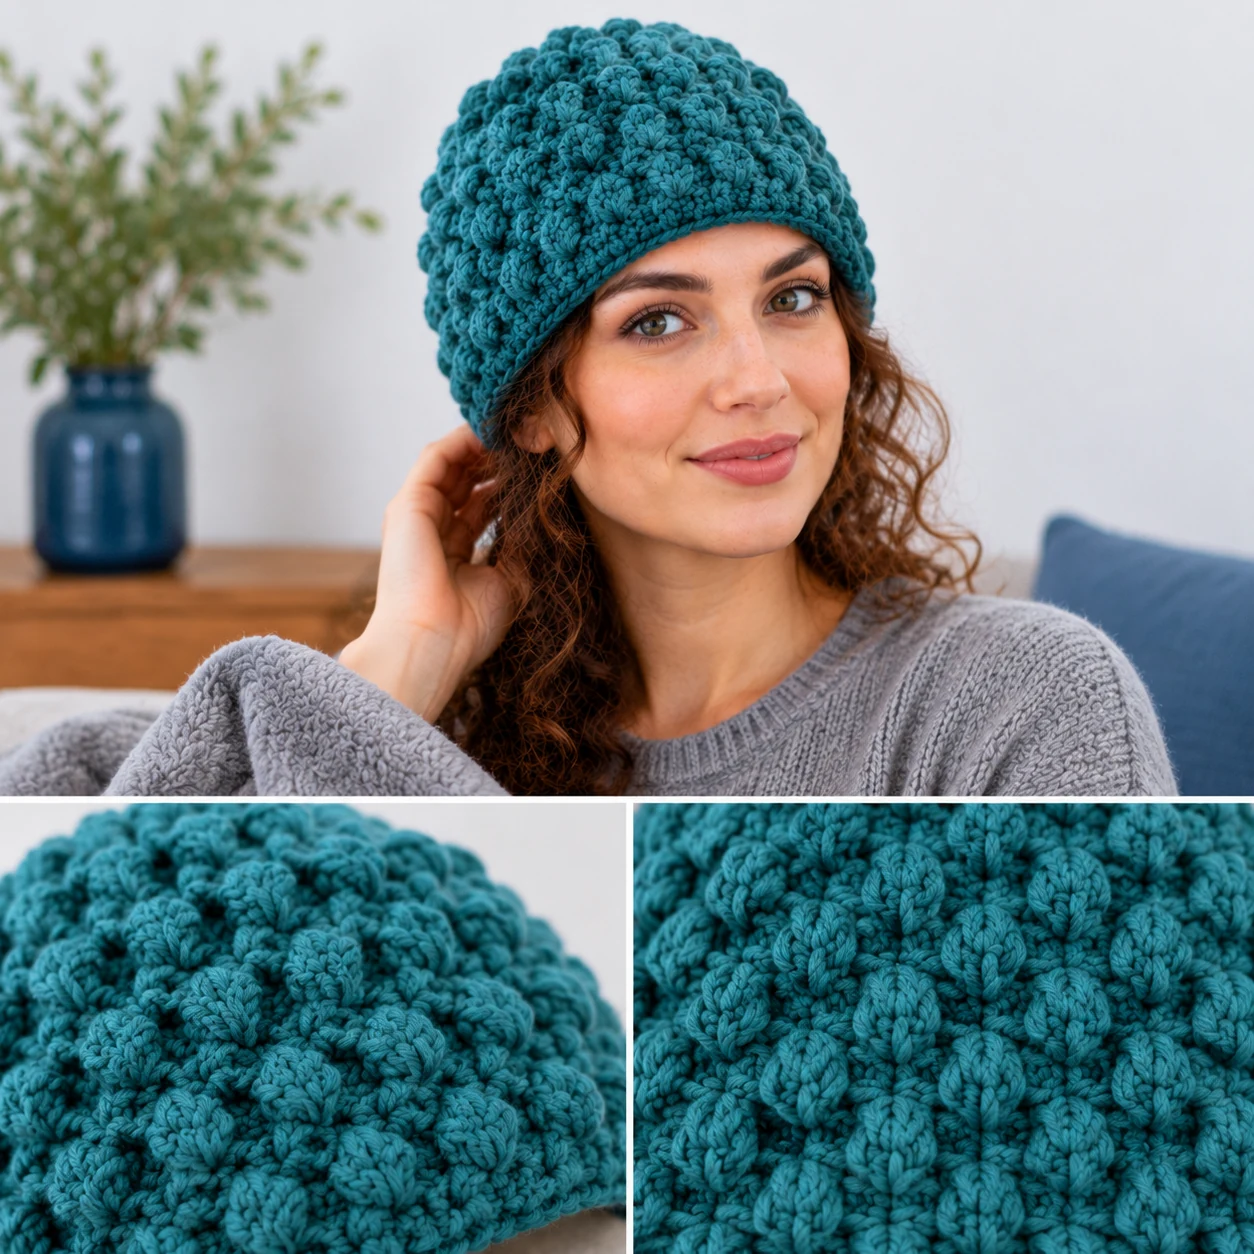
This teal beanie has a textured surface made of small groups of stitches. It looks like a series of tiny knots across the fabric.
Cluster stitches are formed by working several stitches into one and then joining them together at the top. This creates a dense, pebbled texture.
This is similar to the puff stitch but generally results in a flatter, more compact bump. It is less voluminous than the popcorn stitch.
When choosing a pattern, check if the clusters are worked in every stitch or spaced out. Spacing them out creates a different visual effect and changes the fabric density.
Because cluster stitches create a thicker fabric, they may reduce the natural stretch of the beanie. Ensure you measure the wearer and keep the fit comfortably loose.
16. Ridged Row Hat
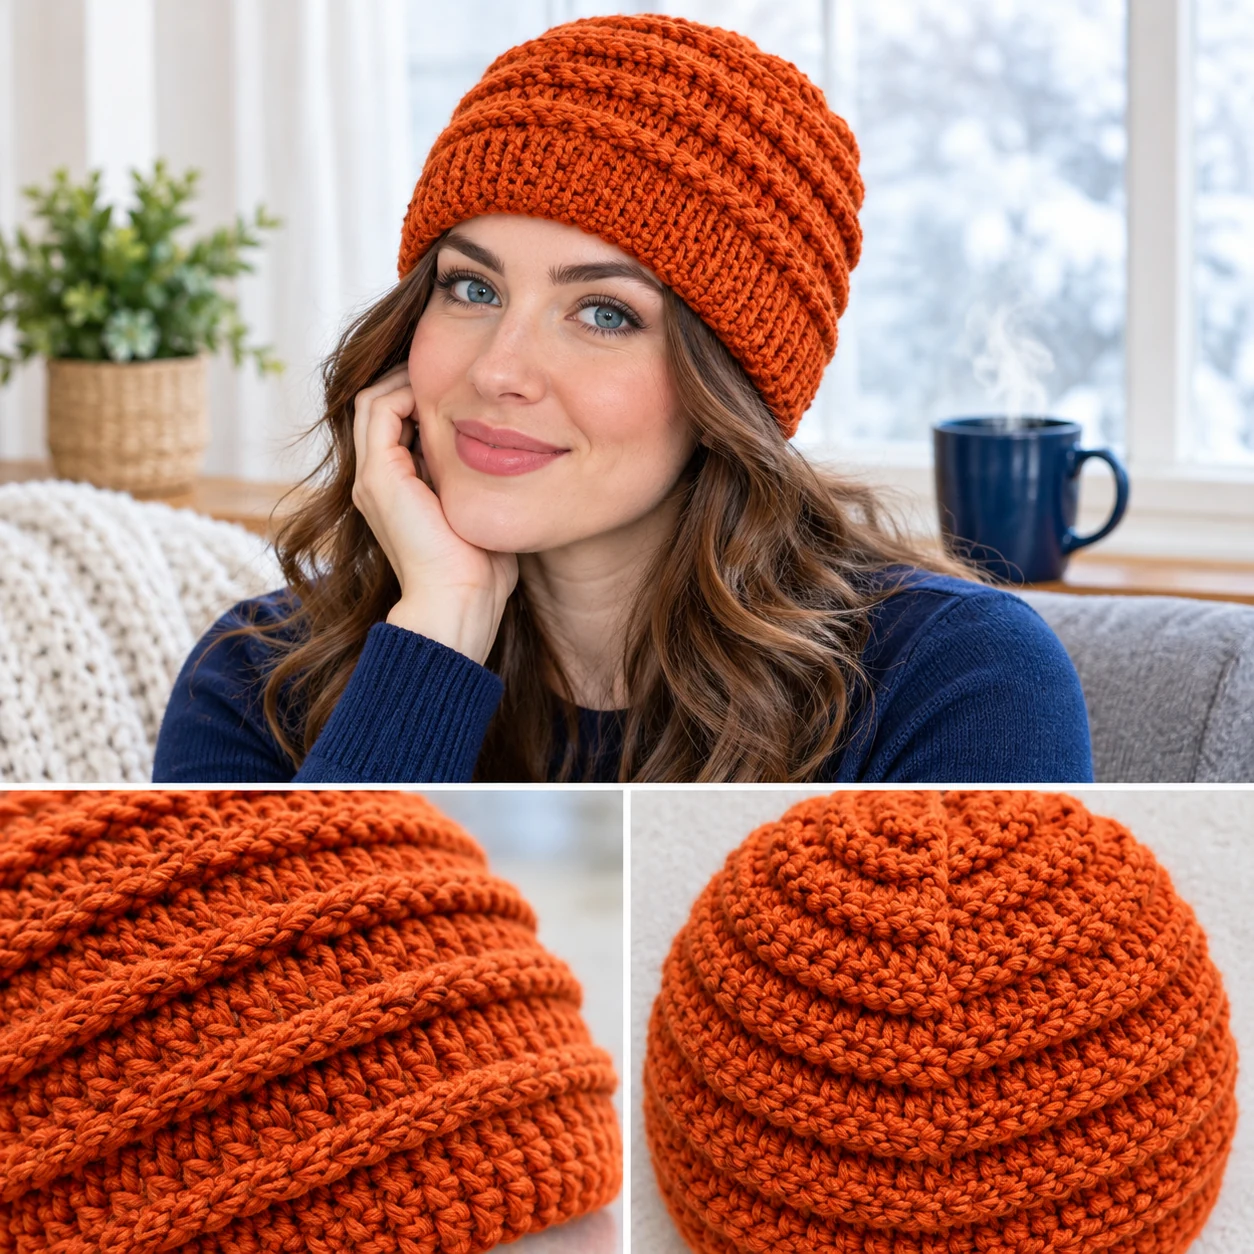
This burnt orange hat features horizontal ridges that wrap around the head. It has a clean, modern look with a strong tactile feel.
The ridges are created by alternating rows of different stitch heights or using post stitches on every other row.
This differs from the BLO ribbing, which creates vertical lines. The horizontal orientation changes how the hat fits and how the fabric stretches.
Ensure the rows are even to keep the ridges consistent around the entire circumference of the hat. Check your stitch count at the end of each row.
Because the ridges create a varied texture, the fabric may stretch differently than a plain beanie. Use a gauge swatch to verify the fit before completing the hat.
Visual Tips:
- Align ridges carefully
- Maintain row consistency
- Check symmetry
17. Moss Stitch Winter Cap
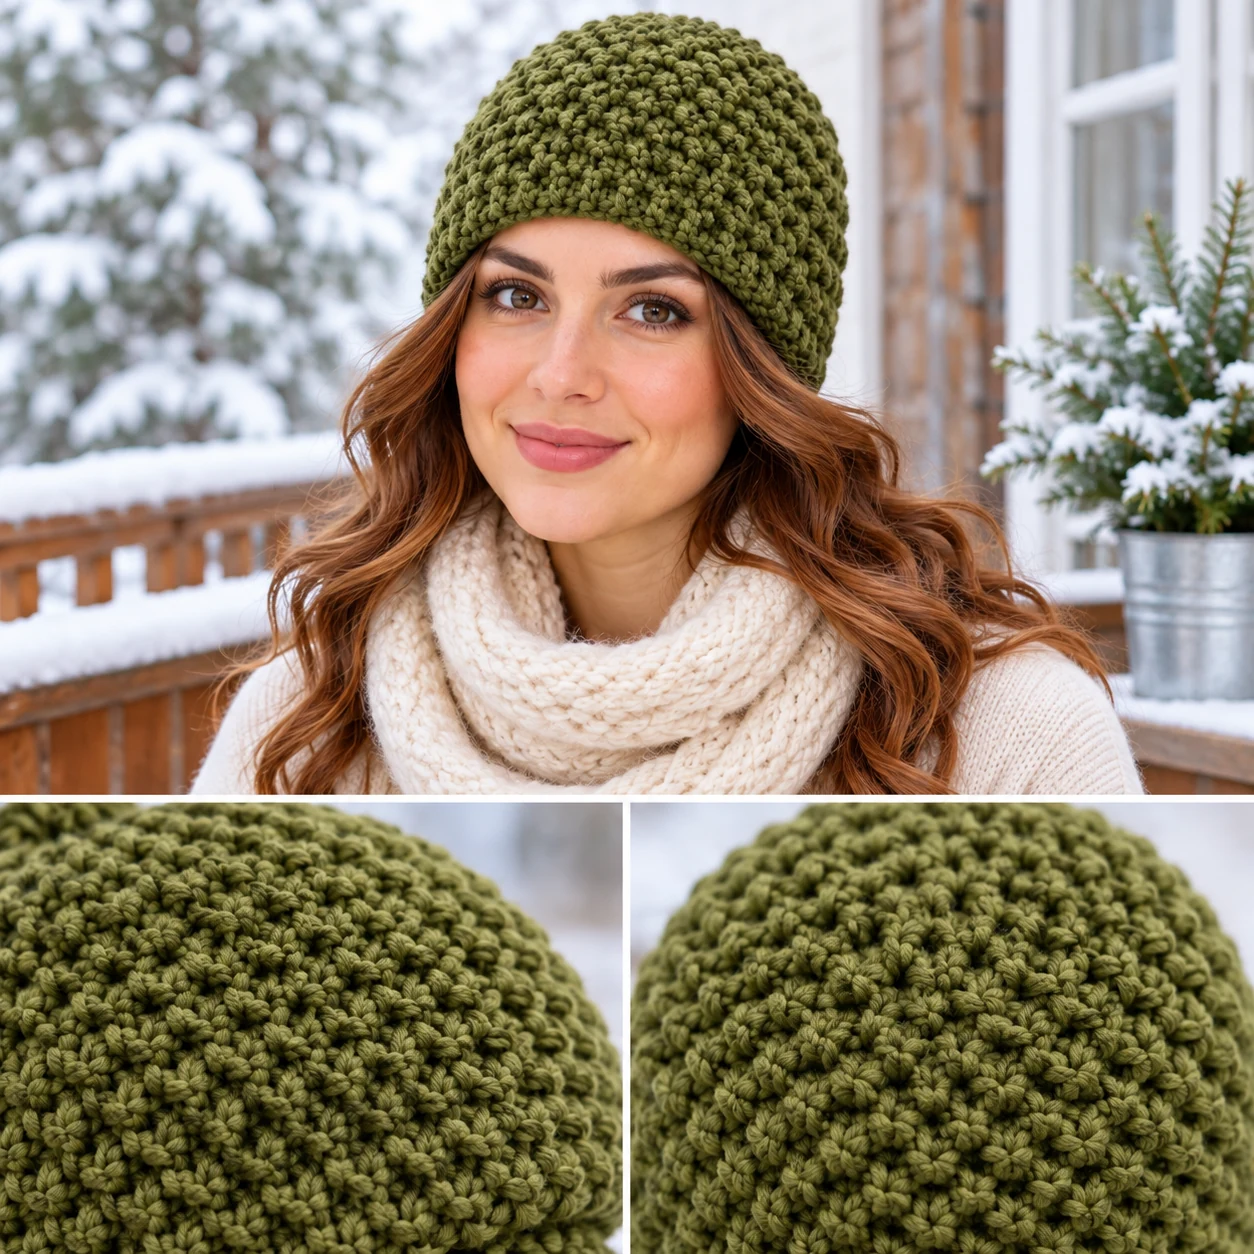
This olive green cap has a woven, seed-like texture. The fabric is very dense and looks almost like a woven cloth.
The moss stitch is created by working a single crochet into the chain space of the previous row. This offsets the stitches.
Compared to the plain single crochet beanie, the moss stitch has more visual depth and a slightly different stretch due to the chain spaces.
This is a great stitch for beginners who want a textured look without the complexity of post stitches. Check the pattern for how to handle the start of each row.
Because the moss stitch is dense, it provides good coverage. Ensure the fit is comfortably loose by measuring the head and working a gauge swatch.
18. Dense V-Stitch Winter Beanie

This soft pink beanie features a pattern of small 'V' shapes. To ensure it is suitable for winter, the design uses a dense stitch arrangement with minimal gaps.
The V-stitch is made by working two double crochets into the same space, separated by a chain. This creates a rhythmic, pointed texture.
This creates a more open fabric than the cluster stitch but is denser than a lace design. It offers a balance of coverage and flexibility.
Check the pattern to see if the V-stitches are worked in rounds or in rows and then joined. This affects the final seam and the way the hat fits.
Because of the chain spaces, the V-stitch has a natural stretch. Use a gauge swatch to ensure the gaps remain small and the fit is comfortably loose.
Pattern Notes:
- Consistent chain spacing
- Even V-shape alignment
- Balanced tension
19. Popcorn Stitch Texture Hat
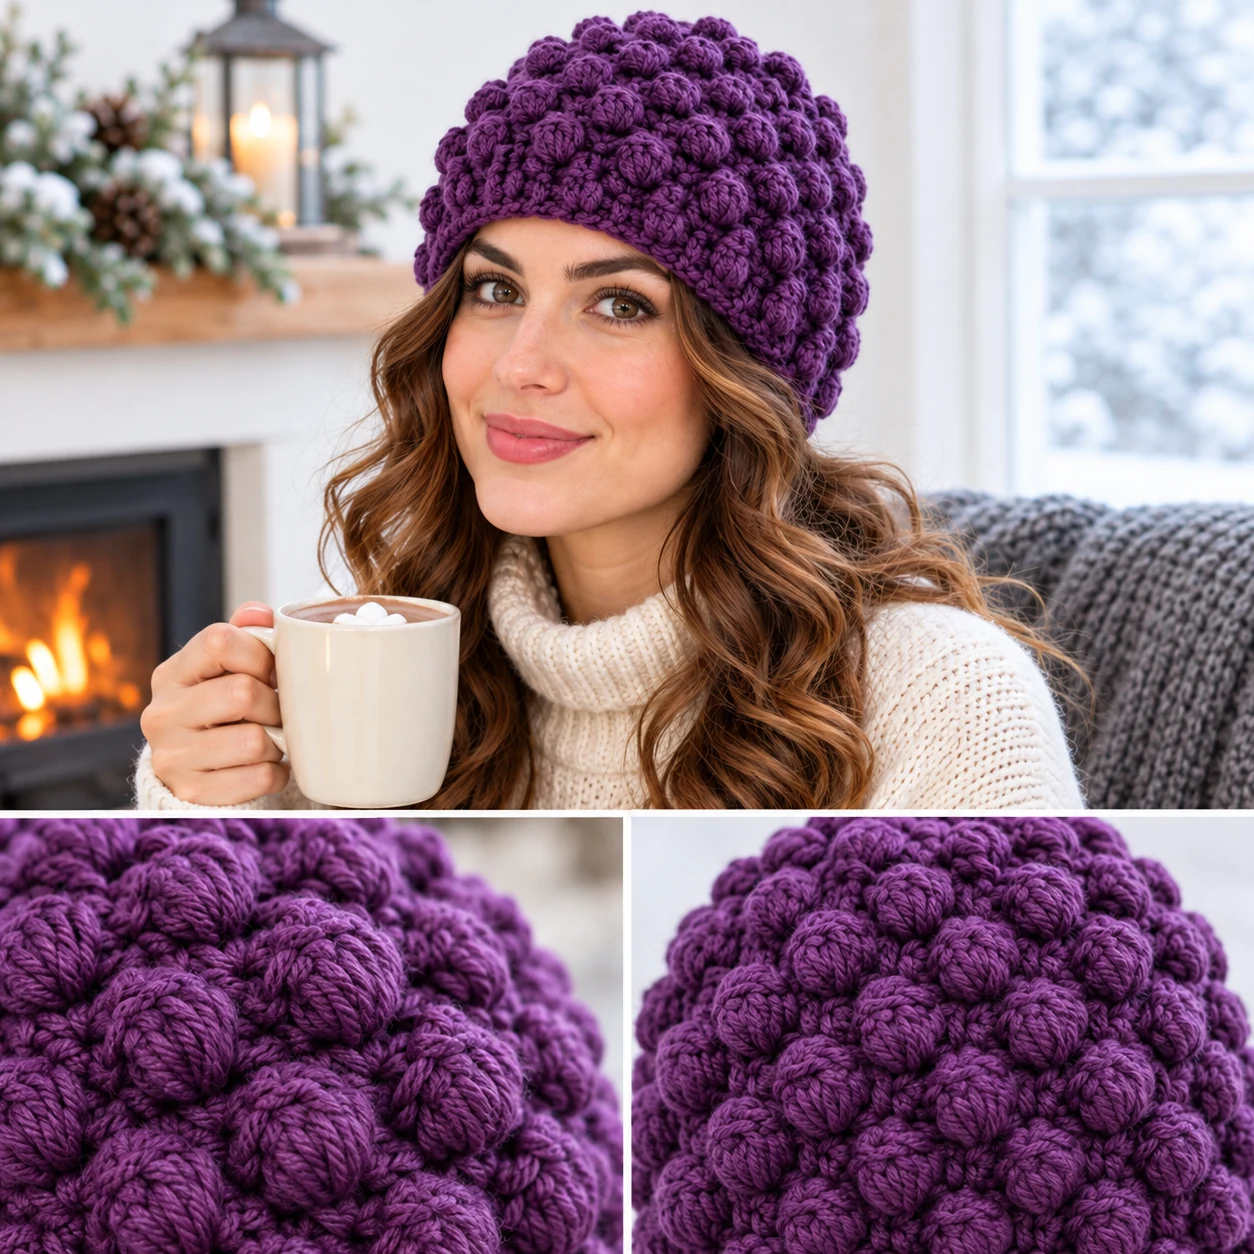
This deep purple hat is covered in large, round bumps that resemble popcorn. It is a very bold, tactile design.
Popcorn stitches are made by working several double crochets into one stitch and then joining them together in a circle.
These are larger and more pronounced than the puff or cluster stitches, making the fabric very thick and heavy.
Because of the volume of the popcorn stitches, this hat will use significantly more yarn than a plain beanie. Check your yarn quantity before starting.
The heavy texture of popcorn stitches can make the fabric quite rigid. Measure the wearer carefully to ensure the hat is comfortably loose and does not pull.
20. Solid Granny Stripe Beanie

This multicolored beanie in soft sage green uses a modified granny stripe pattern. It features blocks of color in a solid, dense arrangement for winter warmth.
The granny stripe typically combines double crochet and chain spaces. In this winter version, the spaces are kept small to maintain a thick fabric.
This differs from the granny square hat because it is worked in long rows rather than small squares. This results in a different drape.
When joining the sides, use a whip-stitched seam with a yarn needle for a secure finish. Weave in all ends securely to prevent the seam from opening.
Because the granny stripe has chain spaces, it is more flexible than a solid beanie. Use a gauge swatch to ensure the fit is comfortably loose.
Joining Tips:
- Use a yarn needle
- Maintain seam tension
- Weave in ends securely
How do you care for your winter hats?
Proper care ensures your hat keeps its shape and texture over time. Always refer to the yarn label first for specific manufacturer instructions.
At a Glance:
- Follow the yarn label
- Avoid high heat
- Lay flat to dry
- Check for loose threads
Avoid using very hot water or high dryer heat, as this can shrink wool and cotton or damage acrylic fibers. Laying the hat flat to dry is the best way to prevent it from stretching out of shape.
Regularly check the hat for loose threads or snagged hair. If you see a loose thread, weave it back into the fabric immediately to prevent it from unraveling.
What are common beginner mistakes?
Many beginners struggle with tension, which can make a hat too tight or too loose. Working a gauge swatch is the best way to solve this problem.
At a Glance:
- Inconsistent tension
- Dropped stitches
- Miscounting rounds
- Incorrect stitch placement
Another common issue is losing stitches at the end of a row or round. Using stitch markers can help you keep track of your starting point.
Incorrectly identifying the top of a stitch can lead to uneven rows. Taking a moment to look closely at the stitch anatomy prevents this.
Common Mistakes:
- Skipping the gauge swatch
- Pulling the yarn too tight
- Forgetting to weave in ends
- Miscounting decrease stitches
How can you build your crochet skills?
Starting with a plain single crochet beanie allows you to focus on shape and fit. Once comfortable, move to textured stitches like the puff or shell stitch.
At a Glance:
- Start with simple stitches
- Try different yarn types
- Practice color changes
- Move to post stitches
Experimenting with different yarn fibers, such as wool or acrylic, helps you understand how materials affect the drape and stretch of the hat.
Practicing color changes in a striped hat is a great stepping stone toward more complex techniques like tapestry crochet.
Frequently Asked Questions
Which yarn is best for a winter hat?
The choice depends on your needs. Acrylic is easy to wash, wool is a traditional choice for warmth, and bamboo is very soft.
How do I make sure the hat fits?
Measure the wearer's head around the forehead and work a gauge swatch. This helps you determine the correct starting size.
What if my hat is too tight?
You may need to use a larger hook or check if your stitch choice reduces stretch. Always aim for a comfortably loose fit.
How do I stop my hat from unraveling?
Weave in every end for several stitches, going back and forth through the fabric, to secure the yarn.
Can I use cotton yarn for a winter hat?
You can, but cotton is not very stretchy and is more breathable than wool or acrylic, which may change how the hat fits.
How do I know when to change colors?
In striped designs, you change colors at the end of a row or round by pulling the new color through the last loop of the previous stitch.
Final Thoughts on Crochet Winter Hats
Creating your own winter hats is a great way to explore different textures and colors. Whether you prefer a simple beanie or a complex cable design, the key is to start with the right measurements and materials.
Remember that this guide is an overview of styles and techniques. For exact stitch counts, sizing, and construction steps, always follow a complete, tested pattern.
Keep your projects comfortably loose and always check for loose threads to ensure your handmade hats remain practical and safe for all ages.