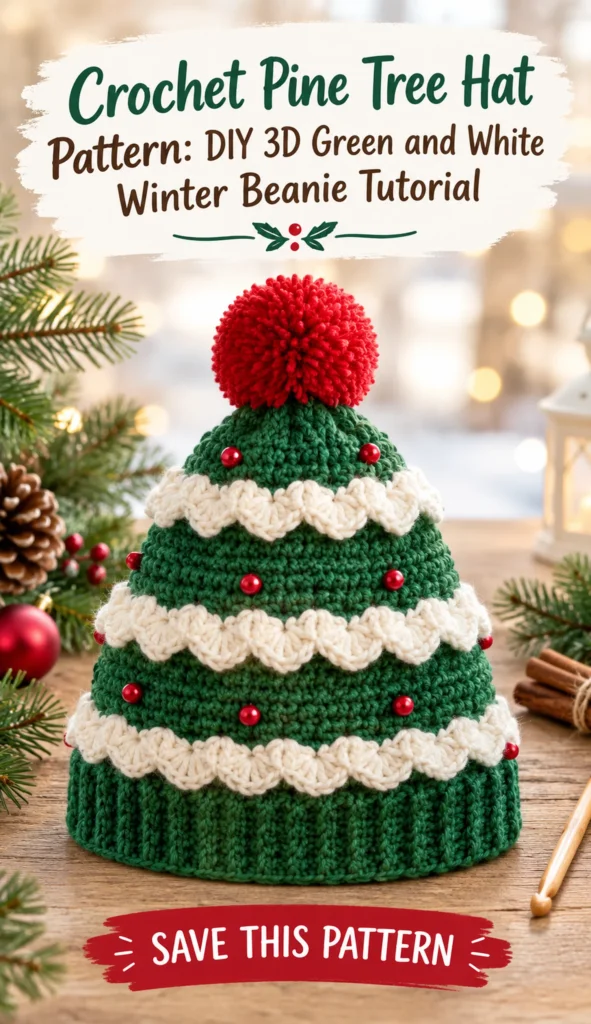
Enhance your winter attire with a one-of-a-kind, handcrafted accessory. This crochet pine tree hat is an ideal choice for Christmas, New Year celebrations, or any seasonal event, utilizing a striking 3D texture to recreate the appearance of pine branches.
Although the complex visual effect may appear daunting, the process is remarkably quick and simple once you establish the stitch pattern. This detailed guide provides everything you need to succeed, including advice on yarn selection and instructions for the 3D V-stitch technique. Get your hooks ready and begin crafting!
Required Supplies for the Crochet Winter Hat
To ensure your crochet pine cone hat has the ideal texture and drape, it is important to have the correct tools on hand before starting the stitches.
- Yarn: Lamia Wool Easy (or any similar Category 4 / Worsted weight yarn). This acrylic and wool blend is durable, soft, and can be washed by hand.
- Color A (Main): Green (approx. 100g or more).
- Color B (Accent): White (a small amount).
- Color C (Pom-Pom): Red (a small amount).
- Crochet Hooks:
- 4.5 mm hook: Use this for the final decreasing rows or for the brim if your tension is loose.
- 5.5 mm hook: Use this for the hat’s main body; this is highly recommended for those who crochet tightly, as the pattern uses many chains.
- 4.0 mm hook: Use this for the final crown decreases to ensure the top cinches tightly.
- Tools: Stitch markers, scissors, and a blunt yarn needle for weaving in ends.
Step-by-Step Instructions for Your 3D Crochet Tree Hat
Step 1: Crocheting the Foldable Brim

The brim of this easy crochet hat tutorial is designed to be foldable, giving it a classic, cozy beanie look. We will use the Half Double Slip Stitch (HDS) worked exclusively in the back loops to create a stretchy, ribbed texture.
- Foundation: Start with a slip knot and chain 25.
- Row 1: Turn your work. Yarn over, skip the first chain, and insert your hook into the back bump of the next chain. Yarn over, pull through, yarn over again, and pull through all loops on your hook (this creates the HDS). Repeat this across the row (24 stitches). Chain 1 and turn.
- Rows 2 and Beyond: For the rest of the brim, you will only work into the back loop of each stitch. Insert your hook into the back loop, yarn over, pull through both loops.
- Sizing the Brim: Continue repeating this row. The transcript suggests making it long enough to wrap comfortably around your head and fold. For an average adult, this usually takes about 7 to 10 rows, but measure it against your head to be sure.
Once your brim is the desired length, fold it in half so the starting and ending points meet. Slip stitch through the back loops of both edges to join them into a ring. Do not turn your work; the right side should be facing out.
Step 2: Setting Up the Base Round
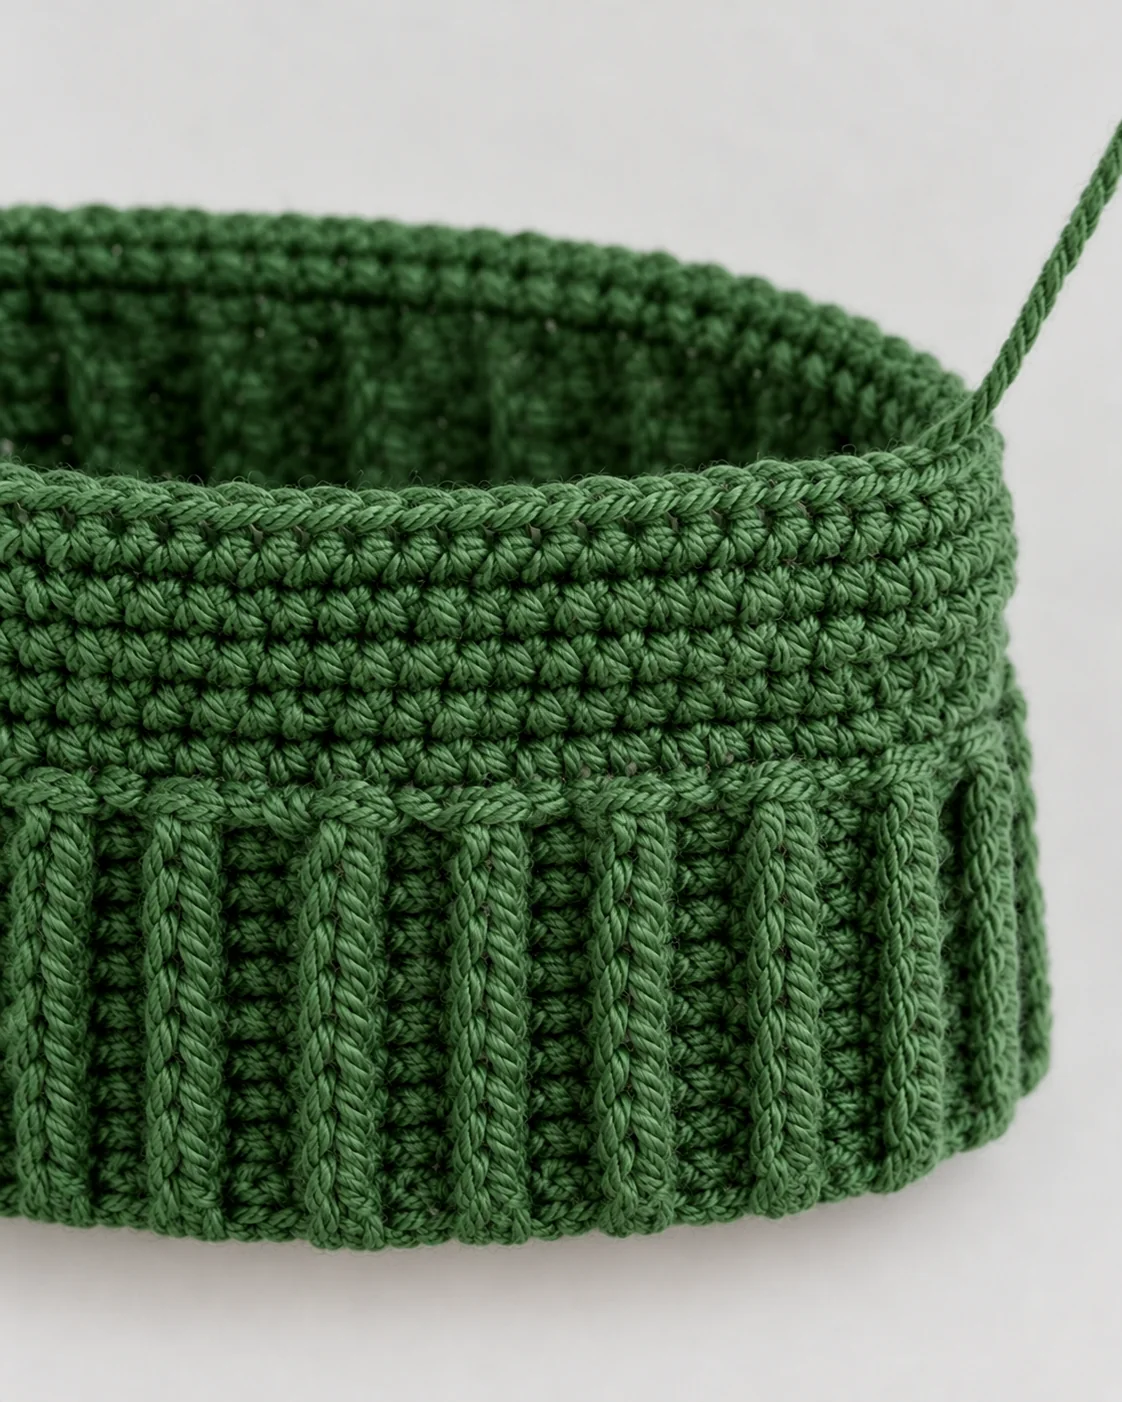
Now that we have our brim ring, we need to create a foundation round of Single Crochets (SC) along the edge. This round sets up the stitch count for the 3D pattern.
- Join Yarn: Attach your green yarn (Color A) to the edge of the brim.
- Stitch Count: You need a multiple of 10 stitches for this pattern. The goal is to reach exactly 80 stitches around the brim.
- Increasing: Because we are working into the sides of the rows, you will need to increase slightly. Work 1 SC into each row end. However, every 7th stitch, work 2 SC into the same stitch.
- Finish the Round: Continue around until you have exactly 80 stitches. Join with a slip stitch to the first SC, chain 1, and cut the yarn.
Step 3: Creating the 3D Pine Tree Texture (The V-Stitch Magic)

This is where the magic happens! The signature look of the crochet pine tree hat comes from working V-stitches (Double Crochets separated by chains) around the foundation chains.
- Round 1 (Color A – Green): Attach green yarn. Chain 6 (this counts as 1 DC and ch-3 space). Skip 3 stitches, and work 2 DC into the 4th stitch. Chain 3, skip 3 stitches, work 2 DC into the next stitch. Repeat this pattern all the way around. Join to the 3rd chain of the beginning chain-6 with a slip stitch.
- The 3D Trick: For the next round, we will work behind and in front of the chains from the previous round to create the 3D branch effect. Chain 6. Count the previous chain-3 as a DC and a ch-3 space. Insert your hook behind the chains of the previous round to make your first DC. Chain 3, then insert your hook in front of the chains for the next DC.
- The Rhythm: You will alternate: Back, Front, Front, Back, Back, Front. This alternating rhythm is what creates the spiral, organic look of the pine branches!
Step 4: Alternating Colors and Directions

To make the festive crochet hat pop, we will alternate between Green (Color A) and White (Color B).
- Round 2 (Color B – White): Attach white yarn. You will repeat the exact same V-stitch pattern. Crucial Tip: When working with white, do not crochet around the green chains! Only work into the white chains from the previous round. Keep your colors separate to maintain a clean look.
- Shifting the Pattern: Every two rows, you need to shift your starting “leg” (front or back) to keep the spiral pattern flowing naturally. If you ended a color on a “front” leg, start the next row of that color with a “back” leg.
- Building the Body: Continue alternating Green and White, shifting the direction every two rows, until the hat reaches your desired length. The creator made the body about 20 cm long (27 cm total including the brim).
Step 5: Decreasing for the Crown

Once the hat is long enough, it’s time to shape the top. Switch to your 4.0 mm hook to make the crown tighter and more secure.
- Preparation Round: Instead of chaining 6, chain 4. Work 2 DC, chain 2, 2 DC, chain 2, all the way around. Join with a slip stitch.
- Decrease Round 1: Chain 3 (counts as first DC). Work 2 DC into the next chain-2 space. Chain 2, work 2 DC into the next space. Repeat around. Join.
- Decrease Round 2 (Closing the top): Chain 2. Work a half-double crochet (HDC) into the next stitch, but don’t finish it. Yarn over, insert into the next stitch, pull up a loop (you now have 3 loops on the hook). Yarn over and pull through all 3 loops. This is your decrease. Continue decreasing around the crown.
- Final Closure: When the hole is very small, cut the yarn, pull it through the final loop, and use your yarn needle to weave it tightly across the top to close it completely.
Step 6: Finishing Touches and Pom-Pom
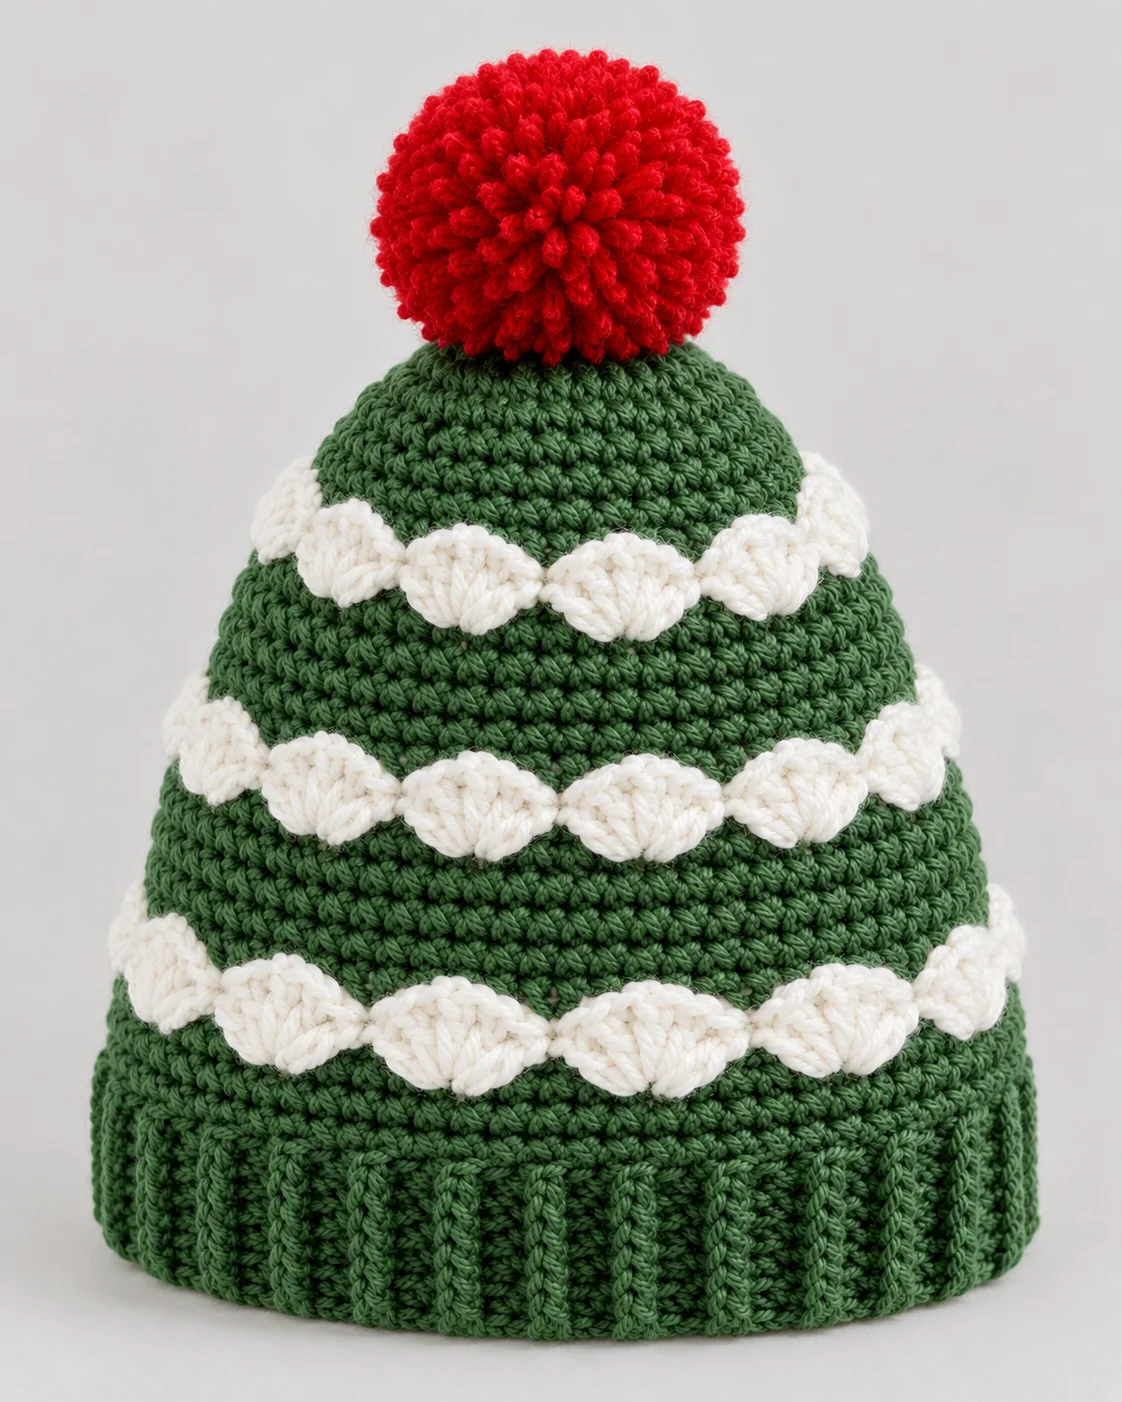
No DIY New Year hat is complete without a festive pom-pom!
- Weave in Ends: Turn the hat inside out. Use your yarn needle to weave in all the loose yarn tails securely. This ensures the inside looks neat and the ends don’t poke through.
- Make the Pom-Pom: Create a fluffy pom-pom using your red yarn (Color C). You can use a pom-pom maker or cardboard circles.
- Attach: Sew the red pom-pom securely to the very top center of the hat. The red adds a beautiful, classic holiday contrast to the green and white pine tree colors.
You Did It!
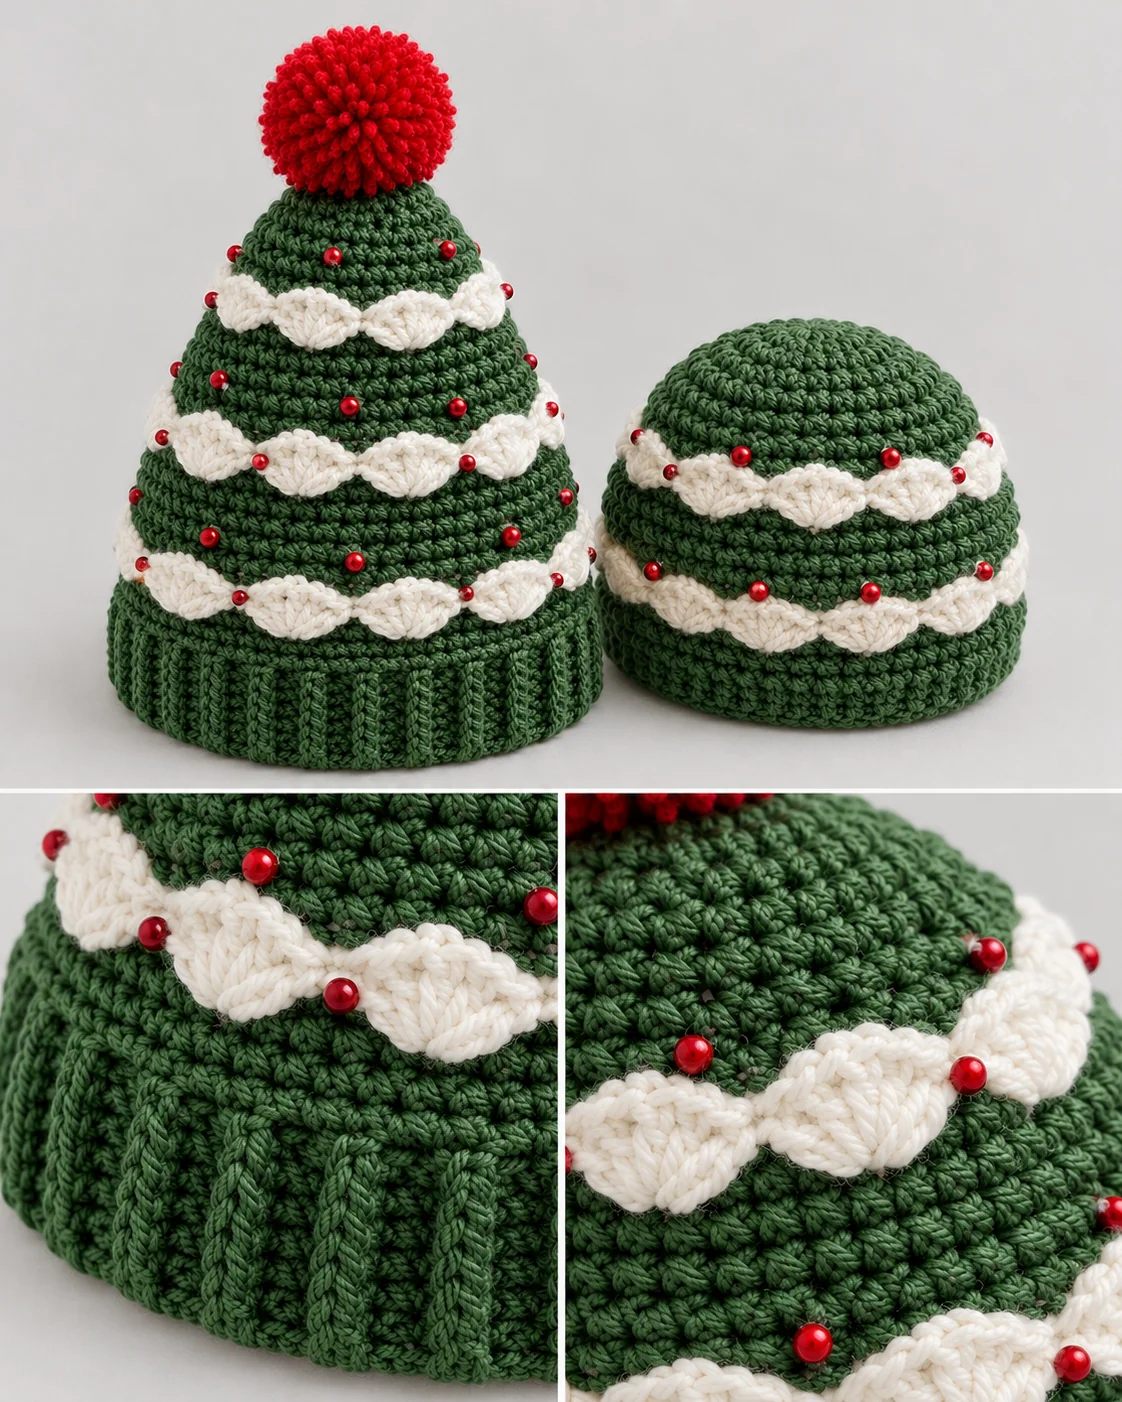
Congratulations on finishing your festive pine tree hat! Take a moment to look at the final photo to compare your work’s overall shape and the close-up details of the 3D stitches. Enjoy wearing your handmade creation!
Pro Tips for Success
To ensure your crochet winter hat pattern turns out perfectly, keep these expert tips in mind:
- Mind Your Tension: The creator of this pattern notes she is a “tight crocheter.” Because this pattern uses a lot of chains, tight tension can make the hat stiff. If you crochet tightly, use the 5.5 mm hook for the main body to keep the fabric drapey and relaxed.
- Keep Your Stitch Counts: Always double-check that your base round has exactly 80 stitches. If your count is off, the 3D V-stitch pattern will not align properly in subsequent rounds.
- Use Stitch Markers: When working in the round, especially with color changes and alternating front/back stitches, place a stitch marker in the first stitch of every round so you never lose your place.
- Don’t Crochet Around the Wrong Color: When working the white V-stitches, ensure your hook only catches the white chains. Catching the green yarn by mistake will ruin the clean, separated 3D effect.
Ways to Personalize Your Project
The versatility of this easy crochet hat tutorial is one of its greatest advantages!
- Change the Colors: You can create an earthy, woodland vibe using brown and green, or opt for pastel pink and white to achieve a cotton candy look, though green and white are ideal for a pine tree.
- Adjust the Size: To fit a child, stop increasing the body a few rounds sooner and reduce the number of rows in the brim to make it shorter. Remember that the multiple of 10 rule still applies!
- Add Ear Flaps: You can increase the warmth by crocheting a few rows of half-double crochets into the brim prior to beginning the main body to create ear flaps.
Frequently Asked Questions (FAQ)
Q: What does “Category 4 yarn” mean? A: Category 4 yarn is also known as “Worsted” or “Aran” weight yarn. It is a medium-weight yarn that is highly versatile and perfect for winter hats and scarves.
Q: Can I use cotton yarn instead of wool/acrylic? A: Yes, you can use any yarn you like! However, cotton lacks the elasticity of wool/acrylic blends. If you use cotton, you may need to add a few more stitches to your brim to ensure it stretches comfortably over your head.
Q: How do I wash this crochet pine tree hat? A: Since the recommended yarn (Lamia Wool Easy) is hand-washable, it is best to hand wash your finished hat in cold water with a mild detergent. Lay it flat to dry to maintain the 3D texture and prevent stretching.
Q: I’m a beginner. Is this 3D crochet tree hat too hard for me? A: While the 3D effect looks advanced, it is actually just a repeating V-stitch! The hardest part is remembering to alternate front and back. Take it one stitch at a time, and you will master the rhythm quickly.
Final Thoughts
You will find that crafting a crochet pine tree hat is a gratifying experience that produces a striking accessory. While the 3D texture created by V-stitches around foundation chains gives the appearance of complex detail, the repetitive stitch patterns make this a calming project perfect for completing while watching your favorite shows.
This DIY New Year hat is guaranteed to be popular, whether you intend to sell it at a winter craft fair or gift it to a friend or yourself. It is our hope that these tips and this easy crochet hat tutorial were beneficial to you.
Please share this pattern with other crafters and give it a thumbs up if you enjoyed it. Subscribe to receive more wonderful crochet tutorials. Have a festive New Year and happy crocheting!