Easy Crochet Ribbed Beanie Pattern, No Extra Fabric Crochet Beanie, PDF Pattern & Tutorial
Looking for a cozy crochet hat that looks stylish without complicated stitches or bulky construction? This easy crochet ribbed beanie pattern is a lovely project for chilly days, handmade gifts, and everyday winter outfits.
With simple single crochet stitches worked through the back loops, you can create a stretchy ribbed texture using a straightforward rectangle construction.
In this tutorial, you’ll learn how to choose your yarn, measure for a comfortable fit, crochet the ribbing, join the sides, and gather the top for a classic beanie shape.
Table of Contents
-
About this ribbed crochet beanie
-
Materials and tools
-
Crochet stitches and abbreviations
-
Step-by-step crochet beanie pattern
-
How to join and finish the hat
-
Common mistakes and solutions
-
Customization ideas
-
Washing and care
-
Helpful tips for a polished finish
-
Frequently asked questions
About This Easy Crochet Ribbed Beanie Pattern
A ribbed beanie is a timeless winter accessory. Its vertical ridges give the fabric a knitted appearance, while the flexible construction helps the hat sit comfortably on the head.
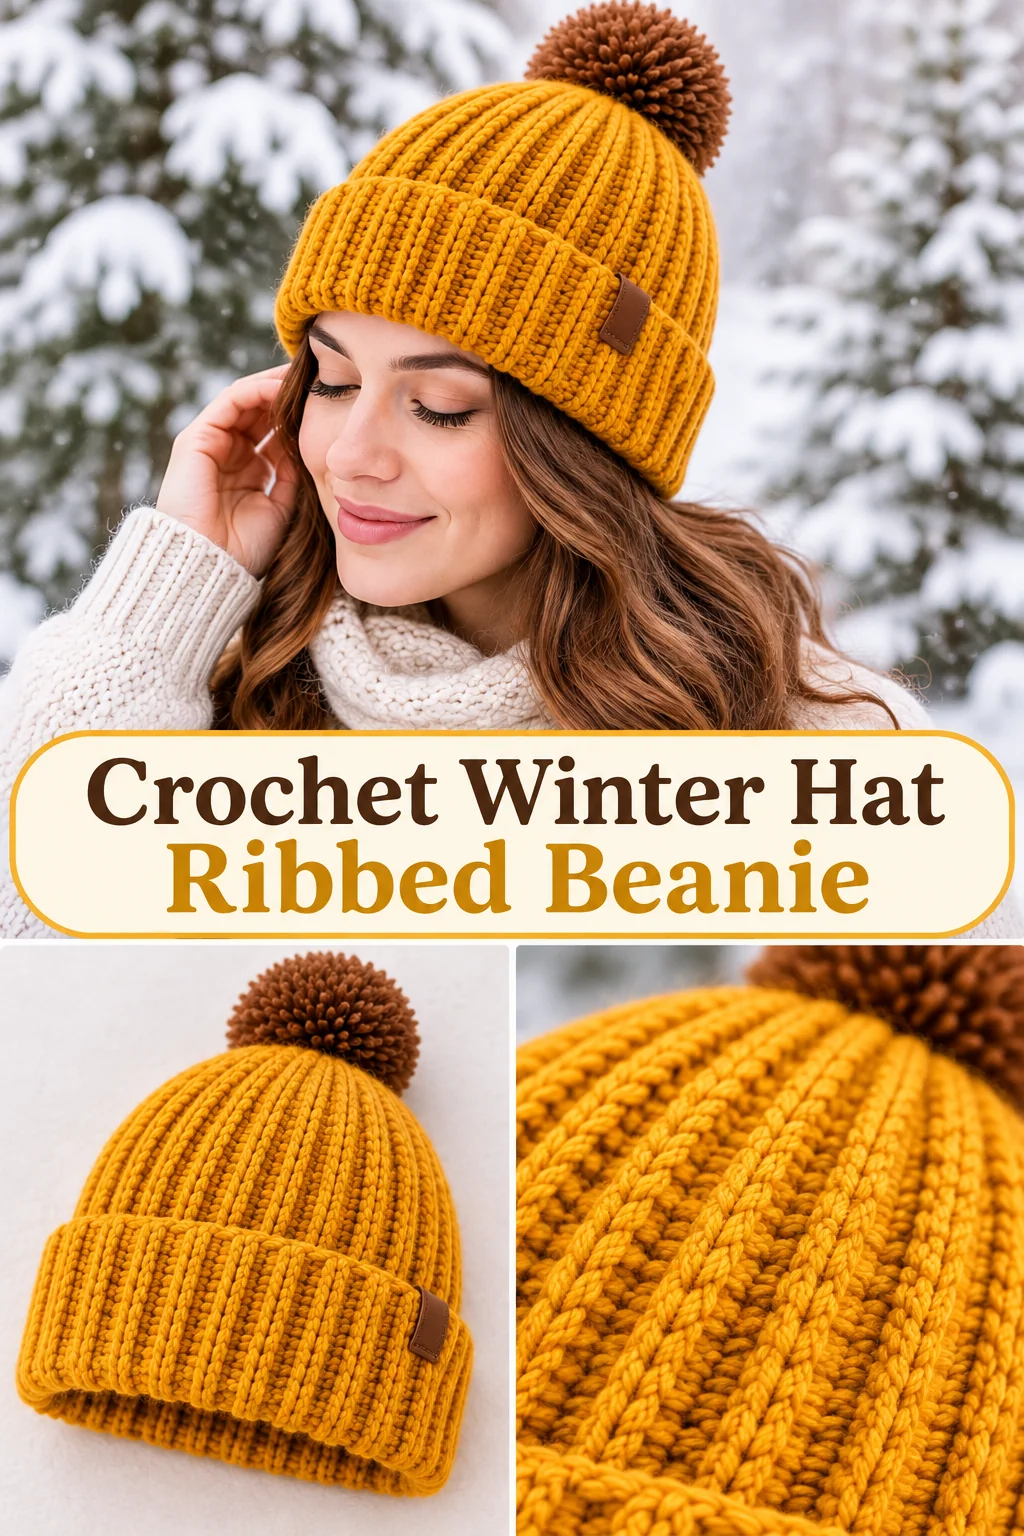
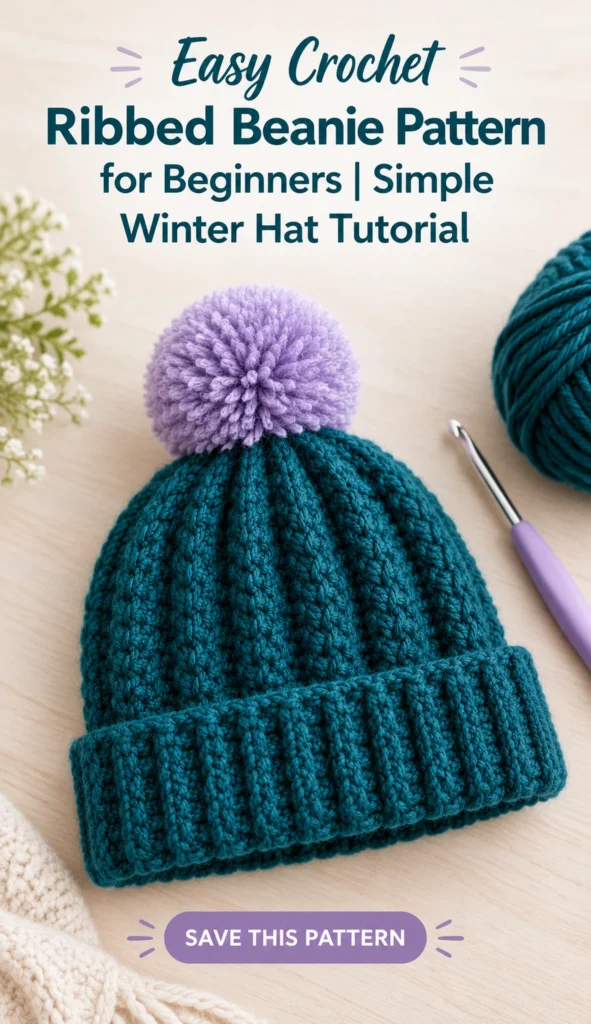
The design in the reference image features a warm deep teal color, a folded ribbed brim, a close-fitting crown, and a fluffy pom-pom. You can recreate that look with one main yarn color or personalize the hat with stripes and contrasting details.
One reason I like the rectangle method for beginner projects is that you can focus on making even stitches instead of shaping a complicated crown with many rounds. Once the rectangle reaches the right measurements, you join the edges and gather one end to create the hat.
Project details
-
Project type: Ribbed crochet winter hat
-
Skill level: Beginner
-
Construction: Flat rectangle, joined into a tube
-
Main stitch: Single crochet through the back loop
-
Suggested adult size: Approximately 21–23 inches in head circumference
-
Estimated time: 3–5 hours, depending on experience
-
Suggested yarn: Medium-weight yarn, also called worsted weight or category 4
-
Optional finishing: Folded brim and pom-pom
The finished measurements depend on your yarn, hook, stitch tension, and number of rows. Always measure your work rather than relying on row counts alone.
Materials for Your Crochet Beanie Pattern
You only need a few basic supplies to make a comfortable, everyday crochet hat.
Yarn
Choose a medium-weight yarn that feels soft against the forehead. Acrylic yarn is easy to care for and available in many colors. Wool or a wool blend can offer additional warmth, while a soft acrylic blend is a practical choice for frequent wear.
For an adult beanie, start with approximately 150–200 g of yarn if you want a generous folded brim or pom-pom. This is an estimate, not a guaranteed amount. A shorter hat or a smaller size may require less.
Tools and supplies
-
5.0 mm crochet hook, adjusted to your yarn and tension
-
Yarn needle for joining and weaving in ends
-
Scissors
-
Measuring tape
-
Stitch marker, optional
-
Removable stitch marker or pins for checking the seam
-
Pom-pom maker or a small piece of cardboard, optional
If your fabric feels stiff, try a larger hook. If the gaps between stitches are too large, try a smaller hook.
Helpful tip: Crochet a small gauge swatch before starting. A stretchy hat needs enough flexibility to fit comfortably without becoming loose after a few wears.
Crochet Stitches and Abbreviations
This pattern uses US crochet terminology. The UK equivalent of single crochet is double crochet.
Abbreviation
Meaning
ch
Chain
sc
Single crochet (UK double crochet)
BLO
Back loop only
sl st
Slip stitch
st / sts
Stitch / stitches
row
A horizontal line of crochet stitches
FO
Fasten off
What does back-loop-only crochet mean?
When you look at the top of a crochet stitch, you’ll see two loops that resemble a small V. The front loop is closest to you, and the back loop is farther away.
For back-loop-only crochet, insert your hook under the back loop alone. Leaving the front loop unworked creates raised ridges across the fabric.
Those ridges give the beanie its signature ribbed texture and allow the rectangle to stretch across the head.
Step-by-Step Crochet Beanie Pattern
The following is a beginner-friendly pattern based on the rectangle construction shown in the reference image. It is an instructional pattern draft, so make a gauge swatch and verify your fit before completing the hat.
Step 1: Make the foundation chain
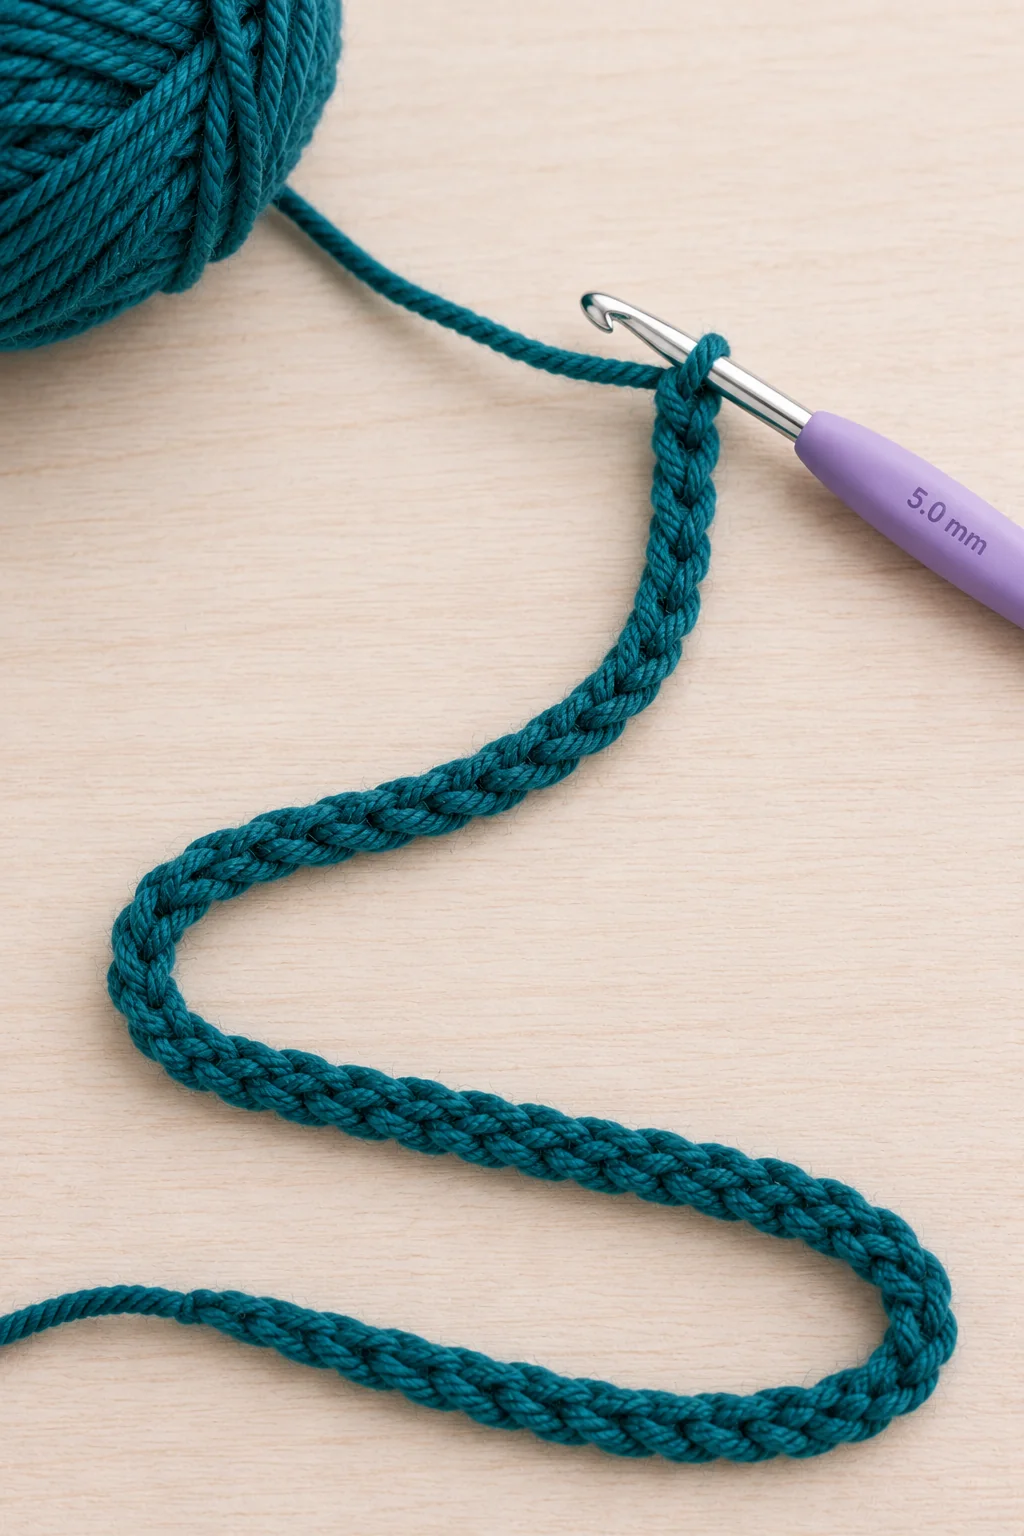
With your main yarn color and a 5.0 mm hook, make a slip knot.
Ch 41.
This foundation chain gives you approximately 40 single crochet stitches in the first row. The chain length determines the approximate height of the hat, so you can adjust it for a shorter or taller style.
For a standard adult beanie, a starting height of about 9–10 inches before folding the brim may work well. The precise amount depends on how much fabric you want to fold up.
Tip: Keep the chain relaxed. A very tight foundation chain can make the lower edge narrower and less stretchy than the rest of the hat.
Step 2: Work the first row
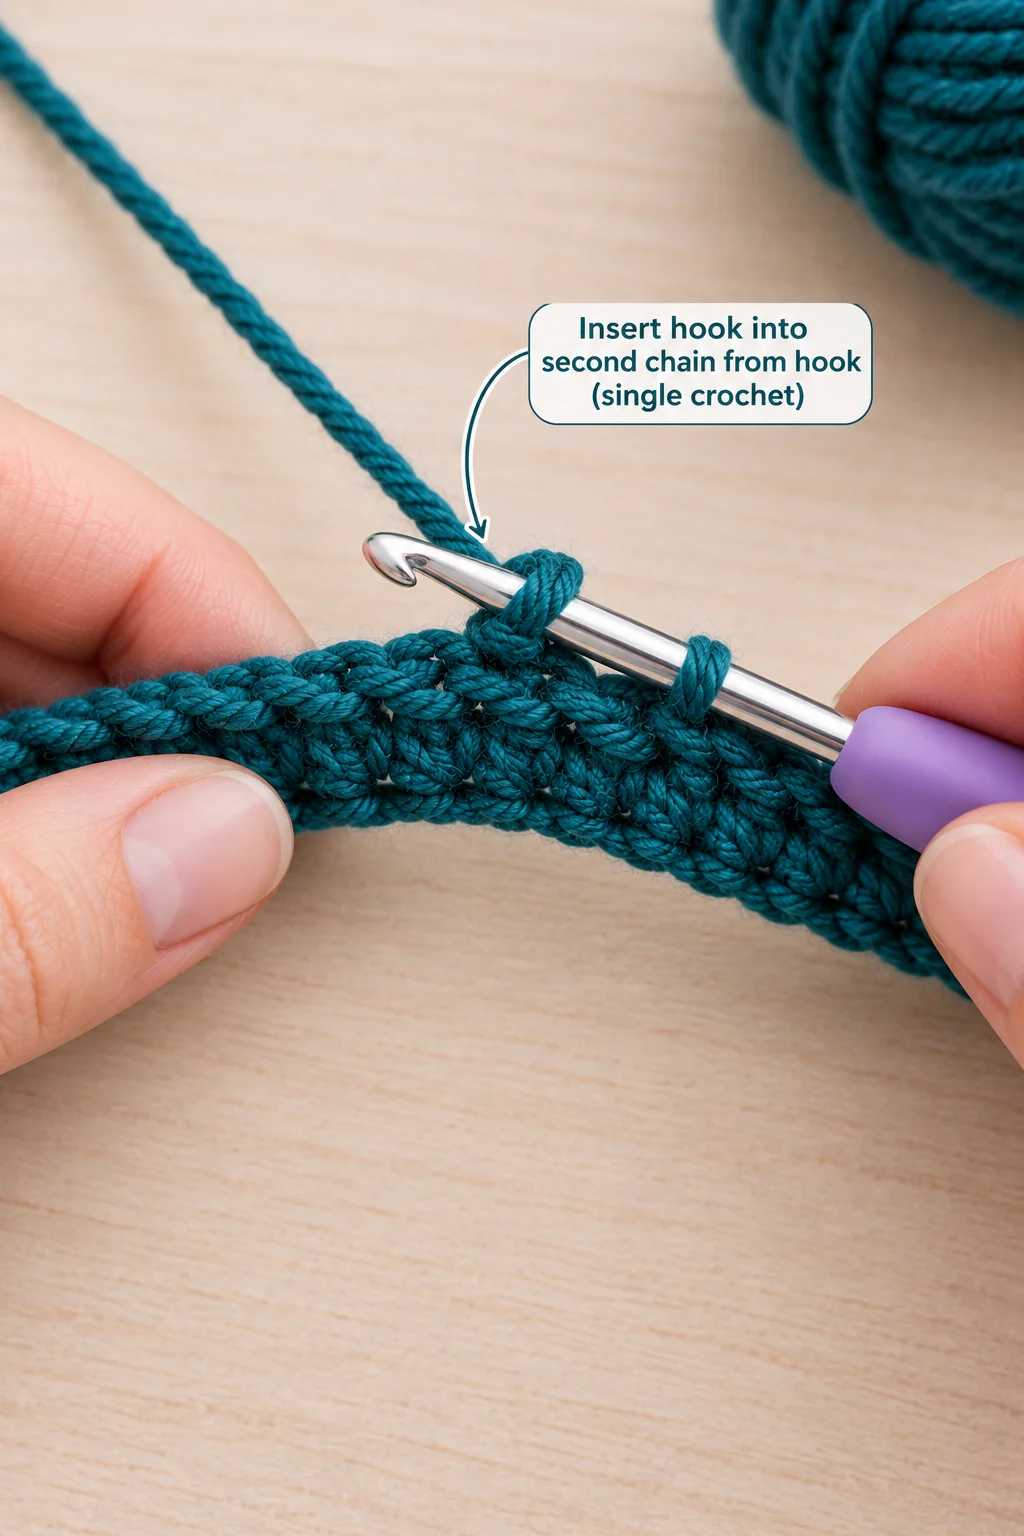
Insert your hook into the second chain from the hook.
Row 1: Sc in each chain across. (40 sts)
Ch 1 and turn your work.
The first row creates the base for your ribbed fabric. Count your stitches before continuing so you know your rectangle starts with the correct width.
Tip: The turning chain does not count as a stitch in this pattern.
Step 3: Start the ribbed texture

Row 2: Sc in the back loop only of each stitch across. (40 sts)
Ch 1 and turn.
Row 3 onward: Repeat Row 2, working one sc into the back loop of every stitch. (40 sts per row)
Continue in the same way until the rectangle reaches your desired length around the head.
The ribbing will form raised vertical lines when the rectangle is turned and assembled into a hat.
Tip: Check your stitch count every few rows. Accidentally skipping the first or last stitch can gradually narrow the rectangle and make the finished hat uneven.
Step 4: Measure the rectangle for a comfortable fit
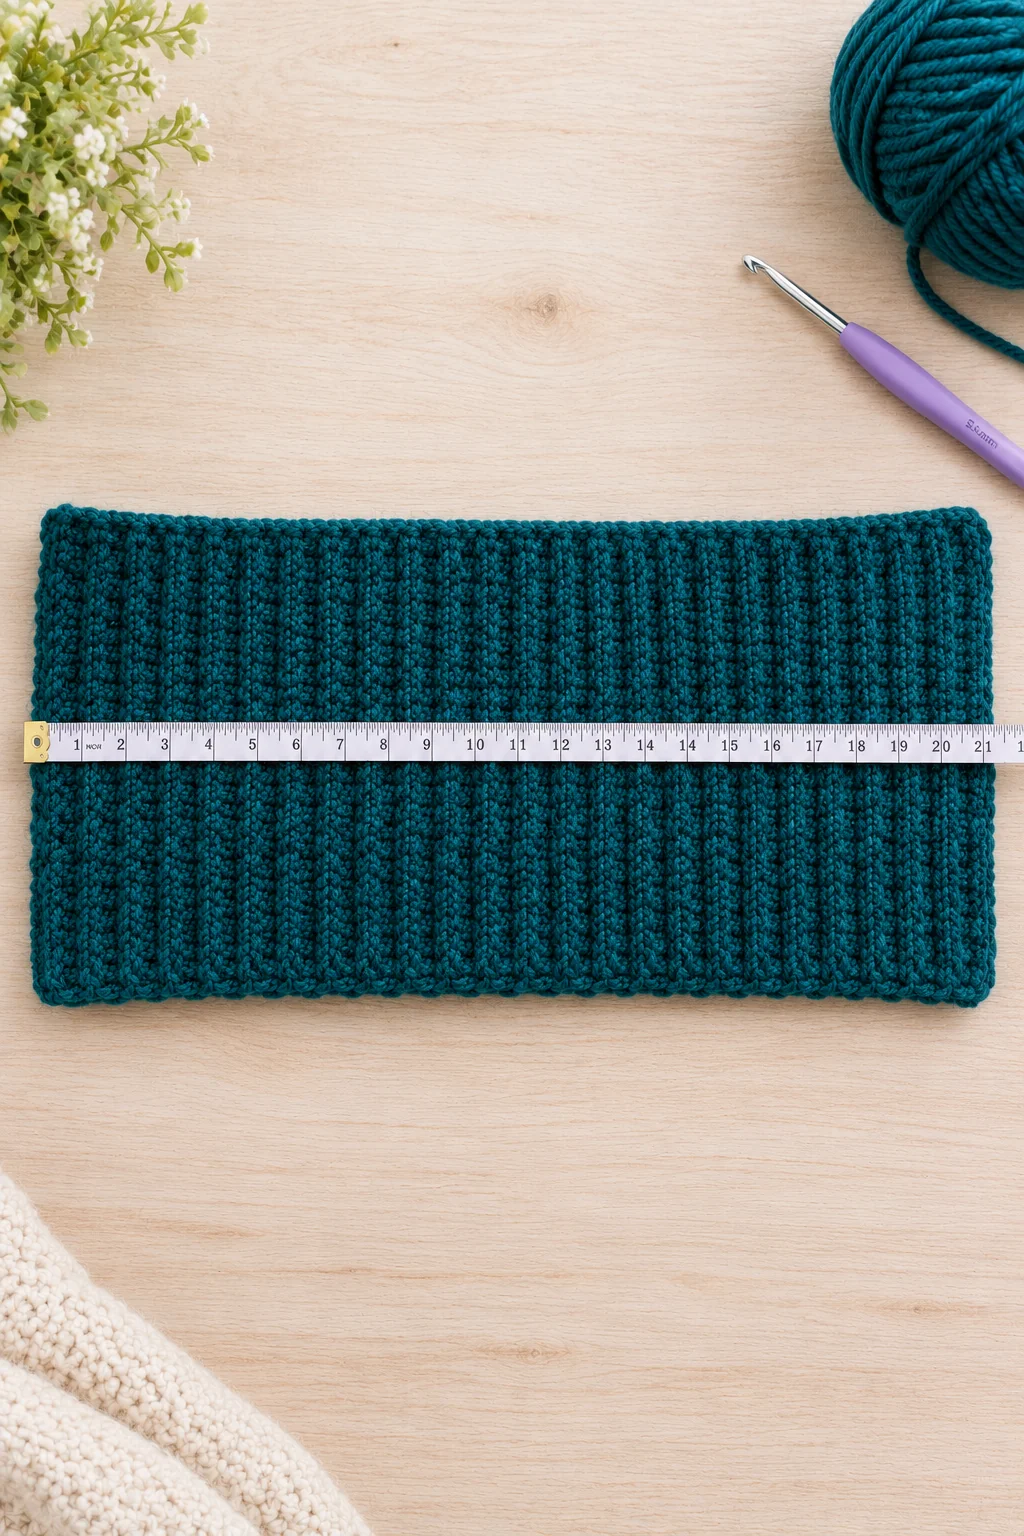
This is the most important part of the project.
The foundation chain determines the hat’s height, while the number of rows determines the rectangle’s length around the head.
For a typical adult head measuring 21–23 inches around, a starting rectangle length of approximately 20–22 inches may be suitable, depending on the stretch of your fabric and the amount of negative ease you prefer.
Negative ease means the hat is slightly smaller than the head so it stretches gently to fit. Do not make the rectangle excessively small, as this can create an uncomfortable hat.
Measure the rectangle without pulling it tightly. Then stretch it gently to see how much comfortable elasticity it has.
Tip: If you are making the beanie for someone else, ask for their head circumference and preferred hat depth instead of guessing.
Step 5: Fold and join the sides
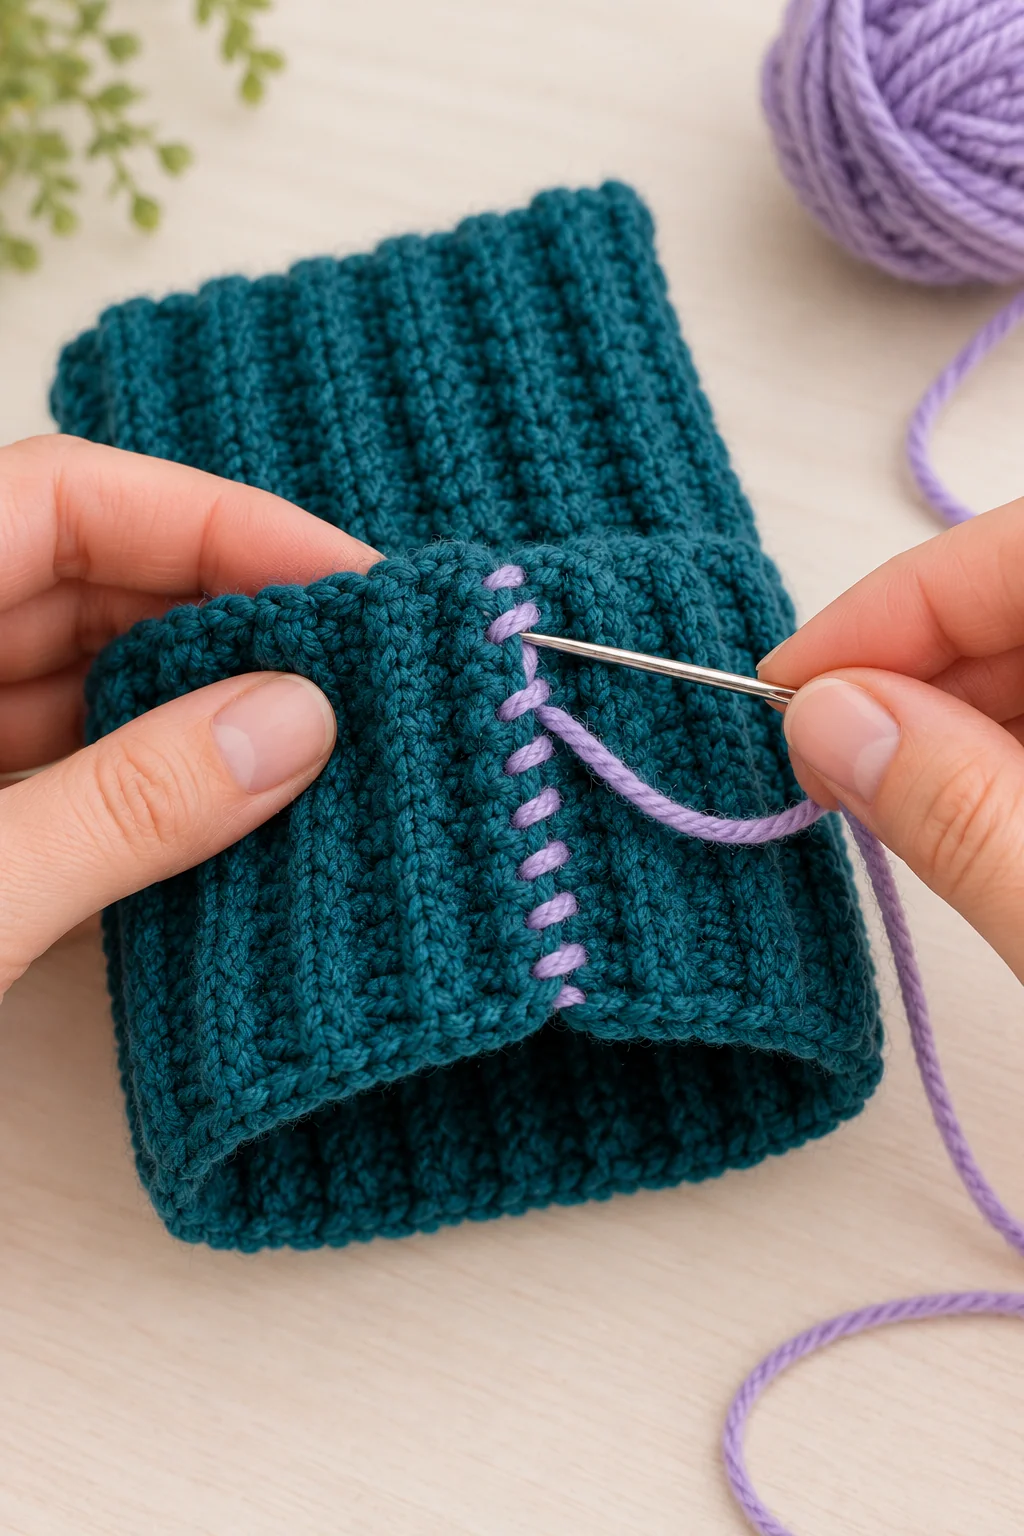
Once the rectangle reaches your target measurements, fasten off, leaving a long yarn tail if you plan to sew the seam.
Fold the rectangle so the two short edges meet. The ribbed rows should run vertically along the hat.
Join the short edges using one of these methods:
-
Slip stitch seam: Insert your hook through corresponding stitches along both edges and slip stitch them together.
-
Whipstitch seam: Use a yarn needle to sew the edges together with small, even stitches.
A slip stitch seam is convenient if you want to keep crocheting with the same yarn. A sewn seam can create a softer finish when worked carefully.
Try the tube over your head or a suitable measuring form before closing the crown.
Tip: Keep the seam aligned with the ribbing so the hat looks neat when worn.
Step 6: Gather and close the top
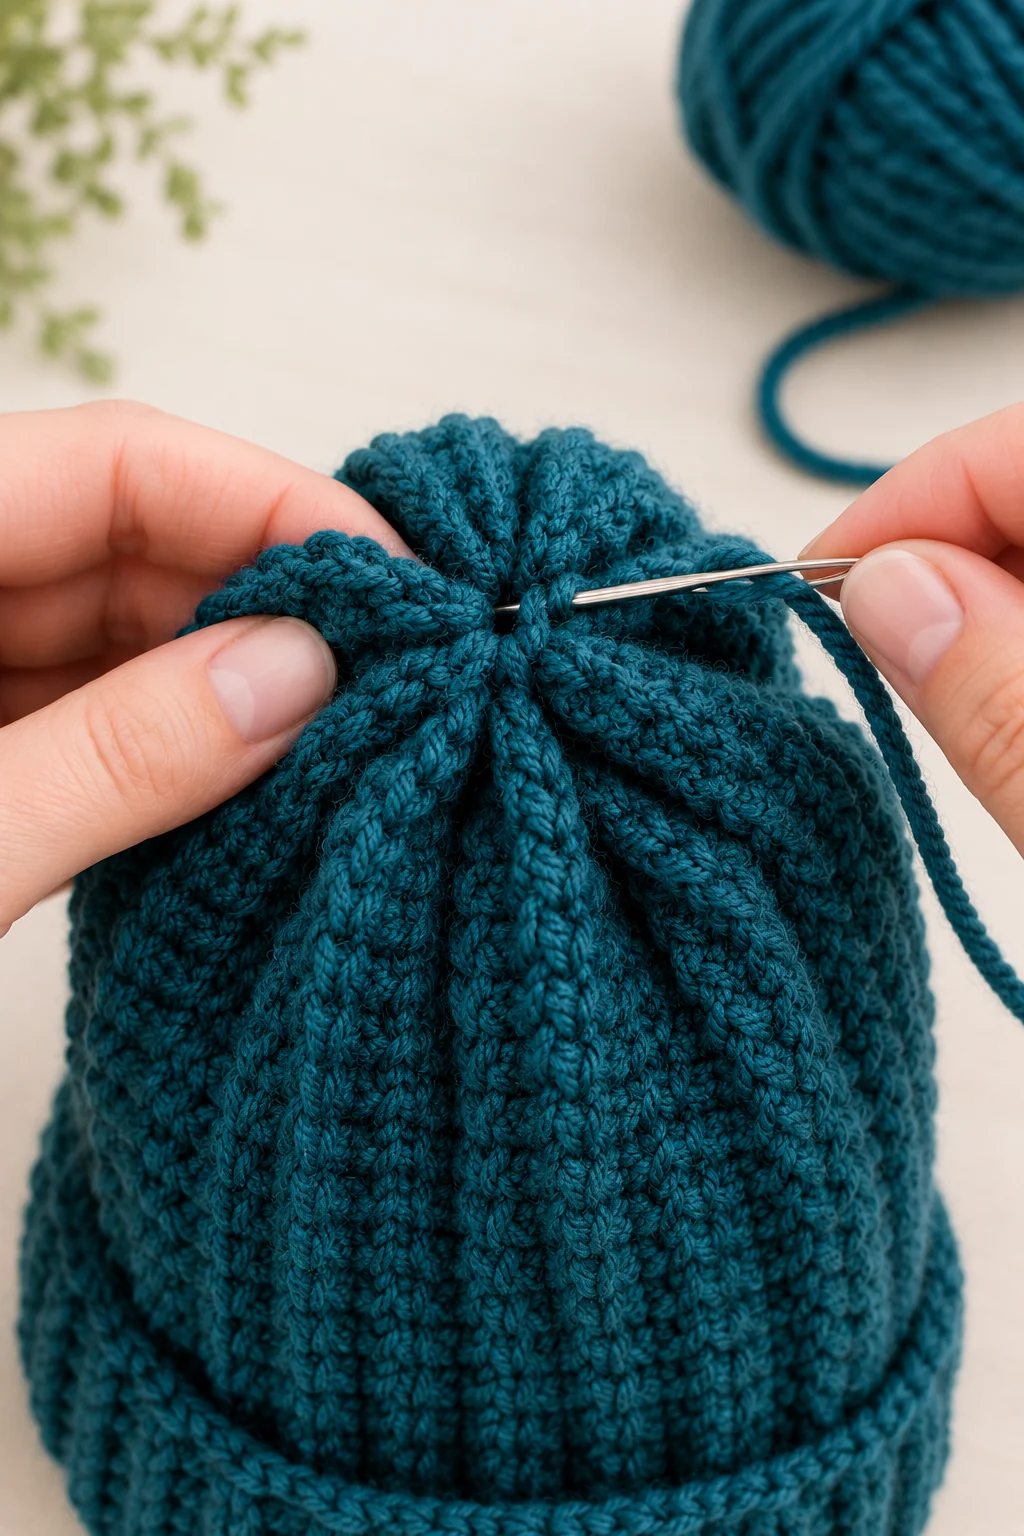
Thread your yarn needle with a long piece of matching yarn.
Run the needle through the row ends around one open edge of the tube. Work a loose running stitch all the way around the opening.
Pull the yarn gently to gather the fabric into a closed crown. Adjust the gathers so they are spread evenly rather than bunched in one spot.
Pass the yarn through the gathered edge several more times to secure the opening. Knot firmly on the inside and weave in the remaining end.
If a small opening remains, use a few extra stitches to close it.
Tip: Avoid pulling so hard that the yarn breaks or the fabric puckers into a hard knot. A smooth, evenly gathered crown looks more professional.
Step 7: Add the folded brim
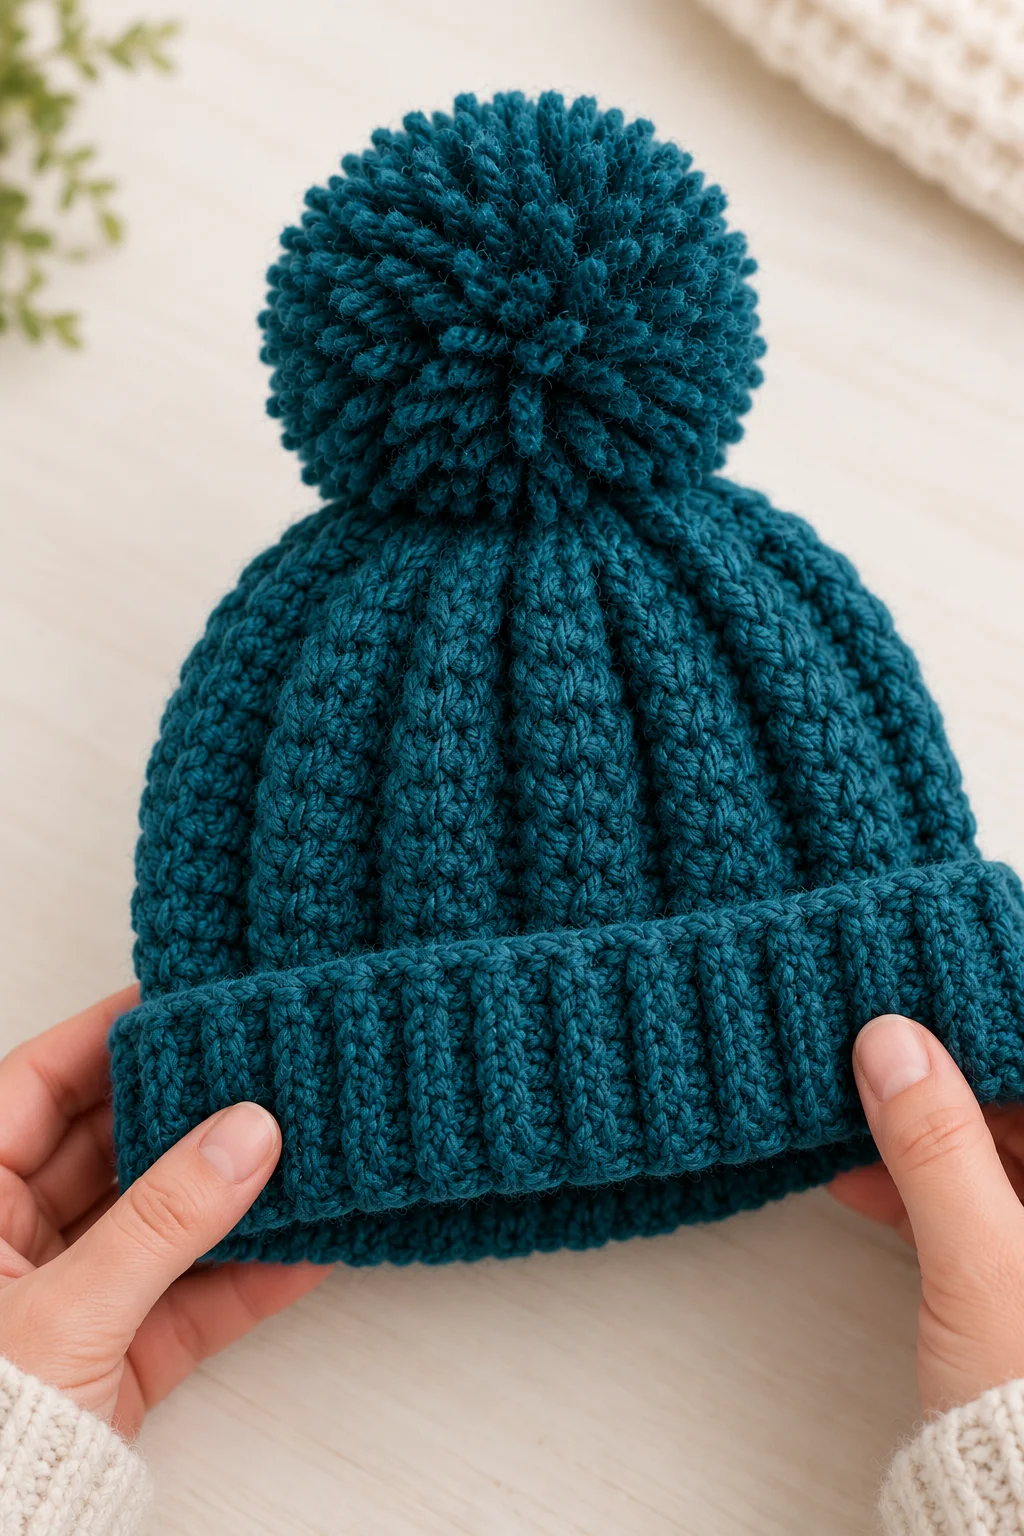
Turn the hat right side out and fold the lower edge upward to create a cuff.
Try the beanie on to check that the brim is comfortable and that the hat covers the ears as desired.
You can leave the cuff folded loosely or secure it with a few discreet stitches at the side seams.
For a longer, slouchier beanie, use a deeper rectangle and a smaller fold. For a fitted winter hat, keep the body closer to the head and adjust the depth to suit your preference.
Step 8: Add an optional pom-pom
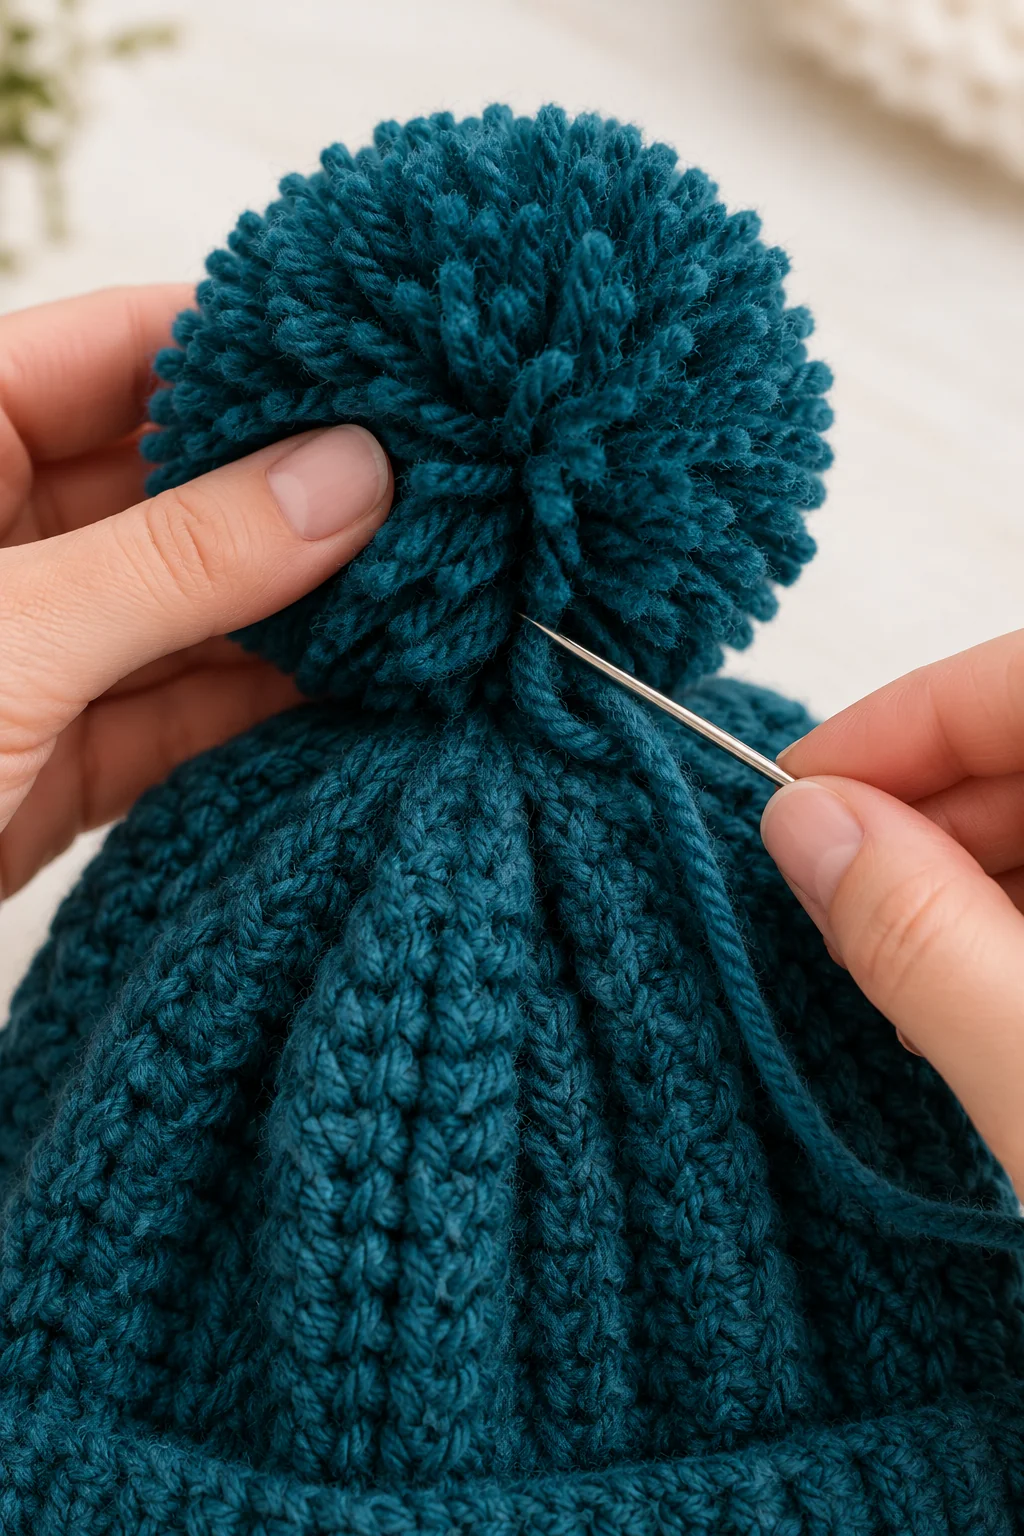
A fluffy pom-pom creates the cozy look shown in the reference image.
Make a pom-pom using a pom-pom maker or cardboard template. Wrap the yarn until it looks full, tie it tightly in the center, and cut the loops. Trim the yarn into a round shape.
Attach the pom-pom to the gathered crown with strong yarn, making several secure passes through the center of the hat.
If you prefer a minimalist look, leave the top plain or add a small crocheted ball instead.
Finishing tip: If you want to wash the hat frequently, consider a detachable pom-pom attachment that is compatible with your yarn and construction.
You Did It!
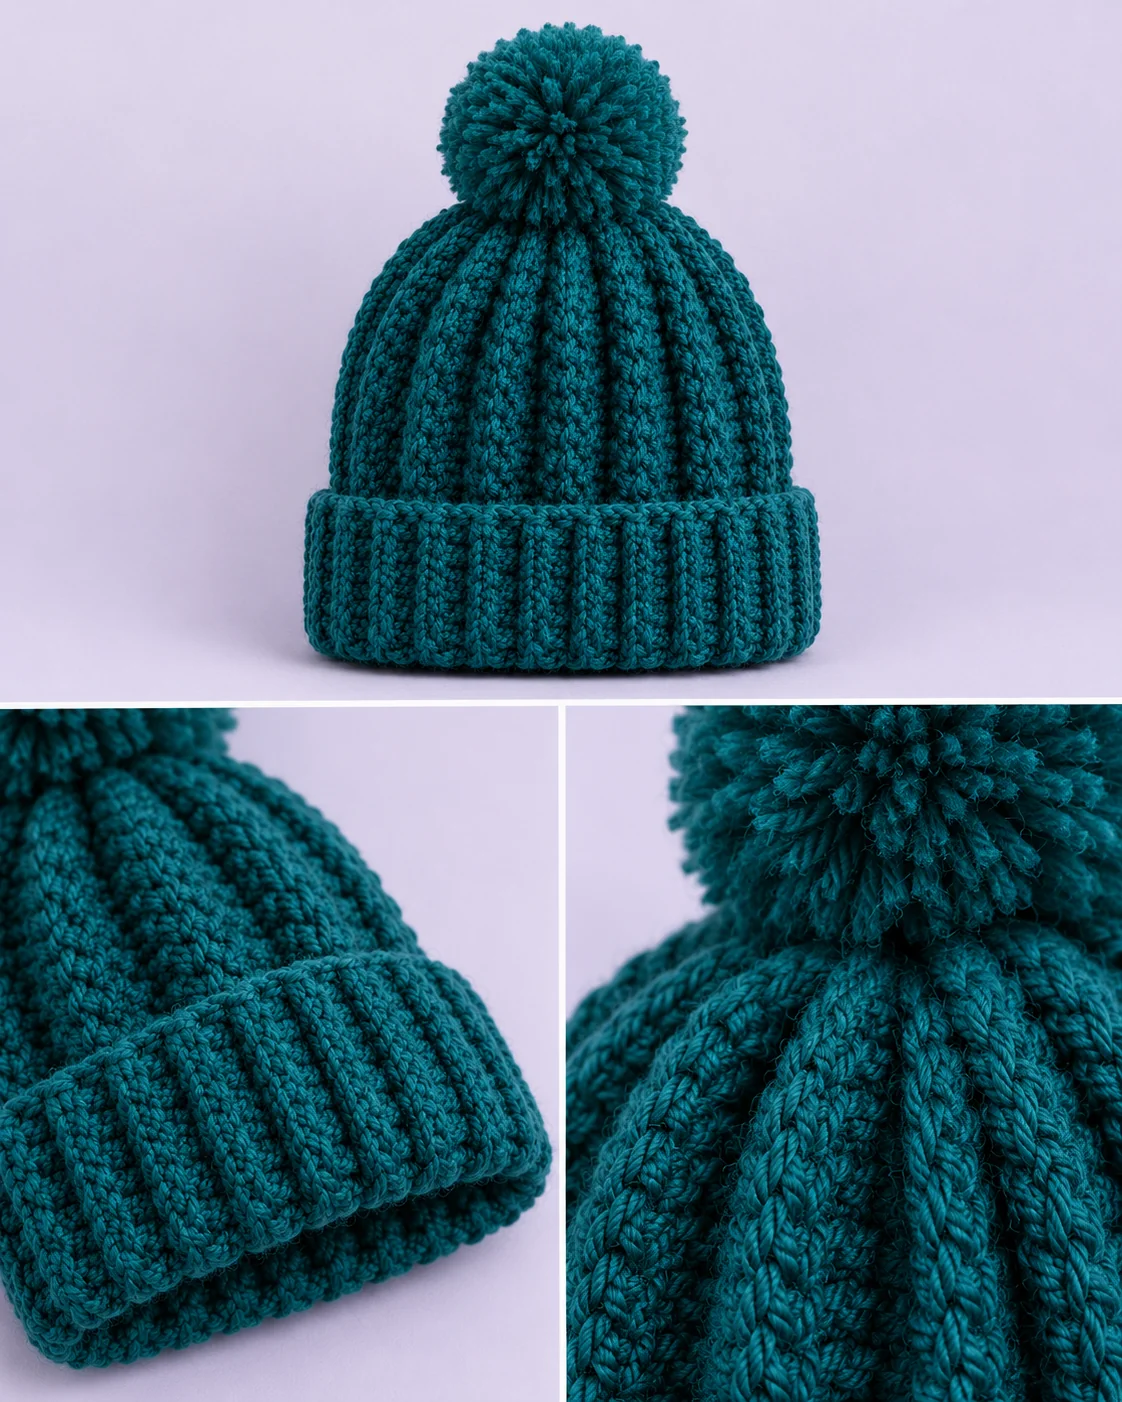
Congratulations on finishing your ribbed beanie! Take a moment to look at the final photo to compare your overall shape and the close-up details of your handiwork. Enjoy your cozy new creation!
Common Crochet Beanie Mistakes and How to Fix Them
The hat is too tight
The foundation chain may be too tight, the rectangle may be too short, or your stitches may be too firm. Try a larger hook, relax your tension, or add more rows to increase the circumference.
The ribbing looks uneven
Uneven tension can make some ridges appear taller than others. Keep your yarn tension consistent and make sure each stitch goes into the back loop only.
The rectangle is too narrow
The starting chain controls the height of the rectangle. If your hat does not cover enough of your head, increase the foundation chain and make a new sample.
The crown looks bulky
Gather the top gradually and distribute the folds evenly. Use several small securing stitches rather than one large knot in the center.
The seam feels uncomfortable
A bulky seam can rub against the head. Try a flatter whipstitch seam or reduce the tension of your slip stitches. Weave in yarn tails so no rough ends press against the skin.
The brim keeps unfolding
Make sure the brim is deep enough for the style you want. You can tack it discreetly at the side seam or leave it free for a flexible, adjustable cuff.
Customization Ideas for Your Ribbed Crochet Hat
A simple ribbed beanie is easy to personalize without changing the basic construction.
Classic mustard yellow: Recreate the warm golden shade from the reference image and add a lavender faux-fur pom-pom.
Neutral winter style: Try cream, beige, charcoal, taupe, or oatmeal yarn for a hat that pairs with most winter coats.
Two-color stripes: Change yarn colors every few rows to create horizontal stripes across the finished hat.
Men’s or unisex beanie: Use black, navy, forest green, gray, or lavender and skip the pom-pom for a simple everyday style.
Women’s winter beanie: Choose warm mustard, burgundy, dusty pink, or sage green. A fluffy pom-pom adds a playful finish.
Child-size version: Measure the intended wearer’s head and hat depth, then adjust both the foundation chain and the number of rows. Do not rely on age alone because head sizes vary.
Lightweight spring beanie: Use a lighter yarn and suitable hook, but remember that a thinner yarn will change the gauge and finished dimensions.
How to Care for Your Crochet Beanie
Proper care helps a handmade hat maintain its shape and softness.
-
Check the yarn label for washing instructions.
-
Wash gently with a mild detergent suitable for the fiber.
-
Avoid twisting or wringing the hat.
-
Press excess water out with a clean towel.
-
Reshape the beanie and let it dry flat.
-
Avoid high heat unless the yarn label specifically allows it.
-
Store it clean and dry, away from direct sunlight.
If your beanie contains a faux-fur pom-pom, follow the pom-pom manufacturer’s care instructions as well.
Pro Tips for a Professional Finish
A neat beanie comes from careful measuring just as much as careful stitching.
First, check your gauge before starting. Even a small difference in stitch size can change the hat’s circumference after dozens of rows.
Second, count your stitches regularly. It is much easier to correct a missed stitch after two rows than after twenty.
Third, test the fit before gathering the crown. The hat should stretch comfortably around the head without sliding off or squeezing the forehead.
Finally, weave in the yarn ends securely. Loose ends can work free during wear, especially around the crown and side seam.
If you’re photographing the finished beanie for your blog or Etsy shop, take a close-up of the ribbed texture, a side view that shows the folded brim, and a top view of the pom-pom. Natural window light helps show the yarn texture without harsh shadows.
Frequently Asked Questions
1. Is this easy crochet ribbed beanie pattern suitable for beginners?
Yes. The rectangle construction uses basic chains, single crochet, back-loop-only stitches, joining, and gathering. It is helpful to know how to count stitches and sew crochet pieces together.
2. How do you crochet a ribbed beanie with single crochet?
Make a foundation chain for the hat’s height, then work single crochet stitches through the back loop of every stitch across each row. Repeat until the rectangle reaches the desired circumference.
3. How much yarn do I need for a crochet beanie?
A typical adult hat may use around 100–200 g, depending on yarn thickness, hat depth, folded brim, and pom-pom. The 150–200 g estimate in this tutorial allows room for a fuller design.
4. What size crochet hook should I use?
A 5.0 mm hook is a reasonable starting point for medium-weight yarn. Use the hook that gives you a comfortable, flexible fabric with no large gaps.
5. How do I make a crochet beanie fit my head?
Measure your head circumference and the desired hat depth. Make a rectangle that accounts for the stretch of your fabric, then check the fit before joining and gathering the crown.
6. Can I make this ribbed crochet hat without a pom-pom?
Absolutely. A plain gathered crown gives the beanie a simple, modern look. You can also add a small crocheted ball or a detachable pom-pom.
7. Can I sell finished hats made from a crochet pattern?
Check the specific pattern’s terms and any applicable marketplace rules. Permission to sell a finished handmade item does not automatically grant permission to copy, share, or resell the written pattern or PDF.
8. What is a crochet beanie pattern PDF?
A crochet beanie pattern PDF is a digital instruction document that can be downloaded and viewed or printed. Before purchasing one, check whether it includes the required sizes, stitch explanations, materials, and assembly instructions.
Final Thoughts: Make Your Own Easy Crochet Ribbed Beanie
This easy crochet ribbed beanie pattern is a practical project for anyone who wants a cozy, handmade winter accessory without complicated shaping. The simple rectangle construction, stretchy back-loop ribbing, and optional folded cuff make it easy to personalize for different styles.
Take your time with the measurements, check your stitch count, and test the fit before closing the crown. A few careful finishing steps can turn a basic rectangle into a hat you’ll be happy to wear or give as a gift.
If you try this crochet beanie tutorial, leave a comment with your favorite yarn color, save the pattern inspiration to Pinterest, and share it with a friend who enjoys handmade accessories.
For more digital crochet designs, visit CraftoraCreative Etsy Shop. Check each listing carefully to see whether it includes a downloadable PDF pattern or another digital product.
Happy crocheting, and enjoy making a warm, comfortable beanie for the winter season!